[Recipe] Quick and Simple Egg Fried Rice
 The lockdown has me reaching for easy and quick recipes since I haven’t been able to get a delivery slot in over 2 months and my husband’s been doing the shopping. I like to find recipes that don’t have a lot of specialist ingredients or that can use plenty of substitutes to make the shopping easier and this egg fried rice has so many possible ways to make it!
You will need:
bite sized meat or meat substitute of your choice, enough for 2. (I’ve used chicken, quorn chicken, and pork in the past)
1 packet of Bachelor’s Golden Vegetable Super Rice or generic version (or other flavour)
1 bag of mixed vegetables
3 eggs
soy sauce
Directions:
1. Stir-fry meat with soy sauce.
2. Check rice packet for instructions and add required amount of water and rice packet to the frying pan with chicken and bring to a boil.
3. Steam vegetables (unless you want a crunchy stir-fry, then skip this step)
4. Add steamed vegetables to the pan.
5. Whisk the eggs with a little soy sauce and once the rice has absorbed all the water, add the egg mixture and constantly stir until eggs are cooked.
6. Divide between two plates, use more soy sauce as needed.
If you are following Slimming World, the only syns are the syns in the packet of rice, which depending on brand range from 1/2 to 1.5 Syns per serving.
###
Facebook: https://www.facebook.com/blog.beccajanestclair
Twitter: https://twitter.com/annaonthemoon
Instagram: https://www.instagram.com/beccajanestclair
Blog: http://blog.beccajanestclair.com
YouTube: https://www.youtube.com/beccajanestclair
DISCLAIMER: I do not work for Slimming World, I am not affiliated with Slimming World beyond being a paying customer/member, I get no personal benefit from writing this post other than the joy of sharing.
Please note: Syn values are based on my exact ingredients using the online calculator. Your Syn value may vary based on your ingredients and the size of your baking containers and portions, so use this number as a guide only. Syn values also frequently change, but these values are correct at the time of publication.
The contents of this post, including personal images are © Rebecca J Lockley and Tim Lockley unless otherwise stated and should not be reproduced without permission.
For full Copyright and Disclaimer, please read http://www.blog.beccajanestclair.com/copyright/
No commentsGluten Free Christmas Pudding
 This year, I was presented with an interesting challenge for our Christmas celebration. My friend, Jen, is gluten free. After some quick consulting with her and reading through both of my previous pudding recipes and a few more online, I came up with a Gluten Free Pudding that honestly tasted no different from a pudding full of gluten.
Please note: This recipe contains dairy and eggs.
You will need:
550-600g dried mixed fruit (I used a whole bag of mixed fruit, a small bag of dried cranberries, and chopped up dried apricots)
250ml alcohol (I used the last of my brandy and topped it up with gin, rum, and krauterlikor)*
75g butter
85g dark muscovado sugar (aka brown sugar)
100g Gluten Free Flour (I used Freee by Dove Farms)
3 eggs
2 1/2 tsp mixed spice
1 tsp ground nutmeg
1/2 tsp ground cinnamon
110g Gluten Free bread crumbs (I bought seeded buns by Genius and used 2)
85g suet (I used veggie suet)
50 ml orange juice (this is in lieu of the peel ad juice of an orange that many recipes call for. I’m lazy.)
150ml Gluten Free IPA (Easy to locate in the GF section of Tesco)*
2 x 2 Pint Pudding basins
1. Soak the fruit in the alcohol. Overnight is best.
2. Cream together the butter, sugar, and eggs. Add the GF flour, spices, and breadcrumbs.
3. Using a spoon (I have one dedicated to GF cooking!), stir in the suet and soaked fruit adding in any leftover alcohol from soaking the fruit. Add in the orange juice and Gluten Free IPA.
4. Cover and sit overnight.
5. In the morning, check the mixture. If it looks dry, add more beer, booze, or juice.
6. Prepare the basins by cutting rounds of parchment paper for the bottoms and tops and butter the sides.
7. Spoon in the mixture and steam the puddings as usual. I use my crock pot and steam for 8-12 hours. I had enough mixture for 2 large puddings and one small tester pudding, which I cooked in the microwave for 2 minutes to test the flavour.
8. Serve flaming (if you’d like) with brandy sauce or cream.
*You can make this alcohol free. Soak the fruit in fruit juice and use strong tea instead of the IPA.
And it was a hit with both Gluten Free and non-Gluten Free folks!
***
The contents of this post, including images are © Rebecca J Lockley and Tim Lockley unless otherwise stated and should not be reproduced without permission.
I have not received compensation from any companies mentioned in my post.
For full Copyright and Disclaimer, please read http://www.blog.beccajanestclair.com/copyright/
Facebook: https://www.facebook.com/blog.beccajanestclair
Twitter: https://twitter.com/annaonthemoon
Instagram: https://www.instagram.com/beccajanestclair
Blog: http://blog.beccajanestclair.com
YouTube: https://www.youtube.com/channel/beccajanestclair
[Recipe] Eggs Benedict without the Muffin
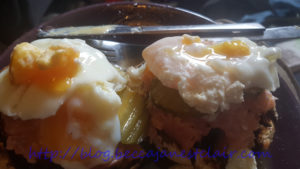 I became inspired by a fellow Slimming World member who used a giant mushroom as a pizza base, so when I spotted big field mushrooms in Asda, I had to get them and this became Sunday Brunch.
Mushroom Benedict (SP)
You Will Need:
2 Large field mushrooms (look for mushrooms the size of muffins)
2 Thick tomato slices
2 Slices smoked salmon
2 eggs
(I added a handful of sliced gherkins because I like them, but they’re optional!)
1. Remove the stem from the mushrooms and put them under the grill for 10-15 minutes until tender.
2. While you’re grilling the mushrooms, put a pot of water on to boil.
3. Grill tomato slices for 5 minutes.
4. While you’re grilling the veggies, bring a pot of water to the boil. Once it reaches the boiling point, carefully crack in two eggs and poach for 3 minutes.
5. Layer each mushroom with a tomato slice and smoked salmon.
6. Top with a poached egg.
If you follow Slimming World, this recipe is FREE and can be used on an SP day!
***
DISCLAIMER: I do not work for Slimming World, I am not affiliated with Slimming World beyond being a paying customer/member, I get no personal benefit from writing this post other than the joy of sharing.
Please note: Syn values are based on my exact ingredients using the online calculator. Your Syn value may vary based on your ingredients and the size of your baking containers and portions, so use this number as a guide only. Syn values also frequently change, but these values are correct at the time of publication.
The contents of this post, including images are © Rebecca J Lockley and Tim Lockley unless otherwise stated and should not be reproduced without permission.
For full Copyright and Disclaimer, please read http://www.blog.beccajanestclair.com/copyright/
Facebook: https://www.facebook.com/blog.beccajanestclair
Twitter: https://twitter.com/annaonthemoon
Instagram: https://www.instagram.com/beccajanestclair
Blog: http://blog.beccajanestclair.com
YouTube: https://www.youtube.com/channel/beccajanestclair
[Recipe] Cauliflower Cheese & Bacon
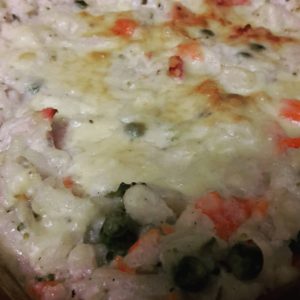 Do you ever watch those recipe videos on Facebook and get really hungry? Me too. Last night, one of my friends linked to a video for Loaded Cauliflower Casserole and it got me hungry and wanting to create this dish to be Slimming World friendly. So I went out shopping today and picked up a Cauliflower and we had this for Tea tonight.
You Will Need:
1 Head of Cauliflower (chopped into florets)
300g frozen mixed vegetables
200g bacon medallions
250g Quark
3 heaped spoonfuls Fromage Frais
1 TBS dried or fresh chives (or use spring onion if you have them. I forgot to buy some but had chives)
1/4 tsp pepper
1/4 tsp mustard powder
45g reduced fat cheddar cheese
1. Boil or steam the cauliflower florets until tender and cook the frozen vegetables. Drain both.
2. Grill bacon. Chop bacon into bite sizes bits.
3. Combine quark, fromage frais, chives, pepper, and mustard.
4. Stir quark mixture into vegetables, add chopped bacon.
5. Spread into a casserole dish and top with 45g cheddar cheese
6. Bake at 200C 25 minutes or until bubbly and cheese is golden.
Syns per recipe: 6 (for the cheese).
This recipe is easy to adapt for vegetarians, just omit the bacon or use veggie bacon. If you are following a Low Carb High Fat diet, use full fat cream cheese and sour cream instead.
***
DISCLAIMER: I do not work for Slimming World, I am not affiliated with Slimming World beyond being a paying customer/member, I get no personal benefit from writing this post other than the joy of sharing.
Please note: Syn values are based on my exact ingredients using the online calculator. Your Syn value may vary based on your ingredients and the size of your baking containers and portions, so use this number as a guide only. Syn values also frequently change, but these values are correct at the time of publication.
The contents of this post, including images are © Rebecca J Lockley and Tim Lockley unless otherwise stated and should not be reproduced without permission. If you are not reading this on http://blog.beccajanestclair.com, my facebook page, Networked Blogs, the RSS feed(s), or through an e-mail subscription, please notify me.
[LJ readers reading this on the LJ RSS feed: Please click on the link at the top of the entry to go directly to my blog to leave a comment, as comments left on the LJ RSS do not get seen by me. Facebook users reading this from my Networked Blogs link can either comment on facebook or on my blog. If you are reading this through an e-mail subscription, you might need to go directly to my blog to view videos and images.]
For full Copyright and Disclaimer, please read http://www.blog.beccajanestclair.com/copyright/
No comments[Recipe] Easy Carbonara Slimming World Style
 Breaking up the Austria posts to bring you a recipe, because I am trying to be back on the SW train. I actually managed to lose 3 pounds over the three weeks I was away, but then since being back I actually gained a half stone. Grrrr. But I’ve got my SW planning journal and a new countdown and I’m trying to be ON IT. FOCUS! I’ve regained so much weight after my great success and it really upsets me a lot. Anyway….
Tim asked me a while ago to come up with a carbonara, and it took me age, but I finally have come up with one that’s really tasty!
This recipe serves 2 (so double it for 4) and it is FREE on Slimming World (Extra Easy)
You will need:
6 bacon medallions, diced
3 spring onion sprigs, chopped
150g frozen sliced mushrooms
4-5 balls of frozen spinach
200g diced lean ham (or deli ham)
200g dried pasta
300g Quark
1 TBS Fromage Frais (could be omitted)
Salt
Pepper
1. Cook the pasta according to the directions on the package and add the frozen spinach the last 5 minutes.
2. Spray a wok or large frying pan with fry light and fry the bacon, spring onions, and frozen mushroom for about 10 minutes
3. Add the ham and while the ham is heating up, drain the pasta and spinach and rinse in hot water.
4. Tip the pasta and spinach into the wok and stir in the quark and the fromage frais. Season with the salt & pepper
5. Divide between two plates and serve with a large salad.
We both loved this, but it did make a lot for even the two of us and I couldn’t eat all of it. I wouldn’t freeze this because I’m not sure how quark would freeze. If you wanted, you could use your HEA and use cream cheese instead of quark or even use some laughing cow wedges.
***
DISCLAIMER: I do not work for Slimming World, I am not affiliated with Slimming World beyond being a paying customer/member, I get no personal benefit from writing this post other than the joy of sharing.
Please note: Syn values are based on my exact ingredients using the online calculator. Your Syn value may vary based on your ingredients and the size of your baking containers and portions, so use this number as a guide only. Syn values also frequently change, but these values are correct at the time of publication.
Many of the Amazon UK links are affiliate links, so if you click on them and buy something, I do get a tiny percent.
This post has not been endorsed by Amazon or any of the products and websites mentioned in this post and I have not received compensation for writing this post or making any videos.
The contents of this post, including personal images are © Rebecca J Lockley and Tim Lockley unless otherwise stated and should not be reproduced without permission. If you are not reading this on http://blog.beccajanestclair.com, my facebook page, Networked Blogs, the RSS feed(s), or through an e-mail subscription, please notify me.
[LJ readers reading this on the LJ RSS feed: Please click on the link at the top of the entry to go directly to my blog to leave a comment, as comments left on the LJ RSS do not get seen by me. Facebook users reading this from my Networked Blogs link can either comment on facebook or on my blog. If you are reading this through an e-mail subscription, you might need to go directly to my blog to view videos and images.]
For full Copyright and Disclaimer, please read http://www.blog.beccajanestclair.com/copyright/
No comments[Recipe] Four Syn Cupcakes [Slimming World]
 Recently, at my Slimming World Group, we had a taster night in honour of one of our member’s birthdays. It wound up being a double…no, triple celebration as my friend was celebrating her 40th birthday, reaching target, AND losing five stone! So proud of her! Anyway. Since it was her birthday, I really wanted to make some kind of low syn cake treat. The Internet is full of suggestions for low syn cakes. Most of them are flourless and use beaten egg whites to make the cake part, or use crushed Scan Bran or Weetabix or Ryvita. But I wanted proper cake. Enter, this Weight Watcher’s recipe! The original recipe states that you can use ANY diet soda with ANY box cake mix. But since Slimming World and Weight Watchers use different criteria for determining points and syns, I needed to use the online calculator to work out the exact syns for my cupcakes. So if you use the exact ingredients I’ve used and make 24 cupcakes, each cupcake will be 4 syns. Any other brand or type and you will need to use the syn calculator.
You will Need:
For the cake –
1 box Betty Crocker Red Velvet Cake Mix
1 330ml can (12 oz) Doctor Pepper Zero
24 cupcake papers
For the icing –
500g Quark
1 mug Truvia or other sweetener
(optional) food colouring
1. Preheat oven to 180C and put the liners in the cupcake tins
2. combine dry cake mix and Dr Pepper Zero. No other ingredients are needed.
3. Evenly divide between the cupcake papers. I discovered 2 Tablespoons per cup will evenly divide it.
4. Bake 15-20 minutes, or until a toothpick inserted comes out clean
6. Pour Quark into a bowl and slowly mix in the sweetener. I used about a mugful, but you might need more or less depending on your sweet tooth. I also added some red food colouring (but I wasn’t satisfied with the result, so I added blue to make violet). If you don’t add colouring, your icing will be white.
7. Pipe or spoon the icing onto the cupcakes.
You will need to store these cupcakes in the fridge because of the Quark icing.
About a week later, I made a Carrot Cake mix with Fanta Zero, and I would be willing to try a yellow cake with Sprite Zero. I bet a chocolate cake made with Cherry Coke Zero or Cherry Pepsi Max would be good, too.
***
[DISCLAIMER: I do not work for Slimming World, I am not affiliated with Slimming World beyond being a paying customer/member, I get no personal benefit from writing this post other than the joy of sharing.]
[Please note: Syn values are based on my exact ingredients using the online calculator. Your Syn value may vary based on your ingredients and the size of your baking containers and portions, so use this number as a guide only. Syn values also frequently change, but these values are correct at the time of publication.]
The contents of this post, including images are © Rebecca J Lockley and Tim Lockley unless otherwise stated and should not be reproduced without permission. If you are not reading this on http://blog.beccajanestclair.com, my facebook page, Networked Blogs, the RSS feed(s), or through an e-mail subscription, please notify me.
[LJ readers reading this on the LJ RSS feed: Please click on the link at the top of the entry to go directly to my blog to leave a comment, as comments left on the LJ RSS do not get seen by me. Facebook users reading this from my Networked Blogs link can either comment on facebook or on my blog. If you are reading this through an e-mail subscription, you might need to go directly to my blog to view videos and images.]
For full Copyright and Disclaimer, please read http://www.blog.beccajanestclair.com/copyright/
No comments[Recipe] Rat-onna-Stick (aka Chicken Satay) [Slimming World]
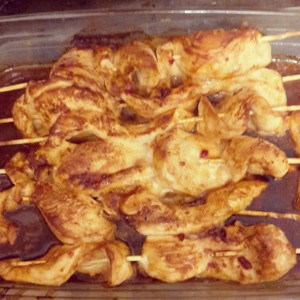
Terry Pratchett’s death has hit both my husband and I hard, perhaps him more than me. While discussing dinner tonight, Tim jokingly suggested Sausage-inna-bun and Rat-onna-stick ala CMOT Dibbler. So, I decided to make Chicken Satay.
[DISCLAIMER: I do not work for Slimming World, I am not affiliated with Slimming World beyond being a paying customer/member, I get no personal benefit from writing this post other than the joy of sharing.]
[Please note: Syn values are based on my exact ingredients using the online calculator. Your Syn value may vary based on your ingredients and the size of your baking containers and portions, so use this number as a guide only. Syn values also frequently change, but these values are correct at the time of publication.]
If you make 7 sticks, each stick is only half a syn.
You will need:
2 TBS PB2*
1 TBS water
6 TBS soy sauce
1 TBS sweet chili sauce
4 boneless, skinless chicken breasts
7 wooden skewers
*PB2 is a powdered peanut butter available on Amazon that has only 1 syn per Tablespoon. You will need to recalculate the syns and omit the water if you use a different brand.
1. Preheat oven to 180C
2. Slice chicken breasts into strips
3. Combine PB2, water, soy sauce, and sweet chili sauce and whisk until smooth.
4. Add chicken to bowl and leave to marinade at least 20 minutes (if you have time, I bet this would taste better marinaded overnight!)
5. Soak skewers in water and thread chicken on in a zig zag pattern
6. Place skewers in an oven proof dish, pour remaining marinade over chicken and bake for 20 minutes.
Enjoy!
***
The contents of this post, including images are © Rebecca J Lockley and Tim Lockley unless otherwise stated and should not be reproduced without permission. If you are not reading this on http://blog.beccajanestclair.com, my facebook page, Networked Blogs, the RSS feed(s), or through an e-mail subscription, please notify me.
[LJ readers reading this on the LJ RSS feed: Please click on the link at the top of the entry to go directly to my blog to leave a comment, as comments left on the LJ RSS do not get seen by me. Facebook users reading this from my Networked Blogs link can either comment on facebook or on my blog. If you are reading this through an e-mail subscription, you might need to go directly to my blog to view videos and images.]
For full Copyright and Disclaimer, please read http://www.blog.beccajanestclair.com/copyright/
No commentsAdventures in Cooking: I Made Risotto!
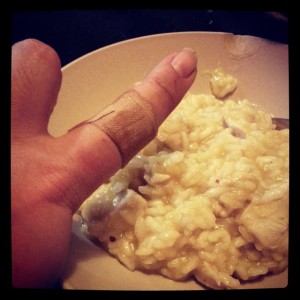 At our recent Slimming World taster evening, one of the ladies made the risotto out of the August Slimming World magazine. It was delicious, and it was the first time I had ever had risotto. I just don’t like rice a whole lot so I don’t eat it often and I rarely make it. Even when we have a Chinese or Indian takeaway, it’s a struggle to eat the rice (even though it’s a fabulous free food!). When I got home, I mentioned this recipe to Tim and he asked if I would try it……ah, the things we do for love.
The original recipe was called (I think) Butternut Squash Risotto. Naturally, it called for a butternut squash. Which I didn’t have. But I did have something called an “onion squash” (called that, I’m guessing because it looked like a giant orange onion) I bought at Waitrose a few weeks ago, so I decided to use that. Cutting into it was tough…so tough my big knife slipped and took a slice out of my knuckle. Ow. Disaster #1. I decided to pull out some pumpkin puree from the freezer instead. I also decided to add some chicken to the recipe, as that’s how we had it at group and it was really good. The recipe also called for onion and garlic (which I omit always due to allergies) and a red chili…which I didn’t have, but I had some dried red chili flakes, so those would have to do.
After cooking the chicken and the veg, the next step is adding the risotto rice and BOILING HOT STOCK one ladleful at a time. The dish has to be kept constantly stirred and the idea is you add a ladle of stock, stir, let it absorb, and repeat until you have one last ladleful of stock to put in. So, ladle in one hand and wooden spoon in the other I began. After 2-3 ladlefuls, my wooden spoon slipped and >SPLAT< a spoonful of boiling hot stock and rice landed on my hand. Ow. I dropped the spoon into the dish and ran my hand under cold water. Disaster #2. I carried on, though I only used 700ml of stock when the recipe called for a full Litre. I can only assume this is because I used pureed pumpkin instead of chunks of squash. Since it looked awfully goey, I took it off the heat, didn't bother adding the last of the stock and stuck a lid on it for 3 minutes.
As I was dishing it out I discovered that when I stopped stirring it to tend to my burnt hand it caused some of the rice to stick to the bottom of my cast iron dutch oven. Disaster #3.
But the risotto was yummy, and Tim even went back for seconds!
I decided the best way to try to clean this would be to add some water to the pot, squirt in some Fairy Platinum, and boil it for 20 minutes to hopefully loosen the stuck on rice. After 20 minutes I took the pot off the heat, grabbed a scrubber and started scraping....and splashed my other hand with boiling hot water. Disaster #4. Fortunately, I was able to shift all the cooked on rice and have rescued my pot. Would I make this again? Sure! But I think I'll be more careful....maybe wear some gloves.
Would you like the recipe?
You will need:
Diced chicken breast (I used one, but you could buy a pack of pre-diced)
250g pumpkin puree
275g risotto rice
700ml boiling hot vegetable stock
Pinch of red pepper flakes
Fry light
Salt & pepper
heavy pot with lid
1. Spray the bottom of a heavy pot with fry light and add the chicken and cook until the chicken is browned on all sides.
2. Add pumpkin puree and the pinch of red pepper flakes.
3. Add risotto rice and simmer for 2-3 minutes.
4. Add a ladle of stock, and cook for 2 minutes (or until stock is absorbed), stirring constantly.
5. continue to add stock in two minute intervals and continually stir.
6. About 15 minutes later, you should be on the last ladleful. Remove pot from heat, stir in the last ladle of stock, season with salt and pepper, and cover for 3 minutes.
Enjoy!
(and if you're on Slimming World, this Risotto is free on EE!)
***
Please note: Syn values are based on my exact ingredients using the online calculator. Your Syn value may vary based on your ingredients and the size of your baking containers and portions, so use this number as a guide only. Syn values also frequently change, but these values are correct at the time of publication.
The contents of this post, including images are © Rebecca J Lockley and Tim Lockley unless otherwise stated and should not be reproduced without permission. If you are not reading this on http://blog.beccajanestclair.com, my facebook page, Networked Blogs, the RSS feed(s), or through an e-mail subscription, please notify me.
DISCLAIMER: I do not work for Slimming World, I am not affiliated with Slimming World beyond being a paying customer/member, I get no personal benefit from writing this post other than the joy of sharing.
[LJ readers reading this on the LJ RSS feed: Please click on the link at the top of the entry to go directly to my blog to leave a comment, as comments left on the LJ RSS do not get seen by me. Facebook users reading this from my Networked Blogs link can either comment on facebook or on my blog. If you are reading this through an e-mail subscription, you might need to go directly to my blog to view videos and images.]
For full Copyright and Disclaimer, please read http://www.blog.beccajanestclair.com/copyright/
No comments[Recipe] Slimming World Fakeaway Fried Chicken
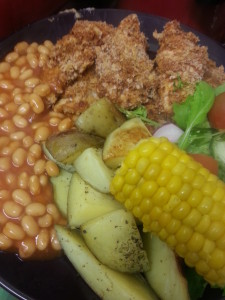 When the Fakeaway book came out I honestly wasn’t sure if I was going to get it. It seemed silly, when there are loads of changes you can make to existing recipes to make them Slimming World friendly, but at the same time I thought it might be useful for some new ideas. Last week, I bought it, and the first thing I did was tab off all the recipes I wanted to try….and I tabbed 24 of them!
So this week, I plan on trying FIVE new recipes out of the Fakeaway book. Of course, I always have to add my own flair to the recipes and I never use things as written in the books, so if I modify a recipe enough that it is different from the recipe in the cookbook, I will share them with you all.
Flipping through the book, one of the first things that caught my eye was the fake KFC. My husband likes KFC, but it’s so greasy I swear it leaves a lump in your stomach. Fortunately, the crew at Slimming World have developed a non-greasy, SW friendly version, so here is my version of KFC style chicken fingers. If you make the full dozen, each finger is 1/2 Syn.
[Please note: Syn values are based on my exact ingredients using the online calculator. Your Syn value may vary based on your ingredients and the size of your baking containers and portions, so use this number as a guide only.]
You will need:
150ml Passata
2 tsp chilli powder
2 tsp celery salt
1 TBS mixed herbs
pepper grinder (I used rainbow pepper)
1 egg, separated and yolk discarded (save it for an omelette!)
60g wholegrain bread (2-3 slices. It’s best to measure this out to make sure you don’t go over or under 60g), blitzed into breadcrumbs
12 chicken breast mini fillets
Fry Light
1 – Preheat oven to 200C and line a baking sheet with foil or parchment (or just spray with Fry Light)
2 – beat the egg white separately until it forms stiff peaks
3 – in a separate bowl (big enough to dip your chicken in) combine passata, chilli powder, celery salt, herbs, and a few grinds of the pepper mill. Fold in the egg white.
4 – Dip chicken fillets in tomato/egg mixture and then dredge in breadcrumbs. Spray tops with Fry Light
5 – bake 30-35 minutes.
If you start preparing your potato wedges/chips while the oven is pre-heating, you should be able to put both chips and chicken in at the same time and if you’ve pre-boiled the potatoes, they will take about the same amount of time as the chicken. I took the chicken out and raised the temperature on the chips for 5-10 minutes to crisp them up.
UK KFC is different from the KFC in the USA. There are no biscuits or mashed potatoes and gravy. Instead, you can get your chicken served with baked beans, chips (fries), and corn on the cob. Beans, potatoes, and corn are all FREE on Extra Easy (and on Green too, I think). For a dipping sauce, I took some Fromage Frais (also FREE) and added some dried chives (FREE) to make a mock sour cream & chives, or you could make Slimming World BBQ sauce.
My dinner tonight cost me 3 Syns, and that was including the ketchup for my chips! Quite tasty, and my husband said it did taste similar to KFC.
***
The contents of this post, including images are © Rebecca J Lockley and Tim Lockley unless otherwise stated and should not be reproduced without permission. If you are not reading this on http://blog.beccajanestclair.com, my facebook page, Networked Blogs, the RSS feed(s), or through an e-mail subscription, please notify me.
[LJ readers reading this on the LJ RSS feed: Please click on the link at the top of the entry to go directly to my blog to leave a comment, as comments left on the LJ RSS do not get seen by me. Facebook users reading this from my Networked Blogs link can either comment on facebook or on my blog. If you are reading this through an e-mail subscription, you might need to go directly to my blog to view videos and images.]
For full Copyright and Disclaimer, please read http://www.blog.beccajanestclair.com/copyright/
1 comment[Recipe] Slimming World Friendly Chicken Korma
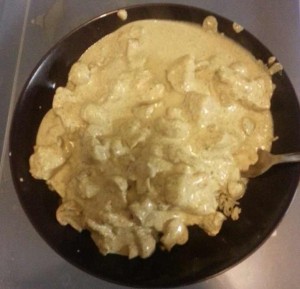
About a week or so ago, I posted to my Facebook page that MüllerLight Coconut with Chocolate Sprinkles yoghurt tasted like eating a Bounty (US: Mounds) bar and I was in heaven and my friend Paul commented with a recipe for chicken korma involving the yogurt. I was dubious as chocolate sounded like a strange ingredient, but tonight I decided to try it. I ran out of Korma powder, so mine was made with half Korma and half Garam Marsala, but it was still ridiculously creamy and “gooey”, as my husband called it. Definately going into regular rotation!
Slimming World Chicken Korma
You Will Need:
2 boneless, skinless chicken breasts, cut into bite-sized pieces
250g button mushrooms, halved (or bigger mushrooms cut into smaller pieces)
(2 large onions, diced – I omitted this as I am allergic to onion!)
3 TBSP Korma spice
1/2 tsp vanilla extract
1/2 tsp almond extract
2 MüllerLight Coconut with Chocolate Sprinkles yoghurt pots
1 container Quark
1/2 tsp tumeric (I had to borrow some from my mother-in-law!)
Fry Light
Rice
-Spray a griddle pan (or frying pan) with FryLight and add the chicken to the pan to brown the chicken (you will need to stir the chicken a few times to get all sides cooked)
-While the chicken is cooking, put a small frying pan over high heat and dry fry the Korma spice, then add the vanilla and almond (though I’m sure both of those are optional!)
-Transfer the spice to a large pot and stir in the yoghurts, Quark, and sweetener. Heat over low heat, making sure you don’t curdle the yogurt.
– Stir in the tumeric.
-Once the chicken is cooked, stir chicken into the sauce and keep on very low heat.
-add the mushrooms (and optional onions) to your griddle (or frying pan) and cook for 5-10 minutes or until soft.
-Add the mushrooms to your chicken and sauce
Divide into two portions and serve over rice. Yum!!
~~*~~
The contents of this post, including images are © Rebecca J Lockley and Tim Lockley unless otherwise stated and should not be reproduced without permission. If you are not reading this on http://blog.beccajanestclair.com, my facebook page, Networked Blogs, the RSS feed(s), or through an e-mail subscription, please notify me.
[LJ readers reading this on the LJ RSS feed: Please click on the link at the top of the entry to go directly to my blog to leave a comment, as comments left on the LJ RSS do not get seen by me. Facebook users reading this from my Networked Blogs link can either comment on facebook or on my blog. If you are reading this through an e-mail subscription, you might need to go directly to my blog to view videos and images.]
For full Copyright and Disclaimer, please read http://www.blog.beccajanestclair.com/copyright/
No commentsRecipe: Easy Peasy Chocolate and Cherry Cake
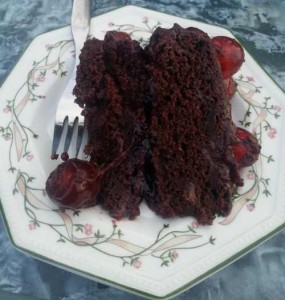 Today (er, yesterday) was a friend’s birthday. A few weeks ago, she told me she was going to purchase a cake to celebrate with, and I said “no, I’m making you a cake”. And then I went on holiday to the US and promptly forgot until I looked at the calendar over the weekend where I had written “make Helen a cake” on Thursday!
So what to make? Like me, my friend is diabetic, so I sent her a text and asked her if she wanted a “good for us” cake or something gooey and naughty and gooey and naughty won out. She had no flavour preferences, so I started racking my brain for something interesting and I kept coming back to the Black Forest Gateau I made for a different friend’s birthday several years ago. The problem was, I really wasn’t in the mood to make a full on Gateau with layers of biscuit and cream, so I settled on somehow combining chocolate and cherries.
Well, this is a hard combination to find recipes for. Either the recipes called for loads of crazy ingredients (one recipe had both buttermilk and sour cream in it!) or they weren’t for a layer cake. I specifically had the idea in my head that there would be cherries IN the cake, between the layers, and on top. I also thought it would involve cherry pie filling and/or cherry jam as opposed to fresh cherries. I was right.
Scouring Pinterest, I came across a Betty Crocker recipe that I am almost ashamed to say is the recipe I settled on!
You Will Need:
1 box Betty Crocker Devil’s Food Cake Mix (they sell them now at Waitrose and probably a few other places)
21 oz cherry pie filling (in the US, this is one large can. In the UK, it took me about 1 2/3 tins. My kitchen scale had ounces on it as well as grams, or you can just eyeball it. 21 oz is approximately 600 grams)
2 eggs
1 tsp vanilla
1/2 jar cherry jam or conserve
1 container glace or maraschino cherries
Chocolate frosting of your choice (store bought or homemade!)
-Preheat your oven to 175C and line the bottom of two 8″ round cake tins with parchment paper
-Ignore instructions on the back of the box
-Combine dry cake mix, eggs, pie filling, and vanilla. As you stir, the cherries will start to break up. This is fine.
-Divide batter between cake tins
-Bake for 20-30 minutes, until a toothpick comes out clean (unless you stab a cherry!)
-Cool cakes for about 15 minutes in the tin, remove from tins and cool for at least an additional hour. You don’t want the cakes to be warm when you put them together (unless you want runny jam in the middle)
-Place the first cake upside down on your serving plate and spread with cherry jam. I used about a half of the jar, you can use more or less. I also added the extra cherries leftover from the pie filling.
-Put the second cake on top of the jam.
-Scrape out the cherry pie filling tins and spread the leftover “jelly” on the top and sides of the cake.
-Spread your frosting all over the top and sides of the cake
-Decorate with glace cherries however you like.
I was told this cake was amazing, and the taste I had was really good. The cherry and chocolate flavours both really come through nicely.
~~*~~
The contents of this post, including images are © Rebecca J Lockley and Tim Lockley unless otherwise stated and should not be reproduced without permission. If you are not reading this on http://blog.beccajanestclair.com, my facebook page, Networked Blogs, the RSS feed(s), or through an e-mail subscription, please notify me.
[LJ readers reading this on the LJ RSS feed: Please click on the link at the top of the entry to go directly to my blog to leave a comment, as comments left on the LJ RSS do not get seen by me. Facebook users reading this from my Networked Blogs link can either comment on facebook or on my blog. If you are reading this through an e-mail subscription, you might need to go directly to my blog to view videos and images.]
For full Copyright and Disclaimer, please read http://www.blog.beccajanestclair.com/copyright/
No commentsRecipe: Philly Cheesesteak Peppers
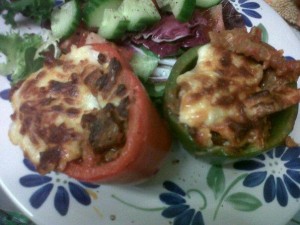
I can’t take credit for this recipe. Credit belongs to Peace, Love, and Low Carb, but I modified her recipe to fit to what’s available in the UK and to my personal preferences. This is a great low-carb dinner when paired with a salad!
You Will Need:
2 peppers per person (I used green and red. I think the yellow or orange ones would be too sweet)
8-10 slices of roast beef (I used Tesco Finest), cut into thin strips (kitchen scissors makes this easy)
shredded mozzarella
300g (aprox) mushrooms, diced (I used my hand held Tupperware dicer)
1 container tomato passata (I think they are 500g in a carton)
Oregano
1. Pre-heat oven to 175C
2. Slice off the tops of your peppers and remove the seeds as well as as much of the membrane as you can. If your peppers won’t stand up, you might want to prop them up in ramekins or in a casserole dish with sides.
3. Using your biggest frying pan (I use my wok), sauteé the mushrooms in a little olive oil until they are soft (about 10 minutes).
4. Add the strips of roast beef and cook an additional 10 minutes.
5. Add a sprinkle of Oregano to your passata and add the passata to the mixture. Cook until bubbly.
6. Sprinkle a little mozzarella in the bottom of each pepper cup and ladle in the meat/mushroom/sauce mixture. Top each pepper with some more cheese.
7. Bake 15-20 minutes until cheese is melted and golden brown.
YUM.
I made 2 peppers for myself and used half a baguette to make open-faced sandwiches for Tim (he doesn’t like peppers and isn’t eating low-carb) and there is still loads of mixture leftover to save for another day, so I bet this would easily fill 6-8 peppers. Each pepper has approximately two soup ladles of mixture in it.
~~*~~
The contents of this post, including images are © Rebecca J Lockley and Tim Lockley unless otherwise stated and should not be reproduced without permission. If you are not reading this on http://blog.beccajanestclair.com, my facebook page, Networked Blogs, the RSS feed(s), or through an e-mail subscription, please notify me.
[LJ readers reading this on the LJ RSS feed: Please click on the link at the top of the entry to go directly to my blog to leave a comment, as comments left on the LJ RSS do not get seen by me. Facebook users reading this from my Networked Blogs link can either comment on facebook or on my blog. If you are reading this through an e-mail subscription, you might need to go directly to my blog to view videos and images.]
For full Copyright and Disclaimer, please read http://www.blog.beccajanestclair.com/copyright/
No commentsRecipe: Diabetic Friendly Hot Chocolate
One thing I really like having on a cold evening (like the ones we have been having!) is hot chocolate….which at first, seemed like it would be a huge no-no for me, but I’ve figured out TWO ways of making diabetic friendly hot chocolate….one that can be used as an “instant” with hot water, and one that requires milk. No photos for this entry….I think we all know what a mug of hot chocolate looks like!
Milky Hot Chocolate
3 TBS Cocoa (plain, unsweetened)
3 TBS Splenda or other sweetener (or sugar if you’re a non-diabetic)
Warm milk
Combine cocoa and Splenda together in a small bowl, then measure out a few teaspoons and add to a mug of warm milk…use as much or as little as you need to get it to the consistency you like. I tended to use about 3-4 teaspoons of the mixture for a large Cath Kidston mug. This mix can be made ahead of time and stored until you want it, just use equal amounts of both!
Instant Hot Chocolate
2 TBS Cocoa (plain, unsweetened)
2 TBS Splenda or other sweetener (or sugar if you’re a non-diabetic)
2 TBS Skim Milk Powder (Note this is NOT non-dairy coffee creamer/whitener)
Hot water
Combine all three ingredients in a small bowl, then measure out a few teaspoons to add to a mug of hot water. Use as much or as little as you’d like. Again, I used about 3-4 teaspoons for a large Cath Kidston mug. This mix also can be made ahead of time, again with equal parts of each item.
You also could easily make it a cappucino by adding in some instant coffee, or using instant coffee, cocoa, splenda, and coffee creamer (instead of powdered milk).
~~*~~
The contents of this post, including images are © Rebecca J Lockley and Tim Lockley unless otherwise stated and should not be reproduced without permission. If you are not reading this on http://blog.beccajanestclair.com, my facebook page, Networked Blogs, the RSS feed(s), or through an e-mail subscription, please notify me.
[LJ readers reading this on the LJ RSS feed: Please click on the link at the top of the entry to go directly to my blog to leave a comment, as comments left on the LJ RSS do not get seen by me. Facebook users reading this from my Networked Blogs link can either comment on facebook or on my blog. If you are reading this through an e-mail subscription, you might need to go directly to my blog to view videos and images.]
5 commentsRecipe: Bill’s Rum Cake
 Yesterday was my Father-in-Law’s birthday. Each year since I’ve been part of this family, I’ve made my FIL a rum cake for his birthday, so even though I’m not allowed to have it, it doesn’t mean I stopped baking.
My aunt makes a fantastic rum cake called the “Bacardi Rum Cake” that uses a cake mix and a packet of Jell-o pudding, neither of which is available in the UK, so I had to create this recipe on my own several years ago. It’s withstood plenty of testing, so I’m ready to share it with you all!
You will need:
For the cake:
2 cups (250g) plus 2 teaspoon self-rising flour
1 cup (200g) caster sugar
2 tsp baking powder
1/2 tsp salt
1/2 c (113g) room-temperature butter
3 eggs
2 tsp vanilla
1/3 c. (80ml) rum (I used dark/navy rum)
Preheat oven to 175C. Grease/spray a bundt pan or an 8″ square.
-combine flour, salt, and baking powder in one bowl and set aside.
-cream together butter and sugar. add eggs one at a time. Slowly add in flour mixture.
-add vanilla and rum. Spread mixture into preferred cake pan and bake 20-25 minutes, until golden brown. Optional – Top with crushed pecans before putting in the oven.
While the cake is baking, make the following glaze:
1/4 cup (60g) butter
1/2 cup (100g) brown sugar
1/2 cup (120ml) rum
2 teaspoon vanilla
-Melt butter and sugar in a thick pan on the stove. Add rum and bring to a boil. Remove from heat and stir in vanilla.
When the cake is done, cool on a wire rack in the pan for about 10 minutes, then gently flip over onto a serving plate. Using a skewer, poke holes in the top of the still-warm cake and pour on the glaze. This cake doesn’t need any icing, but if you want you can sift some icing sugar over the top.
This is always a hit with everyone I make it for, though I will caution that it is in fact possible to get tipsy off of a few slices of this!
—
~~*~~
The contents of this post, including images are © Rebecca J Lockley and Tim Lockley unless otherwise stated and should not be reproduced without permission. If you are not reading this on http://blog.beccajanestclair.com, my facebook page, Networked Blogs, the RSS feed(s), or through an e-mail subscription, please notify me.
[LJ readers reading this on the LJ RSS feed: Please click on the link at the top of the entry to go directly to my blog to leave a comment, as comments left on the LJ RSS do not get seen by me. Facebook users reading this from my Networked Blogs link can either comment on facebook or on my blog. If you are reading this through an e-mail subscription, you might need to go directly to my blog to view videos and images.]
1/2 c rum
Recipe: Italian Meatball Soup
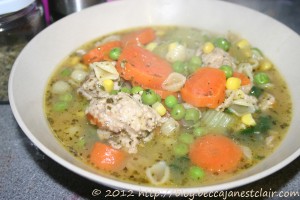 I posted a teaser pic on facebook a week ago, and have since been asked for the recipe, so here we go…
I first discovered the idea on one of the food blogs I regularly read. It was either Serious Eats or The Kitchn and was called “Italian wedding soup”. I’ve previously also seen recipes for “meatball soup”. As my recipe wound up being completely different from either recipe previously posted, I decided to call mine Italian Meatball Soup.
You will need:
-a pack of ground turkey (usually sold as 500g or sometimes 630g)
-3 teaspoons fresh or dried thyme
-1 egg
-50g breadcrumbs
-50g parmesean cheese
-2 TBS olive oil
-3 carrots, chopped/diced
-3 stalks of celery, chopped
-1L chicken broth/stock
-200g fresh or frozen peas
-200g fresh or frozen corn
-100g baby spinach
-100g small pasta
-a handful of fresh thyme, or a few TBS dried
-1 TBS dried basil
-juice of half a lemon
-bunch of fresh parsley, chopped
To make meatballs:
-combine turkey mince, egg, thyme, breadcrumbs, and parmesean cheese and form into small meatballs. Flatten the meatballs slightly (they should be about the size of a 50p). Place the meatballs in the bottom of a frying pan or griddle pan and brown meat on both sides. It doesn’t matter if they are cooked through, as they will finish cooking in the soup. This is just to keep them together. You also don’t need to flatten them first, I just found it easier to work with in the pan this way! Another option would be to start with frozen meatballs or even leftover meatballs as that would cut down the amount of time this takes to make.
To make soup:
-heat olive oil in the bottom of your soup pot and add carrots and celery. Cook until vegetables are soft, about 10-15 minutes. (this is an optional step. You can start by bringing chicken broth to a boil and adding both fresh and frozen veg at the same time, but by cooking the carrots and celery first, they get very tender.)
-add chicken broth/stock, thyme, peas, and carrots. Bring to the boil, add basil, then simmer about 10 minutes.
-add meatballs, cook for 10 additional minutes.
-add spinach and small pasta, bringing soup back to the boil and cook just until pasta is tender (the pack of pasta I used said 5-7 minutes). Squeeze in half a lemon (optional).
-test a meatball to make sure it’s cooked through before serving. Sprinkle with parsley just before serving.
Tim loved it, and he’s not a big fan of soup as a main meal, but this soup was hearty enough to satisfy him. It made enough for us to have this as our Dinner plus enough leftovers for Tim to take the following day. I had to add some more chicken broth to the leftovers.
~~*~~
The contents of this post, including images are © Rebecca J Lockley and Tim Lockley unless otherwise stated and should not be reproduced without permission. If you are not reading this on http://blog.beccajanestclair.com, my facebook page, Networked Blogs, the RSS feed(s), or through an e-mail subscription, please notify me.
[LJ readers reading this on the LJ RSS feed: Please click on the link at the top of the entry to go directly to my blog to leave a comment, as comments left on the LJ RSS do not get seen by me. Facebook users reading this from my Networked Blogs link can either comment on facebook or on my blog. If you are reading this through an e-mail subscription, you might need to go directly to my blog to view videos and images.]
No commentsRecipe: Beer Bread
 By far, the easiest bread in the world to make. It goes great with soups and stews!
I first made Beer Bread in 2009 out of a box mix that cost over $5.00. We loved the bread, and I knew there had to be an easy way of making this without buying a pre-made mix, so off to the search engines I went. There are loads of recipes out there for beer bread and some of them can get quite involved. This recipe is so simple, anyone can make it. You can even mix the dry ingredients together ahead of time, pop it into a jar and give to a friend with a bottle of beer for an instant gift.
Beer Bread
You Will Need:
375g self-rising flour
3 tbs caster sugar
330ml beer (lagers work best – I used Stella)
1. Pre-heat oven to 180C. Butter the sides and bottom of a loaf tin.
2. Mix together dry ingredients. Slowly add beer (it will foam) and use a wooden spoon to mix until sticky.
3. Pour into loaf tin and bake 50-60 minutes or until the top is crunchy. Cool tin on it’s side on a wire rack for 10-15 minutes before removing bread.
This doesn’t even need any butter, it’s tasty without it!
I might be posting a lot of recipes in the next few days as I seem to have a lot of recipes I haven’t yet posted!
~~*~~
The contents of this post, including images are © Rebecca J Lockley and Tim Lockley unless otherwise stated and should not be reproduced without permission. If you are not reading this on http://blog.beccajanestclair.com, my facebook page, the RSS feed(s), or through an e-mail subscription, please notify me.
[LJ readers reading this on the LJ RSS feed: Please click on the link at the top of the entry to go directly to my blog to leave a comment, as comments left on the LJ RSS do not get seen by me. Facebook users reading this from my Networked Blogs link can either comment on facebook or on my blog.]
No commentsRecipe: 500g of Butter (Butterscotch Cake)
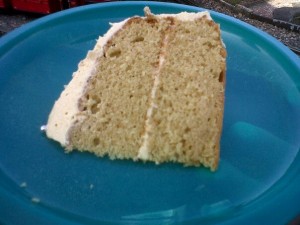
[It was so good, there wasn’t any left!]
To make a long story short, I offered to bake my friend Brian a cake and gave it to him when we saw him on Sunday. Brian decided to donate his cake to the group we were with, so everyone got to have a taste and everyone who had some complimented me on it! So, here you go. How to use 500g of butter in one go….
Butterscotch Cake
For the cake:
225g Butter (softened. I used real butter not Stork like I usually do)
125g Muscavado sugar (brown sugar)
100g Caster sugar
225g self-raising flour
4 eggs
2 tsp vanilla
For the syrup:
50g Butter
75g Muscavado sugar (brown)
50g Caster sugar
1 tsp vanillia
For the icing:
200g Caster sugar (or icing sugar if you have it!)
25g Cornflour (cornstarch)
225g Butter cut into cubes
6 Egg yolks
Butterscotch syrup (from above recipe)
1. Pre-heat the oven to 190C and line your cake tins with some parchment paper.
2. You’ll be making the sauce first so it has time to cool. Melt the butter and two sugars together over low heat for 15-20 minutes until sugars are dissolved. If it doesn’t look like syrup, add a tablespoon of butter (I used olive spread) to make it a little runnier. Remove from heat and add vanilla.
3. While that’s cooling, start on the cake. Use a wooden spoon and beat the softened butter. Add the two sugars and continue to use a wooden spoon to mix it together until it becomes fluffy and golden in colour.
4. You can switch to an electric hand beater for the rest. Add in each egg, one at a time, with a Tablespoon of the flour each time and beat thoroughly before adding the next egg.
5. Beat in the vanilla, and add the remaining flour. The mixture should be thick enough to reluctantly drop off a spoon. If it’s too thick, add a tablespoon of milk.
6. Divide between your two pans and bake for 15-20 minutes. Remove from the oven and cool in the pans for 10 minutes, then turn into a wire rack to finish cooling.
7. Time to make the buttercream icing. You will want to clean off your electric beaters for this. Beat together the cornflour, sugar, and eggs until blended and bright yellow in colour.
8. Add butter one cube at a time, mixing constantly.
9. Pour in the butterscotch sauce and mix together.
10. To put the cake together, just sandwich the two layers with a small bit of the icing, and ice as usual.
Yum!!
~~*~~
The contents of this post, including images are © Rebecca J Lockley and Tim Lockley unless otherwise stated and should not be reproduced without permission. If you are not reading this on http://blog.beccajanestclair.com, my facebook page, the RSS feed(s), or through an e-mail subscription, please notify me.
[LJ readers reading this on the LJ RSS feed: Please click on the link at the top of the entry to go directly to my blog to leave a comment, as comments left on the LJ RSS do not get seen by me. Facebook users reading this from my Networked Blogs link can either comment on facebook or on my blog.]
No commentsRecipe: The Hairy Bikers Sausage and Bean Breakfast Pie
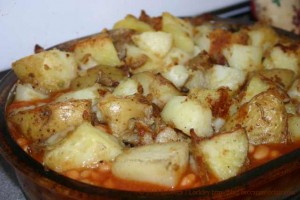
This past Christmas, I was sent a copy of the Hairy Biker’s Perfect Pies by my Secret Santa from an Ex-pat group. I’m not a pie person, and as you know, I’m quite loyal to Jamie Oliver, but I paged through the book and marked a bunch of the pies that looked like Tim and I would like them. Last week when I was meal planning, I read out the pies to Tim, and he picked this one. I had planned to serve it with poached eggs, but I forgot to poach the eggs in the end! Oops. As always, my recipe has been slightly modified due to my own dietary restrictions, and based on what I thought would work better.
You will need:
750g Maris Piper potatoes
3 TBS cooking oil
8 sausages (I used Tesco half-fat)
2 x 415g tins of baked beans
1. Pre-heat the oven to 200C. Quarter the potatoes and put in a pan of boiling water. Bring to the boil and simmer for 10 minutes or until soft.
2. Meanwhile, fry the sausages in 1 TBS oil until browned. (or grill them)
3. Put the sausage in the bottom of a shallow casserole dish and cover with beans. Set aside.
4. Drain and roughly cut the potatoes into chunks. Don’t worry about the skins. Some of the skins will fall off after boiling, some won’t.
5 – Fry the potato chunks in the remaining oil for 2-3 minutes. Pour potatoes on top of sausage and beans
6 – Bake at 200C 15-20 minutes until potatoes are crisp on top and the beans are hot.
I think this would have been tasty with a poached egg on top, but Tim thought it was okay on it’s own!
~~*~~
The contents of this post, including images are © Rebecca J Lockley and Tim Lockley unless otherwise stated and should not be reproduced without permission. If you are not reading this on http://blog.beccajanestclair.com, my facebook page, the RSS feed(s), or through an e-mail subscription, please notify me.
[LJ readers reading this on the LJ RSS feed: Please click on the link at the top of the entry to go directly to my blog to leave a comment, as comments left on the LJ RSS do not get seen by me. Facebook users reading this from my Networked Blogs link can either comment on facebook or on my blog.]
2 commentsProduct Review: Giant Cupcake Silicone Mold

A few years ago, my sister-in-law gave me one of those cupcake cake tins made out of silicone and joked that she gave it to me so I would make her a giant cupcake. The pans sat in the box in the kitchen until one day I finally opened the box, gave the kit a wash, and stuck it in a cabinet. I kept thinking about using the cake pan, but ultimately would make something else, or not be in the mood to play around with it, so it just sat there. My sister-in-law loves peanut butter, and when I was in PA in December, I was reminded of Peanut Butter Icing…which of course, needed to go on a cake for my SIL. Since her birthday was this past Friday, I decided to break out the big cupcake. My sister-in-law also likes white chocolate better than milk, so I had decided on making her a white chocolate cake with peanut butter icing.
For the white chocolate cake, I just took a regular chocolate cake recipe and where it called for melted plain chocolate, I subbed in 200g of melted white chocolate, and I used some white hot chocolate mix in place of the 4 tablespoons of unsweetened cocoa. I also removed a few tablespoons of sugar from the recipe to compensate for the extra sugar in the white chocolate.
The directions said to spray the cupcake bottom, top, and insert with cooking spray, so I did that and followed the directions which said to fill the bottom part up to the line on the inside (about half way) and to fill the top part 3/4 of the way. The piece that makes a hollow hole in the bottom for filling is optional, so I snapped it in place thinking it’d make a nice little cave for some peanut butter icing.
Baked for 20 minutes, and it wasn’t done. Baked it for 15 more minutes (total 35) and it still wasn’t done, but in fact the bottom part of the cupcake had spilled out over the side of the mold and was baking itself into a little pile of cake on the baking tray I sat the molds on. The lid was still in place on the bottom though, so I assumed it would still have an indention. I set the timer for a further 15 minutes (total 50 mins) and both halves appeared to be done so I removed them from the oven….
The TOP piece developed an indention while it was cooling and appeared to be brown in colour on the sides. The BOTTOM piece did not have the indention for filling anymore, and when I removed it from the silicone mold, it appeared to SHRINK in size.
Since I had the indention in the top piece, I decided I would still put some icing in the middle and I attached the top piece. Due to the shrinking of the bottom piece, it looked like a mushroom instead of a cupcake, and I discovered the bottom piece started to buckle a little under the weight of the top piece and it appeared to have a hollow bit….ALL THE WAY IN THE MIDDLE OF THE CAKE. So I used a spoon and shoved in some peanut butter icing into the hole. Why not?
Since I wanted a cupcake and not a mushroom, I decided the best thing to do would be to make a cupcake “liner” out of card stock and arrange it to make the bottom look closer to the same size as the top. my SIL’s favourite colour is purple, so I used purple card stock. Then, to hold it together better, I took a bamboo skewer and stuck it through the middle of the cake. Since it would stick out the top, I made a sign on the computer with Tim’s nickname for my SIL in the shape of a star to tape to the skewer.
I made the Peanut Butter icing and piped it on using a Wilton 1M tip – the same size tip I would use on a normal-sized cupcake.
Peanut Butter Icing (recipe from my cousin, Jen)
1/2 cup butter, softened
1 cup creamy peanut butter
3 tablespoons milk, or as needed
2 cups confectioners’ sugar
Directions
1.Place the butter and peanut butter into a medium bowl, and beat with an electric mixer. Gradually mix in the sugar, and when it starts to get thick, incorporate milk one tablespoon at a time until all of the sugar is mixed in and the frosting is thick and spreadable. Beat for at least 3 minutes for it to get good and fluffy
I decided the icing wasn’t peanut buttery enough, so I added a few extra desert spoonfuls of peanut butter, a little more milk, and a little more sugar. Basically, make the icing to your own taste.
Hopefully, the cake tastes okay – I’m waiting for my SIL to text me!
~~*~~
The contents of this post, including images are © Rebecca J Lockley and Tim Lockley unless otherwise stated and should not be reproduced without permission. If you are not reading this on http://blog.beccajanestclair.com, my facebook page, the RSS feed(s), or through an e-mail subscription, please notify me.
[LJ readers reading this on the LJ RSS feed: Please click on the link at the top of the entry to go directly to my blog to leave a comment, as comments left on the LJ RSS do not get seen by me. Facebook users reading this from my Networked Blogs link can either comment on facebook or on my blog.]
2 commentsRecipe: Homemade Potato Skins
Tim and I were shopping at the co-op a few weeks ago, when he spotted some pre-made potato skins in the refrigerated items section. The container had 6 potato skins in it, and the co-op wanted over £3 for it. I told Tim not to buy it and that I knew I could make this at home quite easily.
Homemade Potato Skins
You will need:
-Potatoes (I used 3 and Tim and I each had 3 skins)
-1 slice of cooked bacon for every potato
-grated cheese
Preheat your oven to 200C. Slice each potato in half horizontally and place skin side up on a lined baking tray (or spray it with oil). Brush olive oil on the skins. Bake for 30 minutes.
Remove from oven. Wearing an oven mit, pick up each potato half and using a large spoon, scoop out most of the inside. You won’t need it for this recipe, but you can save the insides for mashed potato at a later time. You should be left with a mostly hollow shell. If you scooped too much out, you can put a little of the potato back inside the skin.
Crumble the bacon and sprinkle it over the skins. Top with grated cheese.
Put the potato skins back into the oven for 10-15 minutes, or until the cheese is melted and bubbly.
Just as good as store bought or restaurant made for pennies!
~~*~~
The contents of this post, including images are © Rebecca J Lockley and Tim Lockley unless otherwise stated and should not be reproduced without permission. If you are not reading this on http://blog.beccajanestclair.com, my facebook page, or the RSS feed(s), please notify me.
[LJ readers reading this on the LJ RSS feed: Please click on the link at the top of the entry to go directly to my blog to leave a comment, as comments left on the LJ RSS do not get seen by me. Facebook users can comment directly on Facebook.]
2 comments
