Archive for February, 2011
Sorry!
Has it really been two weeks? Oh, dear. I’m so sorry to have kept all of you waiting for the rest of the Austria trip. I got sick sometime around Valentine’s Day, and I’m still not 100% better, even though we went to Brighton last weekend for ModelWorld. Sadly, my visit this week to see my friend Jessy is currently on hold due to me still having symptoms and not wanting to pass things on to her or her children. I’m hopeful that I’ll make it down later in the week, though.
We also are getting new to us bedroom furniture at the end of March, and need to put up lining paper in the bedroom, re-paint the walls and trim, and get new carpeting installed…plus make it so we can put the new furniture in the bedroom. I don’t know how much I’ll be around until after we get all that done. Working on the bedroom will be taking top priority, as we must move the furniture on the 28th.
To add to all this — it’s competition season for my chorus! We’ve got a competition in a few weeks time and then our regional convention/competition in May….with loads of extra rehearsals on weekends to prepare! If you think that’s all we have going on right now…no. It’s also model railway show season! It’s absolutely crazy around here!!
But rest assured, the rest of the posts are coming. I don’t think I’ll get one out tonight (I’m feeling tired!), but I’ll try to get something up tomorrow. If I don’t get to Jessy’s, I’ll try to post every other day this week.
Oh, and we have a bit of good news – Tim found out his new MOM position will start on the 3rd of May. The only downside is his weeks away at training will overlap my chorus convention…and the weekends will be the only time we’ll see each other while he’s away on his course, so that won’t be fun, but at least we now know when he’ll start!
We also re-arranged our kitchen yesterday and finally got rid of the in-laws picnic table we had been using as a kitchen table. We bought Leksvik from IKEA – it’s a small table with two drop leaves. Perfect for two, and expandable for six. Plus, it fits a lot better in our kitchen! Photos will be posted once I get things back in order. Right now the kitchen is still a bit of a mess!
Hope everyone is doing well!!
[LJ readers reading this on the LJ RSS feed: Please click on the link at the top of the entry to go directly to my blog to leave a comment, as comments left on the LJ RSS do not get seen by me. Facebook users can comment directly on Facebook.]

Recipe: Black Forest Cupcakes
 Tim and I spent this weekend with our friends Nicky, Dave R, and Pete. The five of us have decided to get together at least once a month – they provide the pizza, we bring along a pudding (US: dessert). Last time we got together, I took an apple and blackberry crumble along. This time, I wanted to do something different.
I made a black forest cake (Schwarzwälder Kirschtorte, see? It is related to the Austria/Germany trip!) back at the beginning of August for our friend Dave B’s birthday. It was delicious – we didn’t even have a single piece left of it! Nicky and I were going through my food pics over IM and I said I thought I might make that for this weekend. To make a long story short, her brother (Dave R) made a joke about how I needed to make 5 cakes – one for each of us. Originally I had said that I thought a cupcake version of this would be too messy….but then I had to rise to the challenge, especially after someone on one of the cooking/baking communities I read posted a link to Bake it in a Cake. If that person can bake loads of things into cupcakes….I could do a black forest version. I even modelled my recipe off of their cherry chocolate cheesecake recipe.
 The first attempt I made was a half-failure, I’ll be honest. I knew I wanted to take 10 cupcakes with me this weekend (2 cupcakes per person), which meant that would leave two “extra” – just enough for Tim and I to taste test them. The first batch tasted GOOD, but they were too gooey. The cupcakes were spilling out over the top of the liners, the paper stuck to the cakes, and there was just no way that the cupcakes could be eaten without a fork. The filling leaked through the bottom of the paper liner (AFAIK, they don’t sell aluminium liners in the UK) making the liner soggy. I looked back at the cheesecake recipe, and noticed that they gave their cupcakes a crust. Black Forest Gateau sometimes has a biscuit base, so I thought “why not?” and since I had plenty of batter left, attempt number two was made. I am pleased to say that the addition of the bicsuit layer helped to keep it less of a mess!
So, here’s how to make them! This recipe will make 24 Black Forest Cupcakes. I didn’t half the recipe because of the possibility of making a mistake, but when I make these again, I will probably cut the recipe in half and only make 12.
You will need:
200g biscuits (I used 100g plain digestives and 100g chocolate biscuits) (US: cookies)
150g butter, melted
125g plain chocolate (US: baking chocolate), melted*
225g butter, softened
295g sugar
3 eggs (mine were medium sized)
2 tsp vanilla extract
300g flour (I happened to have self-rising, but plain will probably work, too)
4 TBS unsweetened cocoa powder
1/2 tsp baking powder
3 tsp bicarbonate of soda (US: if using baking soda, only use 2tsp**)
1/4 tsp sea salt (regular salt will do fine)
320ml milk
2 tsp cherry brandy (optional)
1 can cherry pie filling
1 jar maraschino cherries
1 packet dream topping/whipped topping (US: Dream Whip or Cool Whip) or cream for whipping if you’re good at that
good quality chocolate, about 25g (for garnish)
cupcake tin
cupcake liners
hint: To melt your chocolate without worrying about it overcooking if you don’t have a double boiler (I don’t!), place a bowl filled with the chocolate in a larger bowl filled with boiling water. Be careful the water doesn’t get in the chocolate.
hint: If you have cookies/biscuits the same size as the bottom of the cupcake tin, don’t worry about the butter. Just place the cookie directly in the bottom of the paper case. An Oreo (with the filling scraped off) might work well!
hint: to make the whipped topping whip better, chill the bowl and the beaters for at least an hour before you make it.
Preheat oven to 175C and put the liners in the tin.
Melt 125g chocolate.
Make the biscuit layer by crushing the biscuits until they are a fine powder. Combine biscuits with 150g melted butter and spoon into cupcake liners. You’ll need about a teaspoonfull per each cupcake. Use your fingers to make sure the biscuit mix covers the bottom of the cupcake liner. This does not need to be super thick.
Cream together sugar, 225g butter, vanilla, and eggs. In a separate bowl, sift together flour, salt, cocoa powder, baking powder, and bicarb. If you don’t have a sifter (I don’t), either mix it together really good or push the ingredients through a strainer. Add melted chocolate to the butter mixture. Alternate adding milk and flour mixture, beating until smooth. If you have cherry brandy, add it at this time. Your batter should look light and fluffy.
 (Please note, that picture is from the first batch. DO NOT fill your cupcakes that full!) Spoon 1-2 teaspoon’s worth of batter in each liner and spread the mixture so it covers the biscuit base. Then, spoon a teaspoonfull of the cherry pie topping into each liner (make sure you have at least one cherry in each cupcake). Cover the cherry filling with another teaspoon or two of batter. You shouldn’t be able to see any cherry filling.
Bake 30 minutes and allow to cool completely.
 Drain maraschino cherries and make dream topping. Take your 25g of good quality chocolate and use a vegetable peeler to shave it into curls.
Put one spoonful of dream topping on each cupcake – just enough to go nearly to the edge. Top with 1-2 maraschino cherries and sprinkle with the chocolate shavings. There will be plenty of topping left. Just freeze the extra for another treat!
*I used a combination of plain chocolate, 85% cacao “good quality” chocolate, and 5 Cherry Cordial Hershey Kisses
**For unknown (and un-googleable) reasons, UK bicarbonate of soda is not as powerful as US baking soda. I’ve noticed I have to add 50% – 100% more in most of my recipes to get them to rise the same as they would have in the US.
[LJ readers reading this on the LJ RSS feed: Please click on the link at the top of the entry to go directly to my blog to leave a comment, as comments left on the LJ RSS do not get seen by me. Facebook users can comment directly on Facebook.]
Recipe: Chicken Tetrazzini
 Every year after a holiday involving turkey, my aunt would make Turkey Tetrazzini and she would always invite my mom and I over for dinner because it “made a lot”. Each time, we’d go and I’d eat it, but I never really enjoyed it. It just never appealed to me, and I can only speculate on why. It had nothing to do with my aunt’s cooking – she’s a fabulous cook, and many of my recipes come from her. The recipe called for tinned mushrooms, and I’m just not a huge fan of mushrooms. Maybe it was the mushrooms that turned me off, I don’t know.
I was flipping through my Betty Crocker Cookbook and I came across the Chicken Tetrazzini recipe, which as far as I can tell is the same recipe my aunt always uses. A lot of my family recipes as it turns out have come straight out of Betty. That’s not a bad thing, it just shows to me that Betty’s recipes really are good. I decided there had to be a way to make this taste good to me, so I set about changing a few things to make it taste better and to make it healthier. The first thing I did was swap out those mushrooms for peas!
So here’s my take on this Betty Crocker classic.
You will need:
200g whole wheat spaghetti, broken into quarters
2 TBS butter
30g whole wheat flour
1/4 tsp salt
1/2 tsp pepper
230ml chicken broth or stock
230ml milk
3 TBS red wine
225g cooked cut-up chicken
110g frozen peas
50g Parmesan cheese
50g bread crumbs
Dutch oven
Preheat oven to 175C. Cook pasta according to directions on packet.
In the Dutch oven, melt butter over low heat (if you don’t have a dutch oven, you will need a regular sauce pan and a casserole dish).
Stir in flour, salt, and pepper and cook until smooth.
Add broth and milk, bring to a boil and boil for one minute. Sauce will be creamy and thick.
Drain pasta and add to dutch oven along with chicken, peas, and red wine. Stir until coated in sauce. If you don’t have a dutch oven, transfer the mixture to a casserole dish.
Combine bread crumbs and parmesan cheese and sprinkle over top of dish.
Place uncovered in oven and bake 30-45 minutes until hot and bubbly. Check your dish after about 20 minutes. If the cheese on top is starting to burn, put the lid on.
[LJ readers reading this on the LJ RSS feed: Please click on the link at the top of the entry to go directly to my blog to leave a comment, as comments left on the LJ RSS do not get seen by me. Facebook users can comment directly on Facebook.]
European Road Trip – Day Two: Neuschwanstein and Setting Up Camp
[Finally blogging about our trip to Germany and Austria we took in September 2010!]
Today was THE day. I was finally going to see what we affectionately dubbed “my castle”. I blogged about this all the way back in December 2009 when we started planning our trip, though at that time we had been planning on staying in Germany and not Austria. In between December 2009 and going on our trip in September 2010, our plans changed A LOT…but the one constant was always going to be visiting Neuschwanstein.
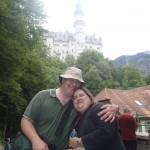
Neuschwanstein has been the inspiration behind many artists, poets, writers, and….animators. Cinderella’s Castle at Walt Disney World is partially based on Neuschwanstein. It’s no surprise…the castle is gorgeous. Even without going inside, I would have been completely satisfied with my visit having finally gotten the chance to gaze upon “my castle”.
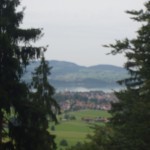
I printed directions before we left the UK to get us from the hotel to the castle, and they seemed to work pretty well. At one point, we were driving on a tree-lined narrow road and I could catch glimpses of the castle through the trees. We pulled over and discovered a path through the bushes (obviously well-travelled by other visitors!) and I got my first in-person look at Neuschwanstein. It took my breath away and nearly had me in tears. We got back in the car, drove about 100 feet, and stopped again, this time to take a photo of the OTHER castle near Schwangau, Hohenschwangau. These two castles are within yodelling distance of each other. We did not tour Hohenschwangau that day, as my main focus was getting to Neuschwanstein, but we will go back and explore it on another trip. There’s so much to do right in that small area I could see us easily planning a week just staying right in that area.
We finally reached the castle grounds. You need to purchase your tickets before you get up to the castle at a special ticket booth (located next to one of the many souvenir shops!). This is also where you would purchase tickets for Hohenschwangau, as well as a combination ticket for both castles. After you have your ticket, you can opt to walk up the mountain, take a bus, or ride behind a horse-drawn carriage. As much fun as the carriage sounded, we opted for the bus ride up and the walk back down, figuring down would be lots easier than up! Tickets are for timed entries depending on what language you want the tour in (tours are offered in German, French, English, and then a multilingual tour where you walk around with a device similar to a mobile phone that translates into something like 30 languages), so you really need to watch how you get up to the castle and make sure there aren’t long queues! In fact, we nearly didn’t make it on time as the first bus to come down filled up with everyone ahead of us, leaving us standing about 5 people back from the front.
The bus drops off right near Marienbrücke (Mary’s Bridge), a very rickety wood and iron bridge that goes over the gorge giving you a perfect view of Neuschwanstein. Tim braved the bridge despite his dislike of heights to take a few photos for me. The bridge is still a decent uphill walk to the castle gates, so we had to get on our way quickly so we wouldn’t miss our booked slot.
Tours start from the courtyard. You can’t take large bags into the castle, so they offer lockers you can rent. Tim and I knew this ahead of time and left our knapsacks in the car, stuffing water bottles into the camera bag and my handbag. Each tour has a number attached to it and a barcode on your ticket. When your number is called, you have to go to the barrier, insert your ticket, and go in. When our tour was called, there was a mad (rude) dash to the barriers and I nearly got knocked over twice by people who seemed to think they had to be first.
Before I tell you about our visit, let’s talk about Neuschwanstein. The castle was built in the 19th century by a man who is better known as Mad Ludwig. It was intended to be his personal refuge, however he died while the castle was still being constructed. Ludwig wanted his castle to be a fairy tale castle and to pay tribute to Richard Wagner, and so all of the rooms are decorated to represent his musical works. Ludwig also had a slight obsession with swans, and there are multiple swans in every single room – carved into furniture, worked into the paintings, and even carved into the crown moulding. In fact, one of the first things you see when you walk in is a life-sized swan sculpture. Neuschwanstein means “new stone swan” in German.
Photography is not permitted inside the castle, but I did find a website with some interior photos.
The other people in our tour group continued to be rude. It’s really a shame, but some people just didn’t have the patience to wait their turn and were pushing and shoving at us. At one point, Tim and I even got separated by a crowd of people because they managed to push by me. It’s a castle, for crying out loud! It’s not going anywhere! Despite (or in spite of, take your pick) the rude tourists, we still had a great time. I was in awe. At one point we were looking out some windows at the scenery below, and I asked our tour guide if it was all right to take some photos looking out the (open) window. She gave me permission, so guess what happened? Yep. About a dozen people in our group all went over to the window and started taking photos and I had to wait until they were done before I could go take mine. Not that the guide wouldn’t have given the others permission, but it just really rubbed me the wrong way to have that happen when I was the one to ask about a picture!
At the end of the tour, you can take a self-guided tour of the kitchens on your way to the gift shop and cafe. The kitchen was amazing, and I couldn’t help but dream of the kinds of meals I’d cook if I had that large of an oven and hob at my fingertips! Once again, we ran into an issue when we tried to use the cafe. Tim and I didn’t know what was going on and there weren’t any signs, so we stood there by the counter waiting to place our order while one of the workers did something away from the counter (but saw us). Tim and I both assumed that since she saw us, she would come over to serve us as soon as she was done. Not so. Three ladies walked in behind us, got in front of us, and started calling for the woman’s attention. We thought we’d get served before these ladies because the woman had seen us waiting, but no. She goes and gets the food those ladies ordered, and then goes back to her other work, completely ignoring Tim and I. Not ones to hang around where we’re not wanted, we left and decided to grab food at the food and drink stands dotting the perimeter of the castle.
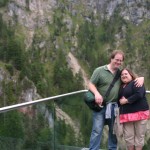
We started walking down the footpath taking photos and Tim was trying to find a spot to set up his camera for a self-timed shot. Ironically, a British couple heard Tim and I talking and asked us to take their photo in exchange for them taking ours. Worked out perfectly! We started hiking down the mountain and found a footpath to follow that went through the woods. It was dotted with benches, so we had someplace to stop and rest if we needed to.
By the time we got to the bottom, we decided it was time to head towards Austria. We had booked a few nights at Camping Hofer in Zell am Ziller, and we had about a two-and-a-half hour drive to get there. Since we’d be setting up camp, we wanted to make sure we arrived while it was still daylight, and the office at the campsite closed at 7PM. If we arrived later, we’d have been forced to find a B&B for the night. Arriving in daylight also gave us the chance to see what shops were available near the campsite. Fortunately, we passed a Billa supermarket on our way.
We arrived while it was still daylight. One of the very odd things about where we were was the complete lack of a sunset. I think it was because we were in a valley completely surrounded by mountains on all sides. The sun must have been behind a mountain. Tim and I just barely managed to get everything set up and Tim was blowing up the mattress as it started to get dark. I fished out a torch (US: flashlight) and managed to make us cups of tea and instead of going back out to Billa, we decided to eat whatever we happened to still have in the cooler that night. A review of the campsite will be made in a separate post.
We had an amazing day! Tim really spoiled me on this trip, and day three was to be another day of my choice – Swarovski’s Kristallwelten
And the photos…oh, you know you want to look!
If you click on the photo once, it will take you to that photos page. If you click on the photo again, you will be able to view it full size. I have no idea why WordPress made it so complicated!


Recipe: Posh Pigs in a Blanket (via Serious Eats)
 I read a lot of food blogs because I love to try new ideas in the kitchen, and one of the best foodie blogs out there is probably Serious Eats. Some of the posts aren’t relevant to me when they review restaurants across the US, but I still always find it interesting. SE has several recurring serials, including one called “French in a Flash“, a series of easy French recipes.
About a week or so before the super bowl, an entry appeared for Hot Dog Vol-au-Vent. The creator of the recipe describes the dish as similar to Saucisson en Croûte, which is similar to a UK sausage roll. You know what I call it? Posh (American) Pigs in a Blanket.
The reason I add the “American” marker is because UK Pigs in a Blanket are different from US ones. In the UK, most people when they describe making Pigs in a Blanket are referring to sausages wrapped in bacon. I myself made these at Christmas when I had my “rescued Christmas” dinner as they are a staple on the UK Christmas table. In the US, however, Pigs in a Blanket are usually made from hot dogs or “little smokies” and involve a tube of Pillsbury Crescent Rolls.
When I spotted the Vol-au-Vent recipe, I was curious and thought I would give it a go, but the recipe calls for onion (which I’m allergic to) and something called fleur de sel. A quick google search revealed that fleur de sel is French sea salt. I did not have any French sea salt, but I did have a canister of Saxa sea salt, so that would just have to do. As for the hot dog part – please don’t buy hot dogs in a can. At least go for the ones sold in the cooked meats aisle, like Hessey’s.
Here’s how you make my version of Posh Pigs in a Blanket.
You will need:
One sheet of puff pastry, thawed and unrolled (I bought a “light” version from Tesco)
16 pieces of hot dogs (you can cut 8 in half, or cut 5 into thirds and only make 15 – I did this and wrapped up the spare bit of pastry with just some mustard. Yum.)
Your favourite mustard (ours is Estragon Senf we brought back from Austria)
1 egg
poppy seeds
sea salt
Preheat the oven to 200C.
Take your sheet of puff pastry, and cut it in half horizontally (I used my pizza cutter), then cut each half into 8 strips.
Give each strip a dot of mustard (however much you’d like), and then roll each strip around a piece of hot dog. Place the wrapped hot dogs seam side down on a baking sheet.
Give the egg a whisk and use a pastry brush to give the tops an egg wash.
Sprinkle with poppy seeds (I used about 2 teaspoons) and sea salt.
Bake for 25-30 minutes until pastry is golden brown.
My husband enjoyed these so much he informed me that I had to make them again!
Vlog – Sneak Peek at Day Two
Post about Neuschwanstein tomorrow!
[LJ readers reading this on the LJ RSS feed: Please click on the link at the top of the entry to go directly to my blog to leave a comment, as comments left on the LJ RSS do not get seen by me. Facebook users can comment directly on Facebook.]
European Road Trip – Day One
[Finally blogging about our trip to Germany and Austria we took in September 2010!]
Or I should say, Day .5 and Day One.
On the Sunday before we left, Tim had to work a 12-hour day shift. So, we packed the car up on Saturday afternoon – I dragged everything outside while Tim was at work, and then when he got home we spent a few hours stuffing it…and boy, do I wish I had thought to take pictures of the packed car! My friend Lou lives down near Dover, and she offered to let us spend the night at her place on Sunday so we wouldn’t lose a half day driving through England. What a lifesaver! We didn’t actually get to her house until past 10PM, and didn’t get to sleep (too busy chatting!) until around 12, but it was well worth it to get on a Ferry around 8AM. Thanks again, Lou (Lou is currently cruising in the Caribbean with our favourite band, Barenaked Ladies)!
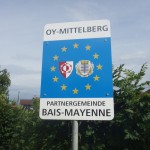
Our plans for Monday were to drive across France, through Belgium and Luxembourg, and finally into Germany. The drive was LONG. I think when we do this again (plans are for 2012 or 2013!), we’ll be breaking the journey sooner, as Tim was really tired. Unless by then I’m driving, in which case we would be able to switch off. But we had important plans and a sort-of itinerary to follow. Plus, I booked us a room for the night in Oy-am-Mittelberg.
We took an early morning ferry, around 8AM BST. Unfortunately, we crossed into a new time zone and we actually lost an hour. I think next time, we’ll aim for a 7AM sailing, as well. I also discovered that P&O sail continuously through the night, so we could have driven down after Tim got off work, gotten on the ferry and stayed at a hotel in France and given us a jump start. Oh well. We know for the next trip. The ferry was also cold. We went outside on the open deck while the ship was leaving port in Dover and while it was docking in Calais, but then we went inside and ordered breakfast. Food on the ferry was expensive, but it was worth it – They had a breakfast deal where you got something like 6 or 7 items for a flat rate. I took a picture of Tim’s plate!
We reached Calais around 9:30AM local time, and started in on the long drive. We made a bathroom stop somewhere in France, and stopped in Belgium for Lunch. I packed things into our cigarette lighter socked powered cooler so we could have a picnic lunch and we took a decent break. Original plans were to get to our Gasthaus in plenty of time for Abendbrot (evening meal), but that wasn’t going to happen. We finally gave in and stopped around 8PM at a service plaza. Our options were an expensive authentic German meal, or Burger King. Needless to say, we opted for Burger King. No reason to break the bank on a dinner break! This also is where we learned about Frauenparkplatz.
A Frauenparkplatz is a parking space, or series of spaces, reserved for women. The spaces are a little wider than traditional spaces, which lead you to think the Germans perhaps don’t think women can park. However, these spaces were actually created for women’s safety and are located close to doors and well-lit. Personally, I think it’s a great idea…it just also has the potential for jokes!
Around this time, we also discovered one of the perks of the Germany Autobahn — Many sections have raised speed limits or even NO speed limit. At first I was afraid for Tim to be driving at 100, but then I soon realized that if he didn’t, we’d get squashed by all the other passing cars! The sections aren’t very long, or at least, driving along at 100 they don’t feel very long. It helped us to make up some time, too. Our Gasthaus had a check-in time of by 10PM and if we didn’t get there, we’d lose 80% of the room rate plus not have a place to sleep. Fortunately, I was able to call the Gasthaus from my mobile and they were willing to “wait up” for us until 11. As luck would have it, we managed to arrive right at 10PM!
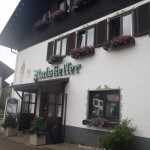
We stayed at the Ratskeller. A Gasthaus I picked completely by random based on it’s location and price. I just looked at a map of where we planned to be the following day, and picked out a few towns to check that looked like they were within an hours driving distance. I picked the Ratskeller completely blind, but it turned out to be an excellent choice.
Our room was basic, but it had all the basic commodities you expect from a hotel – comfortable, clean beds, a clean WC with shower stall, a telephone, television, and as luck would have it- free WiFi. Our hosts even offered to cook a meal for us when we arrived at 10! We declined, since we had made a stop already for food. We did make the mistake of assuming there would be a kettle or coffee maker in our room though and wished we had asked for some tea. We were really tired, so we set our alarms for 8 the following morning, plugged in some of our electronics to get them charged up, pushed the beds together (we booked a double room, but it consisted of two single beds), and collapsed.
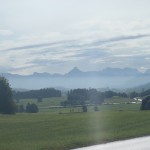
The following morning we pulled back the curtains to absolute beauty. We missed it the night before since we arrived in the dark, but Oy-am-Mittelberg is in a valley of the Bavarian Alps. It’s stunning. Most of their tourism comes from skiing in the Winter, so in the off-season it is fairly quiet. When we went down for breakfast, there was only a handful of people present.
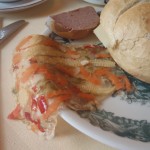
Breakfast (Frühstück) in Bavaria consists of a continental breakfast of meats and cheeses, and then there is usually a second breakfast called Brotzeit (“Bread Time”). The Gasthaus gave us a nice spread of breads, meat, cheeses, cereal, and hard-cooked eggs. The meal also included tea, coffee, milk, and apple juice. Surprisingly, the tea wasn’t bad! Tim and I adopted the continental style breakfast for the duration of our trip, as it made Frühstück a lot easier to prepare before we headed out for the day!
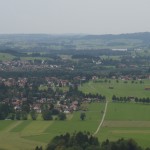
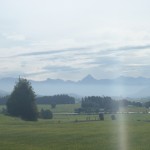
We were soon on the road and on the way to our first tourist stop of the trip – Neuschwanstein Castle. We stopped a few places along the way to take some photos. I’ll try not to overwhelm you with photos, but it’s going to be hard to pick my favourites!
If you click on the photo once, it will take you to that photos page. If you click on the photo again, you will be able to view it full size. I have no idea why WordPress made it so complicated!


[LJ readers reading this on the LJ RSS feed: Please click on the link at the top of the entry to go directly to my blog to leave a comment, as comments left on the LJ RSS do not get seen by me. Facebook users can comment directly on Facebook.]
I have Arrived
I know that’s a funny title…arrived where? And I’m sure I’ll get even more funny looks when I respond with “England”, but there you have it. Last week, I realised that I am embracing the United Kingdom and even though I’ve been calling this place my home for the past year, I finally feel like I mean it.
It’s for a really stupid reason, though. No one asks me where I’m from any more. I don’t get “Are you [Canadian/American/Irish*]?” , “Where are you from?”, or “Are you enjoying your visit?” when I go out or travel. Possibly because I walk with purpose. I can navigate myself through King’s Cross, down into the tube, and across town to catch another train out of Paddington or Waterloo with little fanfare. I know where to find the pricey high street goods for less. I know which pubs are poor quality chain restaurants and which ones are genuinely good. My go-to fast food is fish and chips. I drink tea, and actually now prefer tea over coffee. My kitchen radio is set to Radio 2, except between 12 and 2 when I switch over to Radio 4 or BBC Lincs. People stop me in Lincoln, Derby, London, Leicester, etc. and ask me for directions. I walk everywhere and only consider asking Tim to drive me a mile to the co-op if it’s raining or dark.
I’m sure I’ll always have an American accent, but what sets me apart from visitors is the language I use. Yes, America and England are two countries separated by a common language** But it’s those linguistic differences that make me feel like I have arrived (Tim also says that my tone of voice is quieter and the only times he can tell I’m a Jersey Girl are if I’m on the phone with Jessy or Erin).
I remember my first trip to the UK in 1997. We were all fresh-faced high schoolers ready to visit a foreign country….and half of the group trekked to McDonald’s for Lunch. We thought the signs that said “To Let” were misspelled signs for “toilet”, and we didn’t understand the funny looks we got when we asked for the bathroom. Few of us would have been able to tell you that pants are worn under your trousers, suspenders hold up your stockings, and braces are what hold up your trousers.
We went home from that trip, full of memories and British words. Oh, we thought we were so cool if we asked a teacher if we could go to the loo. But now? I actually cringed when an American friend who has never left the country used words like loo and lorry. Tim laughed at me and told me that that was me 5, 10, 15 years ago…and he’s right. But living here, actually living here…it is what it is. It’s not always glamorous, it’s certainly not easy, but it’s my life. And I love it.
*Yes, Irish. Don’t ask me WHY, but I apparently sound Irish to some people…
**Thank you, George Bernard Shaw
[LJ readers reading this on the LJ RSS feed: Please click on the link at the top of the entry to go directly to my blog to leave a comment, as comments left on the LJ RSS do not get seen by me. Facebook users can comment directly on Facebook.]
Driving on the Continent – Things You Need to Know
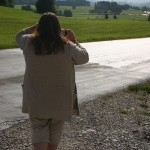
Like many Britons, our idea of a holiday abroad is packing up the car and going across the channel (via ferry, rail, or tunnel) to mainland Europe (called “the continent”). One of the first things you notice as you drive off the boat is the cars are driving on the opposite side of the road from the UK and the drivers sit on the opposite side of the car (so American drivers, it’s the same side of road and car that we’re used to). This can make for some very interesting driving on small country back roads as the passenger tells the driver “you’re too far over!”, and even more fun on the motorways – particularly if you get passed by a driver who looks over and sees the person in the “drivers seat” (left side of the car) napping or reading a book!
Europe has some regulations for driving that you must follow, including carrying appropriate safety equipment with you. You can even purchase the required items on the ferry if you have forgotten them, but most auto supply shops (like Halfords) should stock everything you need.
*The first thing you need to do is pick up a pair of headlamp beam converters. These are round stickers you stick on your headlights so that the beam of light coming from them doesn’t blind other drivers, since UK headlights point in a different direction from European cars. These stickers are removable, and you should try to remember to remove them as soon as you return from Europe. I think our car might still have the stickers on it. Ooops!
*The second requirement is to display a GB sticker on the back of your car. Most post 2001 tags include the GB symbol on them, however this does not exempt you from needing the sticker in all countries. You can purchase this as a magnet if you do not wish to have a sticker permanently on the back of your car.
*Most European countries also require a reflective vest if you will need to get out of your car on the motorway. Some countries require this only for the driver, some require it also for passengers. A good idea is to make sure you have enough vests to cover everyone in your car. There are no requirements on the colour or style of vest, only that you must have one. If you work in a profession where you need a vest, you can use that one or you can even pack along the vests you wear while cycling if you already own some.
*Another item MOST European countries require is a warning triangle if you are stopped on the motorway.
*Lastly, you also should carry a first aid kit. Not only is it a requirement, it could come in handy. If you already have a first aid kit in your car, now is the time to check it and make sure it has plenty of supplies and that the adhesive hasn’t gone off on the plasters (US: band-aids). Your first aid kit does not need to come from an auto supply shop or be specially marked for Europe. Just like the vests, you can use a first aid kit you already own.
There are also some regulations that are country-specific. For example, if we had been going to Austria between November and April, we would have needed to fit snow tyres to the car. A great website for checking the requirements for the countries you plan on visiting is The AA’s Driving Requirements by Country page.
So…we’re ready to drive our UK car in Europe, right? Wrong. You also need to call your insurance company to make sure you have European coverage. It’s best to do this at least a month before your trip to make sure you have copies of the require paperwork, but some companies can email you the documents you need to print. Make sure you carry these papers with you.
It also is a good idea (but not necessary for European travel) to contact your emergency breakdown provider (AA, RAC, etc.) and enquire about services while in Europe. Tim and I were able to get coverage for Western Europe for 14 days for about £65 from the RAC. Pricey, yes, but better than getting stuck somewhere with a broken car. The RAC services we signed up for even included a hotel stay if we needed to wait for the car to be repaired, and would pay for getting our broken car plus ourselves back to the UK if it came to that.
In addition to getting your car ready for European travel, it’s a good idea to make sure you have valid travel insurance and if you are a European resident, a valid EHIC card. An EHIC card is not a substitute for travel insurance, so it is wise to carry both. The EHIC card is free to European residents, including those of us here on spousal visas. The website states that you need to apply via post, however if your UK spouse has an EHIC card, they just need to call 0845 606 2030 and request a card for their spouse.
Oh, and don’t forget to take along your paper counterpart to your driver’s license. You probably won’t need it, but I always like to be prepared.
You also might want to pick up a road map for the countries you plan on visiting. We purchased a Michelin map from Amazon that covered Germany, Austria, BeNeLux, Switzerland, and the Czech Republic. Tim already owned a map book for France, and then we also picked up a large-scale Austria map while we were in Austria, since it had on it the Austrian names for places and had some of the off the beaten path places we wanted to go.
So, we’re ready to go to the continent. Keep reading this week as I start to (finally!) write about our trip in September.
[LJ readers reading this on the LJ RSS feed: Please click on the link at the top of the entry to go directly to my blog to leave a comment, as comments left on the LJ RSS do not get seen by me. Facebook users can comment directly on Facebook.]
More Recipes – Banoffee Pie
 When I first visited the UK and heard the phrase “Banoffee”, I thought it meant Banana Coffee, and was immediately turned off by the idea. Then, I found out that the -offee in the name comes from toffee. Again, I wasn’t impressed, as I do not like English Toffee. Over a year later, I discovered that what the US food industry call English Toffee is not what toffee is like in the UK. Most toffee in the UK is more closely related to caramel – I’ve even seen the words used interchangeably. This, I could get behind. I’m not a super huge fan of caramel, but I like it a lot better than English Toffee!
With Tim’s promotion, I promised him any treat he wanted. We don’t do sweet treats often unless we have guests over or on special occasions. Tim picked his all-time favourite pudding (US: desert), Banoffee Pie.
I scoured the internet and my cookbooks and came up with a recipe that is Tim-approved. Ironically, this recipe also has coffee in it!
You will need:
3-4 bananas (depends on the size. I’d start with three, but have an extra just in case)
375ml can condensed milk (or caramel)
150g digestive biscuits (about half a pack)
300ml cream (or a pack of dream topping)
75g butter (melted)
1tsp coffee (instant)
1tsp sugar (I used Splenda)
1 bar good quality chocolate
water
pie plate
vegetable peeler
zipper top bag
rolling pin
electric mixer
Time saving tips:
When you’re doing your shopping, look in the condensed milk aisle. You might see a product called Carnation Caramel Dulce de Leche. Buy this instead of a can of regular condensed milk and save a step.
Pick up a pack of Bird’s Dream Topping (they even have a no added sugar version) instead of fresh cream to save on calories and for faster whipped cream (especially if you have problems with whipping cream like I do).
Directions:
Put your mixing bowl for the whipped cream in the fridge along with your beaters (this will help your whipped cream whip better).
If you haven’t found a can of caramel, you need to make it. Boil a pot of water and put the unopened can of condensed milk in the pan. boil for 3 hours, then let the can cool before you open it.
While that’s boiling, make your crust.
Put the biscuits into a zipper top bag and go over it with a rolling pin until the biscuits are a fine powder. Pour crumbs into the bottom of your pie plate and pour over the melted butter. CAREFULLY (it will be hot!) stir until the crumbs are moist and spread over the bottom and sides of your pie dish. If it looks a little dry, add some more melted butter.
After your can is cooled (or if you bought a can of caramel), open the can carefully and spread the caramel on top of the crust mixture. If you used the boil method, put the pie in the fridge for an hour or so to let it cool before the rest of the steps. You don’t need this step if you bought a can of caramel.
Slice the bananas and layer them on top of the caramel. Add as many bananas as you’d like, saving some to garnish the top.
Next, make your whipped cream or dream topping. Once it’s fully whipped, add in the instant coffee and sugar and mix until blended. Spoon this on top of the bananas.
You can make chocolate shavings to garnish by taking your bar of chocolate and running a vegetable peeler over it or by using a cheese grater. Top with some extra banana slices.
Put the pie in the fridge for at least an hour to get it to firm up.
I made mine with a can of caramel and a packet of Bird’s Dream Topping and put the whole thing together in less than an hour.
[LJ readers reading this on the LJ RSS feed: Please click on the link at the top of the entry to go directly to my blog to leave a comment, as comments left on the LJ RSS do not get seen by me. Facebook users can comment directly on Facebook.]
Microwave Cooking?
In a few weeks, Tim and I will be travelling down to Brighton to stay with his friend Nick, and to help Nick and his dad out at a model engineering show. We’ll be staying at Nick’s house for 4-5 days. Without going into personal details, Nick is on some serious pain killers that leave him with no appetite. And I mean, no appetite. Tim told me that one time Nick prepared a trip itinerary and neglected to put in lunch and dinner breaks! So…we’re on our own if we want to be fed at all that weekend.
We don’t want to eat out for the entire weekend because a) that’s expensive and b) that would be unhealthy. Plus with my onion and garlic allergy it can make eating out “interesting”. This goes double for trying to buy ready meals or tinned soup!
We also have one other issue to deal with — Nick doesn’t have a stove. No oven, no hob, no grill. Just a toaster, a kettle, and a microwave. I only use our microwave for 5 things – defrosting meat at the last minute, cooking vegetables, heating up cups of cold tea, making rice, and making a quickie “baked” potato.
Lunch should be pretty easy – we’ll be at the show all day and I can make us some sandwiches in the morning to pack along. Breakfast also is pretty easy – cereal and toast. It’s making sure we have a good dinner that’s proving to be a problem for me!
We DID decide to take the car down. Originally, we were going to rail it the whole way, but then we remembered that we probably need to bring along some additional bedding, as we discovered the last time we were there that the small duvet doesn’t quite cover the both of us. This means, I could bring along the crock pot or the George Foreman grill…or even both. I might just do that, since I know I can cook with both of those, even if it’s just using the GF as a panini press.
So, with no stove…what can I cook? I don’t want to rely on tinned stuff or ready meals, but obviously I won’t be able to cook meat or anything like that. I could buy pre-cooked meat products to then heat up, or I could pre-cook some things at home and take them down in the cooler.
If I DO pre-cook meals and pack them into plastic…what meals re-heat better than others? I suppose I could pre-make pasta sauce and then do “baked” potatoes. Or do a roast and cut it up to be reheated along with some veggies? Should I do lots of pre-cooking and package things into individual homemade ready meals like I do for Tim’s Lunches? (well, he always gets leftovers)
I feel like this is worse than camp-cooking, because at least camping I had the gas camping stove.
Ideas/suggestions….please?
(for those of you who are here for things OTHER than food related posts, real posts are coming! I promise!!)
[LJ readers reading this on the LJ RSS feed: Please click on the link at the top of the entry to go directly to my blog to leave a comment, as comments left on the LJ RSS do not get seen by me. Facebook users can comment directly on Facebook.]
He Got It!!
[x-posted to LJ]
I’m married to a MOM.
Mobile Operations Manager.
This is the position Tim interviewed for on Christmas Eve. The one he was supposed to go to training for 2 weeks ago that he got dropped from for not having the proper medical level.
We really thought Tim might not get the position because his fellow interviewee (and friend) who was sent on the course with Tim and was able to go received a rejection letter on Monday, and originally they were all told that rejections weren’t going out until after the person offered the position accepted.
Funny enough, Tim’s offer letter was dated YESTERDAY. Tim thought maybe his letter was being held back because he was the second, his mum thought maybe his letter was being held back because he needed the medical first. Whatever the reason…I don’t care because he got the job!
I’m so so proud of him. This is a “temporary” position – the letter says it will start at a to be determined date and last for 6 months, so basically, 6 months from whenever he has the training I’m assuming. I don’t know all the inside workings but basically there is a manager off for medical reasons in Newark, so they have one of the Lincoln MOMs filling in for him and needed a temp MOM to fill in in Lincoln. After the 6 months, they’ll drop Tim back to his regular job (so he won’t become unemployed) — but he’ll still have all the MOM training and still be able to be used as a “step-up” or even for him to go for a MOM position elsewhere.
Boys in the panel must be thrilled – one person out for 6 months means more OT for them! 🙂
*edit to add* Tim’s explained that it could be for more than 6 months – the letter is just guaranteeing that he will get that grade pay for at LEAST 6 months.
[LJ readers reading this on the LJ RSS feed: Please click on the link at the top of the entry to go directly to my blog to leave a comment, as comments left on the LJ RSS do not get seen by me. Facebook users can comment directly on Facebook.]
Networked Blogs
I’ve just partnered my blog up with Networked Blogs to facilitate cross-posting to facebook. You can go to my main blog page (http://blog.beccajanestclair.com) and click “follow this blog” on the right if you want to follow me..and please do! It looks a little lonely right now! 🙂
hopefully, Facebook won’t double post my blog posts now that I’ve added networked blogs.
[LJ readers reading this on the LJ RSS feed: Please click on the link at the top of the entry to go directly to my blog to leave a comment, as comments left on the LJ RSS do not get seen by me. Facebook users can comment directly on Facebook.]