Harassed at a Railway Show
 (Yes, I took this in the loo on the train.)
Over the weekend, my husband and I did a whirlwind of things – we went up to Yorkshire, we went to London, and we even made it to Wales. But my worst experience out of the whole weekend had to be our visit to the London Festival of Railway Modelling at Alexandra Palace. Now, my problem had nothing to do with the show itself – in fact, I enjoyed the layouts (when I could get in to see them) and I got to meet a Twitch streamer Tim and I watch and while we only purchased a single book at the show, there were plenty of stands we would have made purchases at if we had unlimited spending!
My problem was with the people attending the show. More specifically, with men.
Whenever we attend these more generic modelling shows, I never see a lot of women, unless they are assisting their husbands with their stands or being dragged around by a child or spouse. This means there is never a queue for the loo, but it also means that seeing a woman is a rarity. Probably even more rare to find one wearing a skirt (my preferred clothing choice). But it doesn’t excuse the behavior of some of the men I encountered.
I got looked at. Looks, I can handle, and I’ll even smile back. But a double take? Inappropriate. Looking a third time and then doing a weird winking, tongue clicking “here’s looking at you, kid” kind of thing….not ever appropriate. Nor is it appropriate to repeat it a second time.
It also is OK if you accidentally brush up against breasts when you’re trying to move in a crowd. You just apologize to the person and you’re fine. It is, however, not OK to either not apologize or smirk. 50% of the population (give or take) have boobs. Those of us with boobs know they can get in the way and know it’s usually an accident if someone brushes against them. Also, while we’re on the subject – boobs are there and there’s nothing those of us with them can do to conceal them, so looking down someone’s top is also not appropriate.
In addition to the incidents above (of which I was boob brushed at least three times and I actually yelled at the triple take tounge clicker the second time), there also was the rude shoving. One guy was even pressed up against my back trying to shove past me and that’s just not on. USE YOUR WORDS. Say excuse me if you need to get by, or wait your turn. At one point, the crowd was getting thick and I was following Tim and there was another couple about a foot away from me and this man just decided to barge past us and shoved me (and touched my boob in the process). I mean…really? It’s a model rail show. THE MODELS AREN’T GOING ANYWHERE. With the exception of a few bespoke items, chances are the stands aren’t going to run out of whatever it is you wanted to buy.
So here are my tips for attending railway shows. Or sci-fi conventions. Or…you know what…these are just general tips for being in groups of people —
1. Don’t ogle people.
2. If you accidentally touch someone, apologize.
3. Don’t ogle people.
Simple!
***
The contents of this post, including images are © Rebecca J Lockley and Tim Lockley unless otherwise stated and should not be reproduced without permission.
For full Copyright and Disclaimer, please read http://www.blog.beccajanestclair.com/copyright/
Facebook: https://www.facebook.com/blog.beccajanestclair
Twitter: https://twitter.com/annaonthemoon
Instagram: https://www.instagram.com/beccajanestclair
Blog: http://blog.beccajanestclair.com
YouTube: https://www.youtube.com/channel/beccajanestclair
Support me on Patreon: https://www.patreon.com/annaonthemoon

Renting Space in Your Brain
 +
+
I’ve been a user of the internet in all of its many forms since the mid 90s, and since then I have had my fair share of trolls and mean comments – usually simple one offs like “I don’t like your voice” left on a video (which is ironic when I have acted and sang semi professionally!). But in my history of using the internet and becoming a content creator, I can count on one hand the number of people who just don’t know when to stop and start to become a nuisance . The first incident happened around 15 years ago and was a guy my husband and sister dubbed “Batteries” and things got so bad with him and his threats that I did have to go to the police. The second was about 10 years ago, and it might have been more than one person but at any rate, the result was *me* getting banned from a useful website I posted on and I had to speak with the police about the harassment. Then we delve into the land of psycho expats with more than one just losing their shit and stalking several fellow expats…and now we get to the most recent, ridiculous harassment/trolling efforts of someone who…well, they’re anon as far as I know. They do have internet handles, but I’m not going to mention them out of politeness.
Here’s where we get to the title of my post – Renting space in your brain. It’s incredible how ONE SINGLE COMMENT can kill you. For example, ONE music director in 2002 didn’t like my voice and I didn’t sing for 10 years. These comments weren’t about my singing, but another way I contribute to the arts – these comments were on the words I wrote.
The first comment came in September on my account over on Fanfiction.net. It was from a fellow “author”, and it was nasty and harrassive. FFN doesn’t let you remove nasty comments from registered users, so I simply deleted (And later re-posted) the story the comment had been left on and blocked the user id. Speaking to a fellow reader, I found out that the author in question “does this to any author who writes better than them and has a following”. Ok, so it was down to sheer jealousy then. Fine, whatever. I kept publishing.

I made the move to Archive of Our Own a few months ago after I finally got my invite to the site. I moved over much of my fic from FFN, but I also made an announcement on FFN that I was going to be posting on AO3 and if I wasn’t updating on FFN, to check me on AO3 and I listed my AO3 pseudo – AnnaOnTheMoon.
AO3 allows you to screen comments before they are posted, and a few came in from a person. Again, they were filled with harassment and well, they tried to tell me what I should write. Like, telling me “You need to write blahblahblah and blahblahblah needs to happen.” My response wanted to be “Go write it yourself”, but instead I just deleted the messages, figuring they would get the hint that I wasn’t interested in their “orders”. Other readers left comments requesting different storylines and if I felt I could write them, I did. But when someone demanded I do something or another…no. AO3 doesn’t have a block feature, so I just had to delete the comments as they came in.
Finally, they stopped using their registered profile, and swapped to posting anon. And funny enough, the only reason I found out they were the same person was due to what they wrote in their comments when they referenced “a lack of negative feedback”. Now, why would you assume someone even had negative feedback unless you had been the one who tried to leave it in the first place under your other nom de plume?
It was at this point I turned to getting advice from Author Dayton Ward on Twitter:

Dayton Ward was right. Just ignore, ignore, ignore. Don’t let them have space in my brain. But…it was hard. Especially with the comments that were coming through. At one point, they seemed to blame me for the entire Picard/Crusher fandom.
They decided that a fic I wrote called “The Comment Box” was about them. The fic itself was a tongue in cheek story about the ridiculous comments that are posted on Trek pages. Their response? Dedicating a story to me (and a friend of mine who is a big supporter of my writing.)


They thought they were writing an opt-ed. Uhm…no. They also decided to steal my own tag of tongue in cheek, because…well, why not.
They admitted they had been reading me on FFN and had been the FFN user I blocked. They claimed to have “Been stalked in high school” (I also should note, that basing their age on what they mention in their own author’s notes, they aren’t much out of HS) and yet they decided to stalk me. (oh, and told me my depiction of stalking was wrong, because the way they were stalked is the absolute only way things ever happen)

The story got weird. I was Queen of the kingdom who churned out shit, but then I also inspire people? But the gem had to have been where I basically get blamed for the entire fandom.

I mean…what now? But this “fic” was the final straw, and I contacted the AO3 admins and reported the story and the user for harassment.

…but I still can’t get their comments out of my head. It’s poisoned my story, just like it poisoned one of my previous stories. At this point, I want to either abandon the story (and the series as it’s second in a series), or delete it. But if I delete it, I doubt I’ll ever re-write it, so then that also means that months of work will just be down the toilet because I can’t evict this asshole from my brain.
 ++
++
*sigh* Hopefully, by getting this all out, I will be able to evict them once and for all and return to my writing…because how does that phrase go? The best revenge is a life well lived?
***
+Meme made by me, screenshot from Harry Potter and the Philosopher’s Stone
++Meme by Swear Trek
All other screenshots are from Archive Of Our Own or my own Email and Twitter accounts.Â
The contents of this post, including images are © Rebecca J Lockley and Tim Lockley unless otherwise stated and should not be reproduced without permission.
For full Copyright and Disclaimer, please read http://www.blog.beccajanestclair.com/copyright/
Facebook: https://www.facebook.com/blog.beccajanestclair
Twitter: https://twitter.com/annaonthemoon
Instagram: https://www.instagram.com/beccajanestclair
Blog: http://blog.beccajanestclair.com
YouTube: https://www.youtube.com/channel/beccajanestclair
Support me on Patreon: https://www.patreon.com/annaonthemoon
An Evening with Sir Patrick Stewart

A little over a month ago, my Google Alert for Patrick Stewart (shut up) went off with an interesting alert – Sir Patrick Stewart would be giving a talk during the Huddersfield Literature Festival. Tickets were £15, and I hadn’t yet seen it pop up on Twitter.
…So I blagged front row tickets. And then I waited…and waited..and waited for the day…and OH, was it worth it!

I had a bit of a panic on Thursday when I started to read the weather report for both Yorkshire and Lincolnshire. Snow. But not until the wee hours, so we would likely be fine. To be on the safe side, we packed sleeping bags, extra warm clothing (hats, scarfs, fleeces), water,and snacks into the back of the car just in case the snow turned into a second Beast and we had to sleep in the car.

Our day started off with a walk through Huddersfield. There was an international food fair going on, so we checked that out and we headed to the Town Hall to make sure we knew where we would need to be and we scoped out the place we were meeting up with some friends for dinner before settling down into a local coffee shop (I’ve forgotten the name!) for a cup of Tea. Earl Grey. Hot. (Naturally.)
We met up with friends for dinner at the Zephyr. None of us were familiar with the place. The food was…ok. I had a Cajun grilled chicken burger and there was no spice at all on my chicken, which was disappointing. But the Strawberry gin was good.

We all were scattered around the auditorium, so we parted in the lobby and Tim and I headed to our seats. I still didn’t think it was real…I would actually see one of my heros live on stage? Talking? Telling us about his life and career?

When Nick introduced Sir Pat, he explained that Patrick agreed to photos during the first five minutes (and he even posed for pics), and then asked for phones/cameras to be put away and asked that it wasn’t recorded. In fact, we were told if anyone did get caught with their phone held up during the talk, they would be kicked out. I did spot one guy on the balcony out of the corner of my eye holding up a phone though, so if any footage gets posted online I’ll link it.

Patrick Stewart was brilliant. He warned us that he didn’t give short answers, so there weren’t a whole lot of questions asked, but the stories the man told…it was worth it. I’d have gladly sat there for another hour..two….three…just listening to his stories. Perhaps one day he’ll publish a memoir (and Mr Stewart, if you’re reading this, Please can I edit it?)
We even got a rare treat! Not one accent,not two, but three accents! Sir Pat imitated a local accent when he was telling us about his interview to receive a scholarship to attend the Old Vic (and apologized for it being bad, though as a non-local I couldn’t tell), and then he gave us “Space, ze final frontiere” in a French accent. I have to say, I’m quite happy Paramount didn’t make him use a French accent! His third accent was a recreation of his role in 1967 on Coronation Street, plating a Fireman from Lancashire.
We also learned his favourite episode is the Inner Light (though the questioner asked “What’s your favourite Enterprise episode, so I’m not sure if the questioner was confused over which series Sir Pat was in!). This is honestly no surprise to me as it is an incredible episode and it’s made even better by the appearance of Daniel Stewart playing his son!
Sir Patrick told us about his early days in acting, about meeting and becoming bezzies with Sir Ian McKellen, and how he felt when he was on the BBC’s Who Do You Think You Are and discovered more about his father. We also learned that the two charities he is patron for are in memory of his parents – Refuge for his mother and Combat Stress for his father.
And speaking of his early days in acting – did you know he lied his way into gaining his scholarship? Naughty Patrick! But I think he paid his debt in full back to Yorkshire in the end when he became Chancellor of the Huddersfield Uni.

I’m still giggling over his (former) hair piece having been flown across the atlantic specifically for his audition for Captain Picard…and then it was never used. While he did mention he wore a hair piece in one episode (Violations, in a flashback Beverly has), he didn’t specify if it was the same one or styled the same way. Hmm. Something to ask him in the future, perhaps?
Sir Patrick said in an interview on BBC Radio Leeds on Thursday that his favourite childhood book was Treasure Island…and I really think he should record an audiobook for it, don’t you?
 +
+
All in all, it was an incredible evening. Sadly, I didn’t get to ask him my question. I wanted to ask him to give advice to those of us in the arts (Performing, writing, creating) who face criticism and how you can bounce back from it…but it wasn’t meant to be and I’ll hopefully get to see him again and ask.
It started to snow on the way home. Not a significant amount, but enough to be annoying.
Thanks Huddersfield Literature Festival for having him, and THANK YOU Sir Patrick Stewart for speaking with us!
You are, forever, O Captain my Captain.
***
+Photo by Neil Armstrong.
The contents of this post, including images are © Rebecca J Lockley and Tim Lockley unless otherwise stated and should not be reproduced without permission.
For full Copyright and Disclaimer, please read http://www.blog.beccajanestclair.com/copyright/
Facebook: https://www.facebook.com/blog.beccajanestclair
Twitter: https://twitter.com/annaonthemoon
Instagram: https://www.instagram.com/beccajanestclair
Blog: http://blog.beccajanestclair.com
YouTube: https://www.youtube.com/channel/beccajanestclair
Support me on Patreon: https://www.patreon.com/annaonthemoon
The Beast From The East Strikes Lincolnshire
It’s a November kind of February…well, now March.
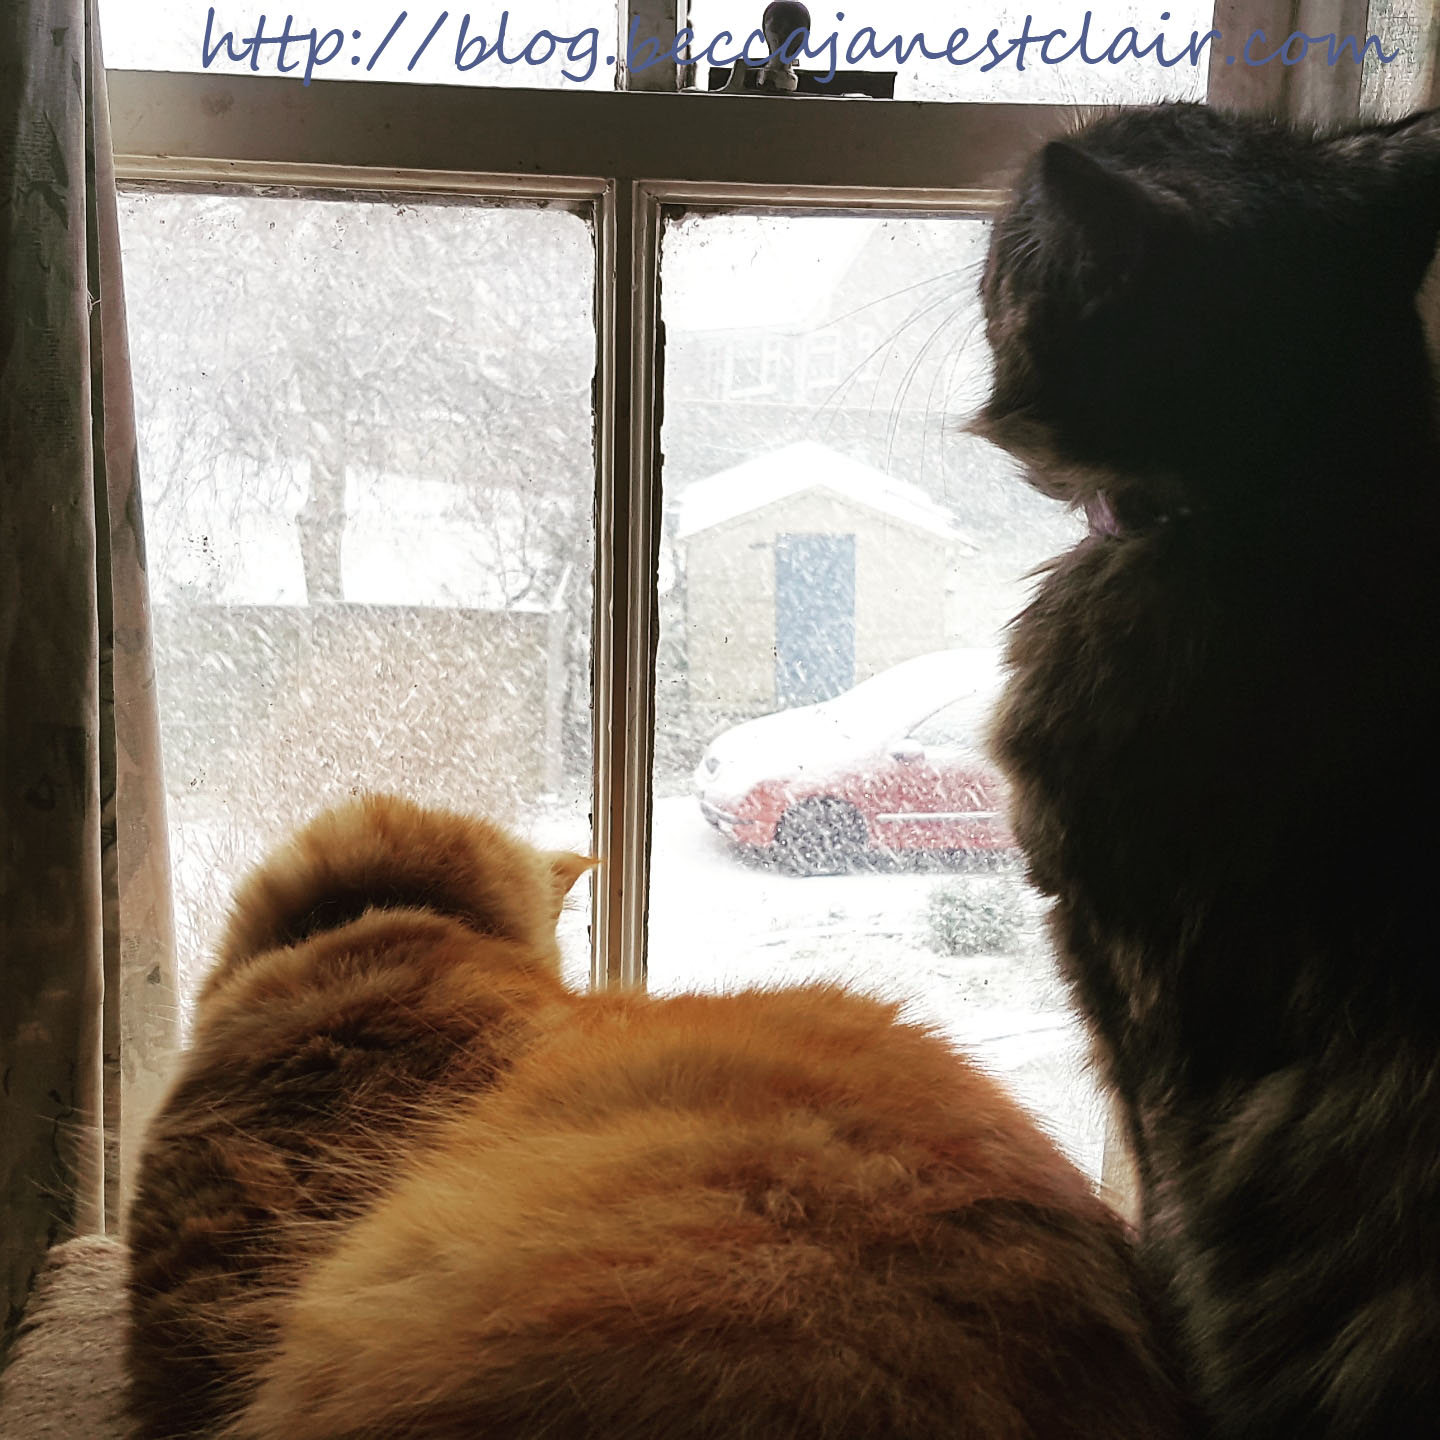
When I woke up on Wednesday before my huband, I left the curtains pulled on the bedroom and glanced at the cats in the spare room on my way to the stairs. They were sharing their perch and both quite avidly watching something out the window. Merddin (the ginger boy) even tried to catch something through the glass. So I looked out and was greeted with:
Snow. Our first major snowfall of the 2017/2018 winter. They’re calling it the Beast from the East with good reason as it stretches all the way from Eastern Russia to nearly cover the entire European continent. It even snowed in Rome!
But let me back up to Tuesday, when we saw minimal snow showers and a squall or two. I happened to be in town to buy a birthday present for my aunt at M&S and when I left the shop, it had started to snow.

The snow continued in little squalls the rest of the day, and we even had one so bad the bus driver could barely see on the drive home, but it wasn’t bad overall. But at 8PM, I received a text from Tesco that my deliver was cancelled due to the snow! I wound up at the local co op where I was lucky to grab a small bottle of milk, and a 6 pack of eggs. No bread.

I went to bed thinking I would catch a bus in the morning to a grocery store since all we got was that piddly amount of snow.

Boy was I wrong!

I was cold. I layered up with thermal tights, thermal leggings, 2 thermal tops, wool and fleece socks…and my brand new Beverly Crusher onesie from Think Geek.

By the time Tim left for work, it was snowing on and off. Then, around 2PM, we seemed to have a blizzard out there.
Wednesday is Slimming World Day for me, and I usually walk to group as it’s not far away. But a recent knee injury has left me getting lifts from my friends, and for group on Wednesday, I asked my consultant if she could pick me up. I’m part of her social team, so I was able to stay to group and help her the entire evening, but not before bundling up for the cold!

My Slimming World consultant picked me up at 4 and we headed to run group as she wasn’t allowed to cancel. But I took a 6 inch ruler outside before I left to measure the snow in the garden, and it was a tiny bit over the top of the ruler.

I also had to have a little bit of fun with MiniBev and MiniPicard.

After Slimming World, we slided our way back home and I walked to the co op once more in the hopes I could pick up the missing essential grocery items. That was a big fat nope. No milk, bread, or eggs. Someone is making a lot of French toast! I did spot this single little icicle though:

When my husband left for work around 11AM for his 2-10 shift, all the hills into Lincoln were closed. He had to park the car up at the Lawn and walk on foot the rest of the way into Lincoln. Once at work, his job took him out to Ancaster, some 20 miles away. His trip home took an hour to get back to Lincoln, and then another hour to get from Lincoln to Dunholme…a distance of only five miles.
Naturally, he was unable to stop for supplies on his way home, so I could only hope the co-op would get a delivery in the morning.

As you can see, the cats are more interested in the electric blanket now than looking out at the snow.
This morning, I was relieved to see we hadn’t had any more snow overnight, however it has now become windy, which means lots of drifting snow. Still, I had hoped the co-op would have been resupplied, but according to a friend, a delivery came in early, but people were buying multiple jugs of milk, loaves of bread, and packs of eggs, leaving the shelves empty by the time I got there.
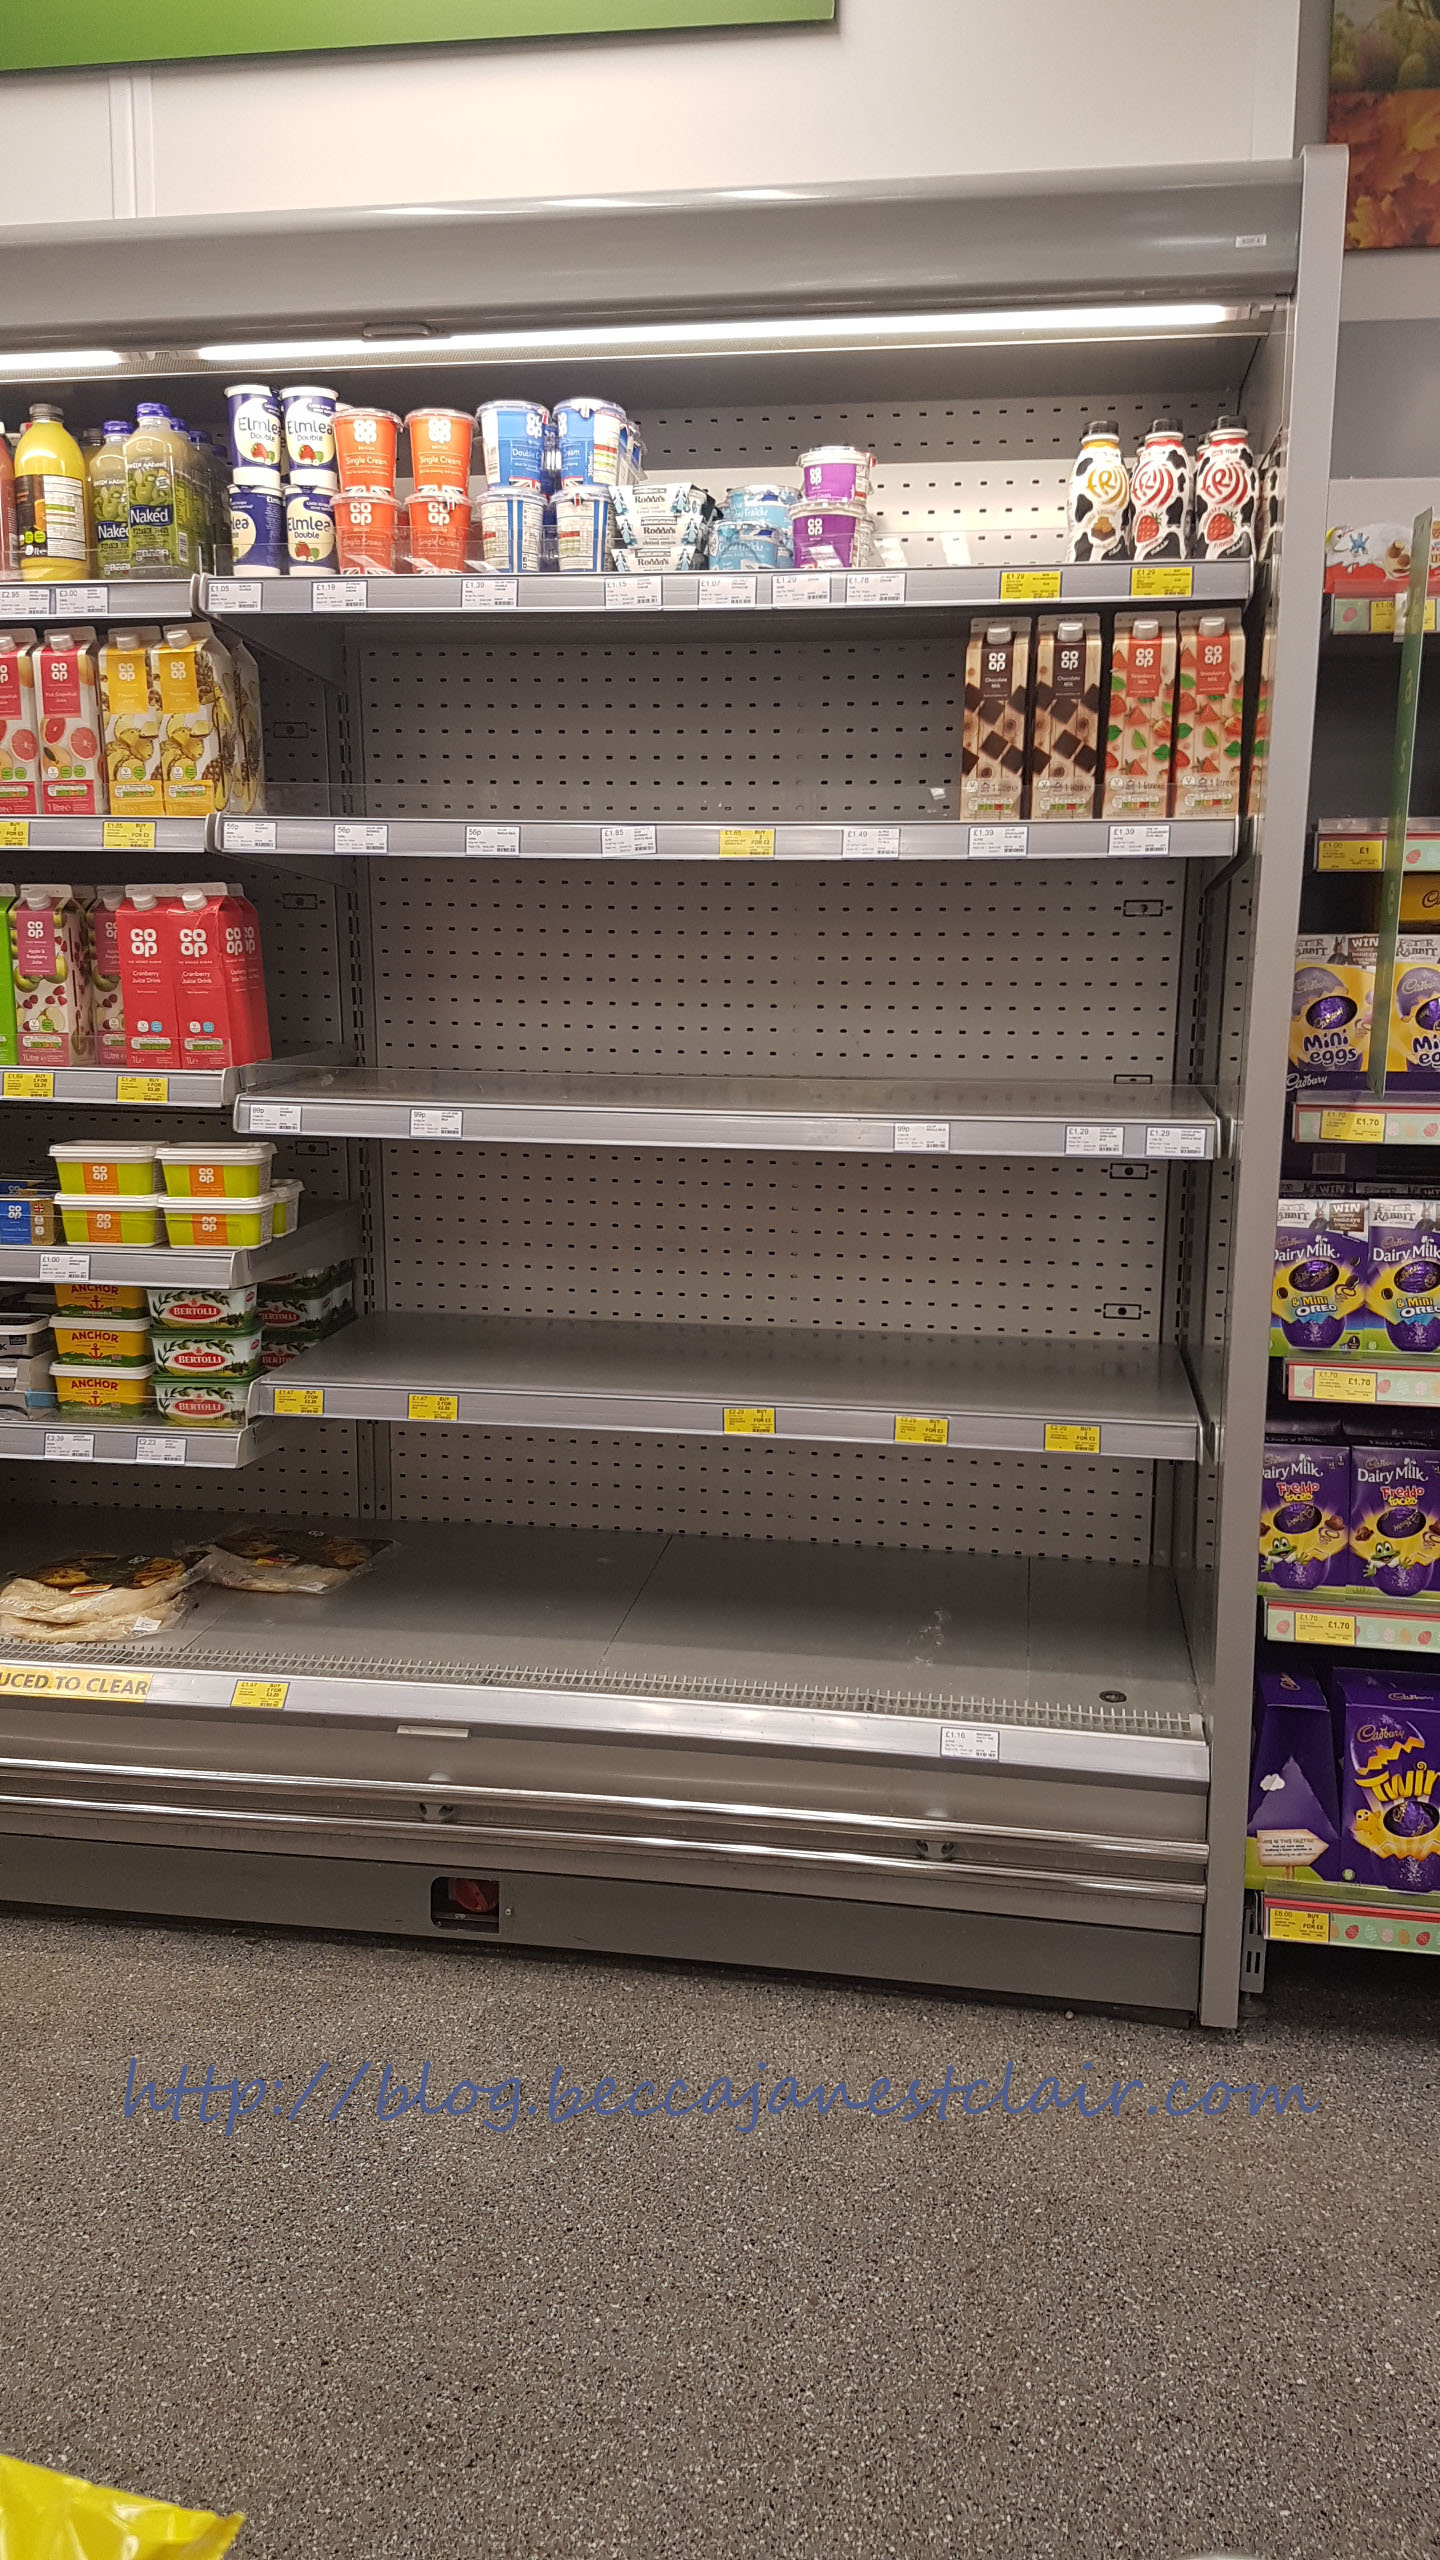

I did manage to pick up a pack of wraps, some soy milk, some chocolate milk, and a 4-pack of duck eggs. I’ve never eaten duck eggs before, but I’m assuming they will taste relatively the same. I hope. We can use the chocolate milk in our coffee and the soy milk with cereal to save the minimal regular milk for tea.
The village roads are still hit and miss. Two of the main roads (Lincoln Rd and Ryland Rd) seem relatively clear, but Honeyholes lane is a struggle and I heard several streets are still completely impassable, as we simply won’t see a plough on the smaller streets. The footpaths are walkable, if you can keep your balance on the packed down snow, and are most definitely not passable if you use any type of walking aid. The buses are even trying to run limited services again.
I’m hoping to get out tomorrow to get groceries. Tesco graciously gave me some vouchers, but I don’t want to schedule delivery until this mess has passed us over as I wouldn’t want it to get cancelled again!
Short video I took from my bedroom window:
***
The contents of this post, including images are © Rebecca J Lockley and Tim Lockley unless otherwise stated and should not be reproduced without permission.
For full Copyright and Disclaimer, please read http://www.blog.beccajanestclair.com/copyright/
Facebook: https://www.facebook.com/blog.beccajanestclair
Twitter: https://twitter.com/annaonthemoon
Instagram: https://www.instagram.com/beccajanestclair
Blog: http://blog.beccajanestclair.com
YouTube: https://www.youtube.com/channel/beccajanestclair
Hatred and Fandom in Star Trek
I know I haven’t updated properly in ages (not since before October, and then it was fanfic for #BevCrusherDay). I’m sorry. I’ve been busy. But right now, I feel like I need to write this post about hatred and fandoms. More specifically, I’m talking about the Star Trek fandom. Call us trekkies or trekkers, I really don’t care…but there’s a whole lot of hate in the fandom right now.

Don’t like the new series? Don’t watch it. You don’t have to watch week after week so you can spread your hate. And you most definitely don’t need to tweet the actors to tell them how much you hate it. No. That’s just…I’m not sure I have words. Now, I haven’t watched all of Discovery yet, because it’s something my husband and I want to watch together and we haven’t had time, so I can only speak based on what I’ve seen on the Facebook groups and Twitter. There is so much of this “this isn’t Star Trek” BS it could fill the Enterprise — all of them. My only response is – Does it have the trek logo? It’s Star Trek. It’s all part of one main franchise, people! And guess what? You don’t have to like ALL of the franchise to be a fan! You don’t even have to like the original series to be a fan!
And speaking of the original series, if I hear one more time “Your series wouldn’t exist if it wasn’t for TOS!” Don’t you think we know that? But acknowledging TOS as the granddaddy of our franchise doesn’t mean it has to be my favourite series. And you can’t really compare Discovery to TOS. TOS was made in the 60s, for chrissake. It was the best sci-fi out there FOR ITS ERA. Yes, it has cheesy effects, the storylines are dated, the model ships look funny….but this is how sci fi was done in the 60s. You have to suspend some of your modern ideas when you watch TOS and try to be a person from the 60s watching it. And if you still think its awful, look for other sci fi series from that era and you’ll soon see that TOS was actually the best.

Move forward to the 80s and 90s of TNG, DS9, and VOY and the effects still won’t compare to the resources someone has in 2018. (And I’m saying that as a die hard TNG fan)
Or compare the Harry Potter films with Fantastic Beasts. FB takes place over 50 years before Harry Potter is even born, yet the effects in FB far outstrip HP. Why? Because HP was made in the early 00s, and FB was made in 2016. Yes, just a small time frame of FIVE YEARS separate the last HP film being made from the first FB film, and the effects have gotten better. OR we could look at Rogue One compared to A New Hope. Again, SAME THING. Film and TV makers aren’t going to take steps backwards with effects.

Another ridiculous amount of hate seems to be aimed at women – both fans and actors. It sometimes feels like as a woman, I’m somehow not supposed to like sci fi or have opinions and the female actors only role is to be sexy eye candy. Uhm…how about no? But you see it over and over again and it’s no wonder we had to make our own Feminist Trek group where we actually support each other.

While we’re talking about fandom and Star Trek, I also feel like I need to talk about fanfiction. I love fanfic, I write fanfic, I read fanfic. For those of you who don’t know what fan fiction is – Fan fic is Fiction written by a fan of a TV series, book, film, etc. that uses the characters/setting for their own storyline. And yes, there’s slash (which is pairing same sex characters together who are usually hetero in canon). I don’t write slash, for reasons I’m not going to get into on this post, but I do write a lot of fan fic. I mean, a lot. Most people like it and encourage me, and I love that. But what I don’t like are the people who decide to tell me what I should be writing or what I should do with my characters or even demanding that I explain why I made someone do something…and…no. The whole idea of fan fic is that you do whatever the heck you want to do with the characters and setting. I have one troll in particular…they must really hate me. They leave me PAGES of negative reviews…even told me they don’t like my writing. Fine. Don’t like me, don’t read me. And yet…they still read and still leave comments. Comments that I ignore and delete. I mean, get with the program already. If you don’t like it, don’t read it. Why is this so hard to comprehend?
And the sheer length of some of these comments – It must take them hours to compose…like, really? Don’t you have something better to do? I get that you don’t like my fic, you told me over a month ago. Pretty sure the answer to not liking something is to stop looking at it. Whether we’re talking about TV shows, Films, Books, Fanfic, Blog posts, Twitter posts, FB posts, Youtube videos…etc. I don’t look at things I dislike, why do you?

tl;dr – I think Swear Trek said it best with Picard up there.
***
Gifs from Swear Trek, which if you aren’t following them on Twitter, you really should!
The contents of this post, including images are © Rebecca J Lockley and Tim Lockley unless otherwise stated and should not be reproduced without permission.
For full Copyright and Disclaimer, please read http://www.blog.beccajanestclair.com/copyright/
Facebook: https://www.facebook.com/blog.beccajanestclair
Twitter: https://twitter.com/annaonthemoon
Instagram: https://www.instagram.com/beccajanestclair
Blog: http://blog.beccajanestclair.com
YouTube: https://www.youtube.com/channel/beccajanestclair
Star Trek The Next Generation FanFic: Doctor Beverly Day

Doctor Beverly Day
Summary:  Jean-Luc decides the ship’s school needs a Doctor Beverly Day.
Genre: Â Family, Romance (eh, at a stretch)
Pairings: Picard/Crusher
Rating: K
Words: Â 857
A/N: So I had a dream last night….this is the dream. Doesn’t everyone dream of P/C?
13 October is Beverly Crusher’s birthday, so what better way to celebrate than writing a short fic or two about our favourite doctor? This will be cross posted to ff and my personal blog because I plan on sharing this fic on Twitter and I don’t want to use my ff account publicly. So if you see this in two places, that’s why. I know it was yesterday, but I’m still adding this one to my submissions.
Also, the disclaimer for posting to my blog: I don’t own TNG, Beverly or Jean-Luc. I don’t work for Paramount, CBS, PocketBooks, Simon & Shuster…etc, etc. I’m just a fan! I also ask for forgiveness from Gates McFadden and Sir Patrick Stewart for using (abusing?)  their characters.
###
Beverly looked around the room in astonishment. “Jean-Luc….you really didn’t have to do this.â€Â They were in one of the conference rooms. A large painted banner hung across one end proclaiming it to be ‘Doctor Beverly Day’.
“Well, I heard how much you thought Captain Picard Day was a success and I thought we should introduce the children to the other members of the Command staff.â€
“Yes, but…most of the children already know me since I’m their doctor, not to mention the mother of-â€
Jean-Luc cut her off. “So what better way to thank you?â€Â Jean-Luc gestured to the table heaving with drawings, short stories, poems, clay figures, and even a small doll. Jean-Luc picked up one of the poems.
“Doctor Bev is the best doctor in the galaxy / She takes care of our menagerie,†he paused. “Well, at least it almost rhymes? Although…do you take care of the animals on board too? Don’t we have a biology lab for that?â€
“We do….but sometimes the children see that I’m a doctor and they ask…you’re not mad, are you?â€
“What? Using sickbay resources to look after a child’s pet? Of course not. Now, let me continue. ‘Her hair is a gorgeous mane / it is the colour of flame’,â€Â He glanced over at her hair. “Hmm, looks like you have an admirer here.â€
Beverly’s eyes twinkled with mischief.  “Are you sure you didn’t write this poem, Jean-Luc?â€
“Quite. ‘I do not like being sick / but when I see Doctor Bev it’s quick / Doctor Bev, you are the best / Better than all the rest’ It’s signed Tommy, age six.â€
“Oh, that’s Lieutenant Anderson’s son. He broke his arm a few weeks ago riding a bike in the arboretum.â€
“The children are riding bikes in the arboretum?â€
“Where else should they go, Jean-Luc?â€
“The holodeck?â€
“Hardly. But anyway, Tommy broke his arm and it was easy to fix up. Cute kid. Cute dad, too.â€
“Hmm.†Jean-Luc frowned.
Beverly leaned over and kissed his cheek.  “Can dish it out, but you can’t take it, eh?â€
“I..ah….† He rubbed the back of his neck. “Shall we look at another poem?â€
“You don’t have anything to worry about. I prefer my men older…and bald.†She whispered the last word into Jean-Luc’s ear and gently nipped it.
Jean-Luc turned red. “I…ah…see…â€Â He picked up a doll made into the likeness of Beverly. “Oh look, a doll. She’ll match the Captain Picard doll I happen to know you have in your office….â€
“I don’t know what you’re talking about, Jean-Luc. The doll is there to soothe children who visit Sickbay.â€Â Jean-Luc raised his eyebrows. “Ok, It’s mine. I asked Mina if I could have it after Captain Picard Day. It was just so adorable.â€
“Mina?â€
“The girl who made it. She probably made that one, too. I’m sure she’d give it to you if you asked. But Jean-Luc, what are you going to do with a doll that looks like me?â€
“Ah….use it to sooth….children?â€
Beverly raised her eyebrows. “Do you get many children in your Ready Room who need soothing?†Jean-Luc opened his mouth and shut it again. Beverly grinned. “Admit it, you just want the doll because it looks like me.â€
Jean-Luc tucked the doll under his arm. “I don’t know what you’re talking about, Doctor. Oh, it looks like the children are ready to perform, shall we go watch?â€Â Beverly was about to reply when a little girl with bouncing red curls tugged on the Jean-Luc’s trouser leg. Jean-Luc looked down at the child and tried to scowl, though his eyes were smiling. “Yes?â€Â The little girl motioned for Jean-Luc to pick her up. Jean-Luc shrugged and bent down so the girl could wrap her arms around his neck as he carefully lifted her. The little girl pointed at the doll tucked under Jean-Luc’s arm and exclaimed “Mama!†Jean-Luc smiled. “Yes, the doll does look like Mama. Would you like to play with it?â€Â The little girl nodded. Jean-Luc handed the doll to the girl and she slid out of his arms to go join her friends.
“You know, she plays with the Captain doll whenever she’s in my office.â€
Jean-Luc looked astonished. “She does?â€
“Mm-hmm. It’s really quite adorable. Tells it to take a nap.â€
“A nap?â€
“ Yes. When you’re grouchy. She accidentally heard me tell Alyssa I thought you needed a nap one day….â€
“I do not get grouchy. Nor do I nap.â€
“So that time I caught you with your eyes closed on your couch?â€
“I was thinking.â€
Beverly rolled her eyes. “Snoring more like it.â€
“I do not snore.â€
“Hmmm.â€Â Beverly called over to the little girl . â€Yvette, sweetheart, does Papa snore?â€
“Uh.huh. An’ he’s loud!!!!â€Â Yvette giggled. Jean-Luc groaned. The other crewmen in the room tried to hide their smiles.
“Ah, thank you Yvette. If you had said it louder, the whole ship would have heard you.â€Â The sarcasm was lost on the little girl, who raised her voice and shouted “PAPA SNORES!â€. Jean-Luc hid his face in Beverly’s hair. “That child….is just a little too much like you some days.â€
***
Forgive me for posting another fic on my blog, but again, I wanted to share it on Twitter for #BevCrusherDay. If you’re looking for any of my other fic, it’s on fanfiction.net. If you search for the title of this story, you’ll find my other stories.
Dispensing with the usual copyright footer, since as I stated, I don’t own TNG or the characters….only my words.
*Image via Pinterest. I’m assuming it’s from Nemesis?
Facebook: https://www.facebook.com/blog.beccajanestclair
Twitter: https://twitter.com/annaonthemoon
Instagram: https://www.instagram.com/beccajanestclair
Blog: http://blog.beccajanestclair.com
YouTube: https://www.youtube.com/channel/beccajanestclair
Star Trek The Next Generation FanFic: Birthday Blues
R2 for #BevCrusherDay
 *
*
Birthday Blues
Summary: Â Take place mid-Season 5 during episode 21, The Perfect Mate. Beverly celebrates her birthday without her best friend.
Genre: Â Friendship, Romance (not much)
Pairings: Picard/Crusher, Picard/Kamala (implied)
Rating: K
Words:Â 1,030
A/N Today is #BevCrusherDay. 13 October is Beverly Crusher’s birthday, so what better way to celebrate than writing a short fic or two about our favourite doctor? This will be cross posted to ff and my personal blog because I plan on sharing this fic on Twitter and I don’t want to use my ff account publicly. So if you see this in two places, that’s why.
Also, the disclaimer for posting to my blog: I don’t own TNG, Beverly or Jean-Luc. I don’t work for Paramount, CBS, PocketBooks, Simon & Shuster…etc, etc. I’m just a fan! I also ask for forgiveness from Gates McFadden and Sir Patrick Stewart for using (abusing?)  their characters.
###
Beverly kicked off her boots at the door, flung her lab coat over a chair and headed straight for the liquor cabinet. She rummaged around until she found the bottle of wine Jean-Luc had given her for her birthday last year and grumbled about men and how they can’t be bothered to remember dates from one year to the next. But he had been so obsessed with Kamala that he seemed to have even forgotten who she was!
She supposed it was her own fault.  She was the one who had pressed Jean-Luc to allow Kamala to leave her quarters…she shook her head. No. It’s Jean-Luc’s fault for finding her so damn alluring. He just can’t help but want to solve a puzzle. It’s one of the reasons I lo….no, stop that. She poured herself a glass of wine and took a sip. She noticed the light blinking on her console and went to check her messages. Her son’s face filled the screen.
“Hi, Mom. I just wanted to wish you a happy birthday today. I hope you’re not spending it alone and Captain Picard does something nice for you…or maybe Counsellor Troi or Commander Riker. I don’t know why I said Captain Picard’s name first. Anyway…Happy birthday, Mom. I love you. I miss you.â€
Wesley’s face faded out and Beverly chuckled. Miss you too, Wes. She checked her other messages. There was a written message from her Nana on Caldos,  a message from her old mentor, Doctor Quaice, and an invitation to meet Deanna and Will in Ten Forward for a birthday drink. She glanced down at the glass of wine she was drinking and shrugged, tipping it back before going to change. Her bubble bath could wait. Seeing her friends would be a pleasant way to spend her birthday.
Of course, the conversation in Ten Forward revolved around the metamorph. Beverly frowned as she accepted another drink from Guinan.
“Happy birthday, Doctor. Where’s the Captain?â€
“Oh, I don’t know Guinan,†Beverly spat out. “Off with Kamala, no doubtâ€
“I….ah…see. You know, you shouldn’t be moping on your birthday.â€
Beverly glared at Guinan. “I’m not.â€
“Really? Sure seems so to me.â€
Beverly shook her head. “Thank you for the drink, but I better be going.â€Â Beverly placed her empty glass on the bar and stalked out of the bar. Of all the nonsense I’ve ever heard out of Guinan. Me? Moping? Over Jean-Luc?! She stalked her way into the turbolift and made it back to her quarters and headed straight  for the bathroom, grabbing the bottle of opened wine and a glass as she sailed past the table. A long soak in the tub was just what this birthday girl needed. She grabbed the PADD with the current holonovel she was reading in her other hand as on her way past her bed. Bubbles, books, and wine was all a girl needed to celebrate her 45th birthday…right?
Several hours and multiple “Computer, raise bath temperatureâ€s later, Beverly finally decided to haul herself out of the bathtub. She was wrapped in a fluffy towel drying her hair when she heard her door chime. Who could be bothering me at this time of night? I hope it’s not an emergency….out loud, she spoke the command to open the door.
Jean-Luc sheepishly walked in, a bottle of wine in one hand, and a bouquet of flowers in the other. He looked up at her and blushed as he realised she was only wearing a towel. “I…ah….didn’t mean to disturb…..â€
Beverly grinned. It was fun to make Jean-Luc feel uncomfortable. She walked closer. “No, you didn’t disturb me. I was just finished in the bath.â€Â She indicated the flowers and wine. “For me?â€
“Ah…yes…happy birthday Beverly.â€Â Jean-Luc held out the items to her.
“Hmm, so you did remember.â€Â She leaned deliberately to allow Jean-Luc   a good look at her towel-clad cleavage before giving him a chaste kiss on the cheek. “Thank you.â€
“Yes..well…Er…I’m sorry if you thought I forgot. I was…..ah….busy.â€
“Why don’t you open the wine and I’ll put some clothes on.â€
“You don’t have to get dressed…ah….†Jean-Luc’s face turned pink. “That is….I meant….â€
Beverly laughed. It was so easy to rile Jean-Luc up. “I know what you meant. But please sit. It will only take me a minute.â€Â Beverly retreated back to her bedroom silently laughing. Perhaps tonight would be a good birthday, after all. She returned to her living area a few minutes later, clad in a soft pair of leggings and a long sweater. She accepted her glass from Jean-Luc and curled up on her sofa, tucking her legs under her. How many glasses of wine does this make for today? Four? Five? Who’s counting.
“I ah…went to the liberty of replicating some nibbles to go with the wine,†Jean-Luc indicated the plate on the low table.
“Hmm. Good idea, Jean-Luc.  So…how is Kamala?â€
“She…ahhh…Well, tomorrow is the ceremony.â€
“And she’ll be bonded to Alrek?â€
“Yes.â€
“It still sounds so…barbaric. Giving away a person like that?â€
“Kamala says it is what she wants,†Jean-Luc paused and took a sip of wine before continuing. “She asked me to stay with her tonight.â€
Beverly nearly choked on her drink. “She…what?â€
“She asked me to stay with her.â€
“And you said…?â€
“Well, I’m here, aren’t I? I wasn’t going to miss your birthday.â€
Beverly pursed her lips. “I see. And if it wasn’t my birthday?â€
Jean-Luc shook his head. “Beverly, I don’t even know who she is. She changes depending on who is in the room with her and yet….I find her slightly alluring….†Beverly frowned. “I’m sorry, it’s your birthday and here I am pouring out my soul to you…but I guess I needed a friend.â€Â He reached out and took her hand and gave it a squeeze.
Beverly tilted her head at him. “Just a friend?â€
“No. I needed you.â€Â Beverly placed her glass on the table and bridged the gap between the two of them to pull him into a tight hug.
“Jean-Luc, I am always here for you.â€
Jean-Luc pulled back slightly and rested his forehead against hers. He gently kissed her. “I know, Beverly. I know.â€
***
Dispensing with the usual copyright footer, since as I stated, I don’t own TNG or the characters….only my words.
*Screenshot from Season 7, Episode 26 – All Good Things
Facebook: https://www.facebook.com/blog.beccajanestclair
Twitter: https://twitter.com/annaonthemoon
Instagram: https://www.instagram.com/beccajanestclair
Blog: http://blog.beccajanestclair.com
YouTube: https://www.youtube.com/channel/beccajanestclair
Star Trek The Next Generation FanFic: Bev Crusher Day
I know I don’t usually post fanfiction on my blog, but bear with me….
 *
*Bev Crusher Day
Summary: Jean-Luc surprises Beverly on her 46th birthday. P/C light.
Genre: Friendship, (light) Romance
Pairings: Picard/Crusher, Picard/Nella (mentioned)
Rating: K
Words:Â 1069
A/N Today is #BevCrusherDay. 13 October is Beverly Crusher’s birthday, so what better way to celebrate than writing a short fic or two about our favourite doctor? This will be cross posted to ff and my personal blog because I plan on sharing this fic on Twitter and I don’t want to use my ff account publicly. So if you see this in two places, that’s why.
Also, the disclaimer for posting to my blog: I don’t own TNG, Beverly or Jean-Luc. I don’t work for Paramount, CBS, PocketBooks, Simon & Shuster…etc, etc. I’m just a fan! I also ask for forgiveness from Gates McFadden and Sir Patrick Stewart for using (abusing?)  their characters.
###
Beverly smiled as she glanced at the memo that scrolled across the screen:
Meet me at Holodeck 3. 1600. Dress for riding. –JLP
Beverly checked the time. 0700. Her shift ended at 1500, so that would give her just enough time to change. Her relationship with Jean-Luc had been strained lately.  After he was rescued from Celtris III they had a long chat and he admitted to her they had told him she was there and it had been thinking about keeping her safe that had kept him complacent. She wept when he had told her, and the evening was spent with the two of them holding each other. They had fallen asleep together on Jean-Luc’s sofa and it lead to…well, not really seeing each other, but their breakfasts had turned into also sharing dinner most nights and they had a comfortable relationship. It never quite crossed the line, but it sort of teetered on the edge. In their 20-year friendship, they had shared only a handful of kisses prior to a few weeks ago. But since Jean-Luc returned they seemed to have been kissing each other more frequently. Never more than just a kiss, but it all felt warm and comfortable….and then Nella happened.
Beverly should have known something was up the minute she reached for Jean-Luc’s hand during Data’s concert and he pulled it away. And then when Nella had the audacity to come into her Sickbay to tell her she was injured while playing with Jean-Luc! Nella was lucky Beverly had taken an oath to do no harm, that’s for sure . And Jean-Luc…well, it wouldn’t have been the first time she showed up at his quarters for their standing breakfast date, but the last time had been years ago, and it had been Vash….who Beverly hardly had considered a threat to her relationship with Jean-Luc. But seeing Nella there in her seat sipping coffee as if she just belonged there had made Beverly’s blood boil.
And then, Nella left. While on one hand, Beverly was thrilled that Nella had left, she also felt badly for Jean-Luc. He seemed to have fallen hard for the woman, dare she say, he might have even been in love with her? But the upside to Nella being gone is he had resumed his daily breakfasts with her. Beverly smugly smiled to herself. Nella, you never had a chance.
This morning’s breakfast had been simple.  Jean-Luc had been fairly quiet and Beverly was a little disappointed he hadn’t wished her a happy birthday. She thought perhaps it had slipped his mind, and she wasn’t going to remind him. But now this invitation had her curious….had he been planning this all along?
She put the thoughts out of her head as her first patient for the day arrived. No time to think about Jean-Luc and their non-relationship  relationship right now.
###
Beverly stood outside Holodeck Three, decked out in a blue blouse, black riding trousers, and riding boots. She felt a little silly as crewmembers shuffled past her, but then again, why should she? She was merely waiting for her companion.
Jean-Luc came around the corner and Beverly’s breath caught in her throat. He really was rather good looking. Jean-Luc was wearing a soft creamy coloured shirt, the V-neck showing off the fact that most of the hair on his body was on his chest. Beverly giggled to herself. Jean-Luc soon came up to her and gave her a chaste kiss on her cheek. “What has you giggling?â€
“Nothing,†she innocently said. “You look nice.â€
“Aren’t I the one who is supposed to tell you you look nice?â€
“Well, do I?â€
“Always.â€Â He accessed the panel next to the door. “Computer. Run Picard-Crusher-23â€
The doors to the holodeck slid open.   “Enter when ready.â€
“Well, shall we?â€Â He took her hand in his and they entered the room. Beverly gasped. She was standing on a hill on a bright sunny day overlooking fields and fields of gentle rows of plants. A tudor-style house sat in the distance.
“It’s…beautiful, Jean-Luc.â€
“It’s La Barre. I always wanted to show it to you.â€
“Thank you. I feel honoured.â€
“Now that Robert and I are on….better terms, perhaps we can visit someday. I think you and Marie would get along well.â€
“That would be lovely. So…horses?â€
“Yes. The stable is this way….I picked out a lovely mare for you.†The horse Jean-Luc had picked out for her was grey with a white star-shaped mark on her forehead. “Her name is Silver Star. She was Maman’s favourite.â€Â Jean-Luc helped Beverly onto Silver Star. “Shall we?â€
They rode in companionable silence. Beverly’s horse was keeping pace with Jean-Luc’s and she was enjoying the feeling of the wind running through her hair and on her face. Wind wasn’t exactly something you got to experience often when you were on a starship.
Jean-Luc surreptitiously watched Beverly. He loved the way her hair streamed behind her like a ripple of fire. He thought he might like to run his fingers through her hair, and then stopped himself. No. Best not think about that. He led the horses up another ridge and pulled his horse to a stop. Dismounting, he helped Beverly off her horse before pulling a pinic basket out from behind a tree.
“Prepared, were you?â€Â Beverly asked with a twinkle in her eye.
“I came in a little early…I wanted today to be special. Happy Birthday, Beverly.â€
Beverly smiled. “I thought you hadn’t remembered.â€
“No, I knew. Perhaps I should have wished you a happy birthday this morning, but I had already planned this….shall we?â€
“Lead on, Macduff.â€Â Jean-Luc levelled an annoyed gaze at Beverly, but she had laughter in her eyes. “Oh, Jean-Luc, the look on your face! As if I would ever dream of misquoting Shakespeare around you!â€
“Hmm.†Jean-Luc quickly spread out the tartan blanket and pulled out a bottle of wine, two glasses, some cheese, baguettes, slices of apples, strawberries, and a small cake. “It’s not much…†he said, passing a glass of wine to Beverly.
“No, it’s perfect.â€Â She leaned over to place a kiss on his cheek, but Jean-Luc turned his face and captured her lips instead. When she broke the kiss, she looked into his eyes and smiled. “Well, that was nice.â€
“Indeed.â€Â Jean-Luc wrapped his arm around Beverly and pulled her closer. Perhaps this would be a very happy birthday indeed.
***
Dispensing with the usual copyright footer, since as I stated, I don’t own TNG or the characters….only my words.
*Screenshot image from the 4×05 Episode, Remember Me.
Facebook: https://www.facebook.com/blog.beccajanestclair
Twitter: https://twitter.com/annaonthemoon
Instagram: https://www.instagram.com/beccajanestclair
Blog: http://blog.beccajanestclair.com
YouTube: https://www.youtube.com/channel/beccajanestclair
[Recipe] Slimming World Style Japanese Ramen (Wagamama Fakeaway)
 A few days ago, a member of my slimming world group posted a picture of a delicious looking Japanese Ramen style soup her husband had made. Based on her photo, and a recipe I found on BBC Good Food, I came up with this. It reminds me of the kinds of meals you can get at Wagamama.
Japanese Ramen, Serves 2. SYNS: 0
You Will Need:
2 blocks of Ramen noodles (medium chinese noodles)
2L water
2 chicken stock cubes
6 sprigs purple broccoli
1 carrot, diced
200g baby corn, sliced into rounds
1 spring onion stalk, sliced
2 boneless chicken breasts
2TBS Chinese 5 spice
1TBS soy sauce
2 handfuls spinach
2 eggs, hardboiled and sliced in half
1. Slice chicken breasts into strips and coat with the Chinese five spice. Spray a pan with fry light, and fry strips until golden, or use a griddle pan. Set aside.
2. Add the water, stock cubes, soy sauce, purple broccoli, baby corn, spring onion, and carrot to a pot and bring to a boil. Allow vegetables to cook through.
3. Add Ramen and cook according to package.
4. Place one handful of uncooked spinach in the bottom of each bowl and slowly ladle the broth and vegetables on top. Use tongs to extract 3 broccoli sprigs per bowl. Evenly divide the noodles and chicken between the bowls and garnish with egg.
***
DISCLAIMER: I do not work for Slimming World, I am not affiliated with Slimming World beyond being a paying customer/member, I get no personal benefit from writing this post other than the joy of sharing.
Please note: Syn values are based on my exact ingredients using the online calculator. Your Syn value may vary based on your ingredients and the size of your baking containers and portions, so use this number as a guide only. Syn values also frequently change, but these values are correct at the time of publication.
The contents of this post, including images are © Rebecca J Lockley and Tim Lockley unless otherwise stated and should not be reproduced without permission.
For full Copyright and Disclaimer, please read http://www.blog.beccajanestclair.com/copyright/
Facebook: https://www.facebook.com/blog.beccajanestclair
Twitter: https://twitter.com/annaonthemoon
Instagram: https://www.instagram.com/beccajanestclair
Blog: http://blog.beccajanestclair.com
YouTube: https://www.youtube.com/channel/beccajanestclair
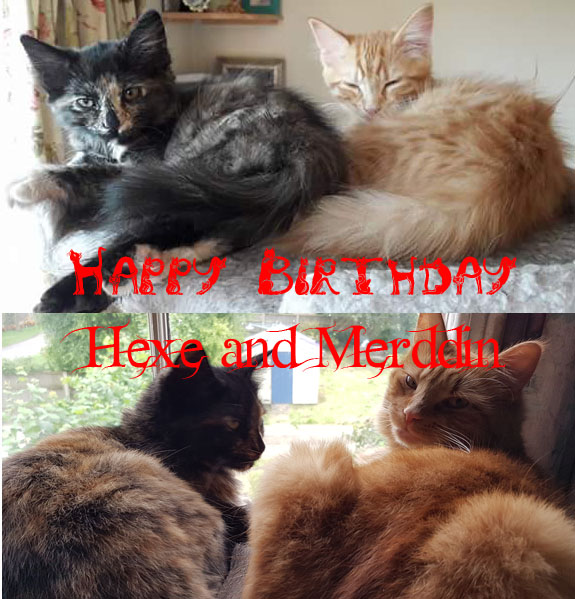
Happy Birthday Hexe & Merddin!
When Tim and I went away to Manchester for an overnight last October, we had no idea that the night we got home would be our last night with our cat, Prudence.
Prudence was Tim’s cat. She had wandered into his garden about 12 years prior and just made herself at home. Tim determined that she must be the cat from Prudential, so Prudence became her name. A few years after I moved, when Pru finally decided I was going to stick aound, she accepted me and she became my cat just as much as she had been Tim’s.
In 2014, she had an operation to remove a tumor from the base of her tail. It was cancerous, and the vet told us if it came back there wasn’t going to be any possible treatment other than to make her comfortable. He couldn’t tell us if we would have 2 weeks, months, or years with her. We decided that we would make the hard choice when she was ready, as we were sure she would let us know when she knew it was her time.
While we were away in Manchester, she started gnawing at her leg. I can still remember (and still have a slight stain from it) the puddle she was sat in when we got home. Her cancer had come back, and it was brutal. We spent the last night together all on the sofa bed in the living room and in the morning said goodbye to her. Instead of cremation, we opted to bury her in the garden.
I was distraught. Being home 90% of the time, she and I were companions. She would usually be in the room with me and we would have our little rituals together. I couldn’t even get to sleep the first few days because there was no fuzzy lump purring on me. I slept cuddling a Bagpuss toy and with a white noise app on my tablet set to a cat purr.
It was during this time we started to plan our trip for our anniversary. We were going to go to Yorkshire to see a lecture by Tim Peake. Unfortunately, Tim had to cancel. But we still had a hotel booked for 2 days in Bradford, so that was when my friend stepped in and invited us to come over and visit her and her 6 cats and to pay a visit to the Yorkshire Cat Rescue. We were going just to visit the cats……Tim, Nicola, and I all had the idea in the back of our head that we would get another cat that weekend, but none of us said this thought out loud to each other.
Once we were at YCR, we started off in the adult cat room. There were nice cats, but none that really spoke to us…..until we got to the kitten room.
In the kitten room, we watched a trio of kittens. A rambunctious boy and 2 girls snuggling together on a bed. One of the girls got plucked out to go to her fur-ever home, leaving the other girl trembling and upset. Since we were allowed to open the pens to play with the cats, I opened up the pen and picked the little girl up. She curled up against my chest and started purring! Not wanting to be outdone, her brother poked his head out and climbed straight onto Tim’s back! We had found our kittens.
Since the kittens were in Keighley and we were in Lincolnshire, we made arrangements for my friend Nicola to pick them up for us and foster them for a day or two, when I would come up on the train to retrieve them.
Tim and I were riding on the Keighley and Worth Valley Railway that afternoon trying to name them. With our girl being a tortoiseshell , we decided she needed a suitably witchy name. With her brother being ginger, I first naturally considered names out of the Harry Potter Universe…..but somehow Hermione didn’t sound like a good fit for her, and Minerva would only suit a grey tabby….so then we started thinking about our favourite places, and we finally settled on Hexe (German for witch). But what would we name the boy? He needed a suitable name to go along with a witch, and we joked about naming him Aslan…..but then Tim was worried I would come home with a third cat, a white kitten we would name Pax (points if you get the references!!). Somwhere along the line we started thinking about engines – and so Merddin got his name after both the Welsh legend (Merlin) and the double fairlie at one of our favourite Welsh narrow gauge railways. Officially, Hexe is Countess Hexe von Fluffington, and Merddin is Merddin Emrys. (though really, I think he should be Sir Merddin Emrys!). Well, I say officially, but you know….they’re cats.
And here we are…..our kittens are turning one today!! I can’t imagine my life without them in it…..but we do still miss our Proodle Doodle (among her other silly nicknames!)
It’s been a learning curve for us, too. Tim hadn’t had a kitten in many years, and I never had had TWO kittens at once! Merddin finally grew into his ears and feet (and boy has he grown!) and Hexe continues to be our little dainty girl who loves her snuggles, but on her own terms!
Happy Birthday Kittens!!!
(I’ve made both a short and an extended edition of their first year. Watch them both below!)
PS: Did I mention our cats came from Yorkshire Cat Rescue? They are an AMAZING home grown charity and they place cats all over the country! So if you’re looking to adopt, consider YCR…plus you cn ride the Keighley and Worth Valley Railway the same day!
**
The contents of this post, including images are © Rebecca J Lockley and Tim Lockley unless otherwise stated and should not be reproduced without permission.
For full Copyright and Disclaimer, please read http://www.blog.beccajanestclair.com/copyright/
Facebook: https://www.facebook.com/blog.beccajanestclair
Twitter: https://twitter.com/annaonthemoon
Instagram: https://www.instagram.com/beccajanestclair
Blog: http://blog.beccajanestclair.com
YouTube: https://www.youtube.com/channel/beccajanestclair
Pickpocketed in Dresden

You always read about people being pickpocketed, and you never think it will happen to you. After all, you’re smart. You keep your wallet in a secure pocket or around your neck; you’ve purchased RFID blocking cases and sleeves, and/or you use slashproof bags when you travel. But then perhaps you get too comfortable in your location and you become lax. You find yourself leaving your handbag by your feet while you take a photo, or perhaps your wallet doesn’t get put back into a zippered pocket….and then you get hit by a pickpocket.
This was my reality on our recent trip to Dresden. I felt so at home in the former East German city that I didn’t really think about my own personal safety and after having my Wochenkarte checked onboard a tram, I shoved my pass case into the front pocket of my camera bag instead of putting it away inside my zippered purse. We got off at Albertplatz and made our way to the Rebecca Brunnen (fountain) near the Drei Konig Kirche and on towards the fountain at the end of the street and even got as far as the golden statue of August II, two hours after we had had our tickets checked. It was while we were paying for our lunch at a Nord See takeaway that I noticed it was missing.
Queue panic. Serious panic. I emptied my entire camera bag right there on the sidewalk, double checked, and made Tim triple check…..it was gone. My passcase that contained my Wochenkarte (worth €61!), My London Oyster card, and more worrying – my National Rail ID and travel card for travel within the UK.
At first, we wanted to believe I had merely dropped it on the tram, so we headed to the DVB office at Postplatz. After finally finding someone who could speak English (I do speak German, but in this instance, I knew English would be easier), he agreed to contact the driver of the tram we had been on. The driver would check the tram and get back to him in an hour. So we went off to the shopping centre at Altmarkt (I really wanted ice cream!) and returned to find out that the driver had not found my case. We were advised to either return in 2 hours or come back the following day, and the Fundbüro was also suggested. Being pickpocketed was mentioned as a possibility, but we still didn’t want to believe that had happened. I also kept checking my facebook “other” inbox, thinking that if someone had found the case they might have searched for me on facebook and tried to match the photo ID to my profile pic, but no luck. We headed to the Lindt shop and had a delicious Eisschokolade drink (it was crushed truffles and milk. SO DELICIOUS) before heading back to our apartment.
The following day, I returned to the DVB office, but my case stil hadn’t been found, so we went around the corner to the Fundbüro. The Fundbüro is located at 13 theaterplatz, and is in the basement of a building that has many other city offices in it. I dont think it was the city hall building, but it was definitely a city office building. Once we got to the basement, there was a sign (in German) telling us we could only enter if the light above the door was green. Since it was green, we went inside. Fortunately, the people in the office speak English. After explaining what I had lost, they searched their computer that logs everything that comes in and the gentleman suggested to me that I most likely had, in fact, had the item stolen from me because things like wallets tend to show up fairly quickly if they are simply found.
Well, crap.
We had plans for the day, so we purchased a second weekly ticket (uuuugh) and headed on our way. That night I also researched how to get home after we landed back at Heathrow……and I had to spend an additional £31.50 – £10.50 for the Heathrow Connect (while Tim would be using the Heathrow Express, it was twice as expensive to buy a replacement ticket for me) and £21 for a single from King’s Cross to Lincoln. I planned on using my contactless debit card on the underground to get from Paddington to King’s Cross.
The following day, while Tim explored the transportation museum in town, I made my way to the police station to file a report. This report was necessary so I could have my rail passes replaced once we got home, and on the off chance that our travel insurance would kick in.

The main police station in Dresden is located on Schießgasse between Landhausstraße and Rampische Straße. it is a beautiful building, and we actually had admired it on our first evening in Dresden and took several pictures of the building so I knew exactly where I needed to be.
Once you enter the building, there are two windows – one to the left and one to the right. IF both are manned, I believe you are supposed to go to the left, but as only one window was manned, I went to the right. After asking if I could speak to someone who spoke English since my German wasn’t up to snuff (see the end of this post for some handy German phrases!), I was directed to a small waiting area.
After about 20 minutes, a female officer came out and I thought she would be helping me, but after I explained to her what had happened, she asked me to wait. 20 more minutes went by, and I was finally called back by an officer who identified himself as Herr Jentzsch. Herr Jentzsch explained that he wasn’t fluent in English, but since I could speak some English, we decided we could communicate…..along with the aid of google for looking up images of things and correct words!

I was back with Herr Jentzsch for quite some time, but that was mostly to do with needing to first explain everything in English (and write the report in English), and then helping Herr Jentzsch to translate what I had said into German. This is where looking things up on google helped us, as some of my English words and what I thought were the German equivalents were not understood. This was likely due to either dialect differences (I know a mostly Bavarian/Tirol dialect) or because when i translated a word with google, it gave me a literal translation and not the correct word. It didn’t matter though, because even though we had a slight language barrier, we persevered, and I was handed a Bescheinigung to take home with me to get my cards replaced. Herr Jentzsch even wrote part of the Bescheinigung in English for ease of it being understood once I was back in the UK!
All in all it was a pretty painless process. Well, the reporting was. Obviously, losing my card case has been quite painful and I’m still waiting on replacement cards from Rail Staff Travel, but I’m sure they’ll get to me eventually.
I still feel pretty vulnerable….and stupid. But at the same time, relieved. Sure, I had to buy another weekly ticket for 60 euros and train tickets for £30, plus wait for my replacement travel cards to show up before I can travel again, but it could have been worse. My entire purse could have gone missing with all my cash, debit card, and credit card. My passports could have been stolen, my entire bag could have been grabbed, or I could have been hurt. Yes, this incident has cost about £100, but it could have been worse. Way worse. And you know what? I learned my lesson. For the rest of the trip, NOTHING went into the front pocket of my bag unless it was disposable (like a brochure), and I buried my passport underneath the padding that holds my camera. This isn’t going to stop me from travelling, it’s only going to make me more aware in the future. And If I get checked by fare revenue on the tram next time we’re in Dresden, I’ll make sure I put my ticket away BEFORE getting off the tram….and I probably won’t store it in my passcase with my UK tickets and passes.
**
If you don’t speak German and you need help whilst in Germany you might need these handy phrases (with some rudimentary pronunciations. It’s not perfect as I’m not a linguist, but the effort will be appreciated):
Ich brauche Hilfe (Ik brow-keh hill-fe) – I need help.
Sprechen Sie English? (Sprek-ken zee) – Do you speak English?
Ich spreche kein Deutsch (Ik sprek-eh k-eye-n Doy-ch) – I don’t speak German.
Ich kann sich nicht verstehen (Ik can seech neecht ver-stay-en) – I don’t understand you.
Danke (Dank-eh) – Thanks.
***
The contents of this post, including images are © Rebecca J Lockley and Tim Lockley unless otherwise stated and should not be reproduced without permission.
For full Copyright and Disclaimer, please read http://www.blog.beccajanestclair.com/copyright/
Facebook: https://www.facebook.com/blog.beccajanestclair
Twitter: https://twitter.com/annaonthemoon
Instagram: https://www.instagram.com/beccajanestclair
Blog: http://blog.beccajanestclair.com
YouTube: https://www.youtube.com/channel/beccajanestclair
Packing Carry-On Only with Ryanair
My husband and I planned a bit of a spur of the moment trip to Leipzig and Dresden recently and booked cheap flights with Ryanair. We did not want to pay the baggage fees (£40 one way for one bag!), so we decided to pack into our good old LL Bean Deluxe Bookbags. I’ve had mine since the mid-90s when I was in High School, and my husband got his about 8 years ago. These bags were made to last, so I can highly recommend one! They hold 32L, and weigh around 600g, so perfect for a carry-on!
We were going away for 5 days, one night would be in an Ibis in Leipzig, and the rest of the trip we stayed in an apartment in Dresden. I packed with the plans that I would wear everything at least twice, and if I needed to I knew I could wash things in the sink.
Packing list:
• Sport skort
• Short sleeved sport top
• Long sleeved sport top
• 3 x sport knickers
• T-shirt
• Pajama shorts
• Slippers
• Toiletries bag (see below)
• Nesting snack boxes
• Travel cup
• Crushable sun hat
• Packable rain coat
• Laptop charger/UK to EUR converters/US charging hub
• First aid kit
• Bag of snacks
• Tea bags/sweetener
• Bread bag and bag clasp*
• Reusable shopping bag
• Folding mini rucksack
All my clothing fit into a single packing cube. I also had some zipper top plastic bags in the bottom of my cube in case I needed to separate any dirty or wet clothing or in case the airport didn’t accept my toiletries bag and made me swap it to a plastic bag. I deliberately picked a sport skort for having shorts built in to protect my modesty when I crouched down to take photos and also to help with preventing chafing. I took sport tops for their quick drying technology so I had the option of washing my shirts in the sink. The long sleeved top I packed along was one that has mesh shoulders and upper back, so it still kept me cool even in the heat. I even packed sport knickers for their quick drying properties. I worked out that I actually only needed to pack 2 pairs (plus the pair I wore on the plane) as long as I was religious with washing them, but I decided to take a third pair along for a spare. And I actually wound up adding in two more pairs because I had the space for them. I also added a bralette, which didn’t work out the way I had expected it to.
I packed slippers over flip flops since we were going to be in an apartment and I knew I wouldn’t need them for the shower. In Germany and Austria (at least), it is usual to remove your shoes when you enter a home, so we always pack hausschuhe when we visit these countries and are renting apartments.
The nesting snack boxes are from Paperchase, and they are excellent for travelling if you plan on making packed lunches while you are away since they take up very little space in your bag. We also took along reusable drink cups that could hold both hot and cold drinks in them since we had a rental car with cup holders. We just took the cheapie £1 cups you can get in Starbucks, so nothing fancy.
Curious about the bread bag/clip? In Germany and Austria (and likely other parts of Europe), fresh rolls daily is a thing. You can buy them in the grocery store or from a bakery, but the bags they sell them in don’t keep the bread fresh longer than a day. Since our trip was so short, we didn’t want to have to deal with getting bread daily, so I packed a bread bag and took along a bag clip. This actually worked and our bread remained fresh for the duration of our trip!
You also might notice laptop charger, but no laptop. My laptop fit into a sleeve in Tim’s camera bag, so I only needed to pack my charger. However, I had plenty of space, so I could have easily slipped my laptop in.
Toiletries:
• 2in1 shampoo/conditioner bar (Godiva by Lush)
• Dove bar soap
• Hibiscrub
• Zineryt
• Degree for Women solid deodorant
• Mist You Madly body mist
• Face moisturiser
• Make-up: BB Cream, powder,blush, eyeshadow, concealer, mascara, & lipgloss
• Anti-itch cream
• Anti-chafe cream (lifesaver!)
• Sudocreame
• Clinique Moisture Surge
• Boots Tea Tree blemish stick
• Toothbrush/toothtabs/mouthwash tabs
• Folding hairbrush and hair bands/pins
• Vicks inhaler stick
• Yes To Cucumber travel wipes
• Febreeze
and the clothing I wore on the plane:
Denim Skirt
Footless tights
Socks
Sport knickers
Bra
T-shirt
Thin Jumper
Fleece body warmer
Sketchers Go Walks
The tights and socks were the only ones of each I packed as I planned on washing them in the sink. I forgot to wash the tights and wished I had them on the return trip! I also didn’t need the body warmer again until our last day, but I needed it on the UK side the day we left and knew I would need it in the UK once we landed. Wearing it on the plane meant it didn’t take up any space in my bag, though I did have room for it. I wore my denim skirt the day after we landed and on the way home, and wore the skort the other three days.
After I came home and emptied my bag out, I decided to ask myself a set of questions. A girl on #HPLWorld calls it an “exit interview†with her bag. These are the following questions I ask myself:
1 Did I wear all my clothing packed? At least twice? If no, what and why?
2 Did I use all outerwear/accessories? If no, what and why?
3 Did I use all toiletry items including cosmetics but excluding first aid kit? If no, what and why?
4 Did I have to buy anything for immediate use? What?
5 Did I use all electronics/electronic accessories packed? If no, what and why?
6 Did I use all other items not previously categorised? If no, what and why?
7 Is there anything left unused that can be eliminated from a future trip?
8 Is there anything used on this trip that you do not want to pack again?
9 Was anything missing? Anything you felt like you should have packed?
10 Did the bag hold up? Was it too heavy or awkward?
11 Will you travel hand luggage/rucksack only again?
These questions apply to my main bag only. My personal item is my camera bag/purse and contained my DSLR, zoom lens, other camera accessories, and purse. I did not use my zoom lens, but it’s not something I would eliminate from a future trip if I was taking my DSLR.
1. Yes, I wore everything I packed at least twice, and in some instances more than twice. Except for my knickers, since I took enough pairs to last the whole trip.
2. No, surprisingly. It didn’t rain at all on our trip during the day so I never needed to use my mack in a pack. It also stayed ridiculously hot, so I never needed to add on a layer of wrist warmers.
3. No. Items left unused at the end of the trip were blush, eyeshadow, lipstick/gloss, and mascara. I used the BB cream daily as it had SPF in it and set it with setting powder, but I never used the other make-up items as it was just too hot for make up!
4. Yes – My folding brush broke the first day so I had to pick up a new one and we purchased sunblock in the airport before we left. I didn’t like the toothtabs, so I bought some toothpaste too.
5. We never tried out the HDMI cable (we were too tired each night!) and I didn’t need to use my card reader.
6. Yes. Er, I think. I’m sat in Starbucks enjoying the air conditioning while my phone says it’s 32C out, so I can’t double check everything. I think I had a leftover zipper top plastic bag, but that was it. Oh, I didn’t use all of the tea bags or eat all of the HiFi bars packed, but I left them behind. I didn’t know if we would need lots of tea bags or if I would be hungry daily for a bar.
7. This is a good question, and a puzzling one. I’d love to eliminate the rain coat, because it takes up a chunk of space, but rain is one of those unpredictable things. Originally, it was supposed to rain on our trip! An umbrella would take up less space, but an umbrella is less convenient as it ties up a hand to hold it. The travel cups turned out to be an excellent idea as we had a rental car and were able to pour water and soft drinks out of larger bottles and have it easy to hand. Probably wouldn’t take the travel cups on a trip we aren’t renting a car on, though.
8. No more bralette. Ugh. I really hated that thing. It offered no support whatsoever and I felt like I might as well have been wearing no bra. I think I’ll either just make space for a second proper bra (and I had space!) or I’ll have to hope I can wash/dry my bra overnight at least once during a trip. Or maybe use a bathing suit top as double duty. The Boots tea tree blemish stick I removed from its original packaging did not work out. It became dried out and unusable, and I would have had room for the original packaging anyway! I also didn’t really like the Yes To Cucumber facewipes, but they were passable.
9. I wanted a second pair of shoes desperately. The heat made my feet sweat in my sketchers so badly and it was just gross. So either a second pair to alternate or maybe just some powder to sprinkle in my shoes daily to keep them feeling fresh. And as mentioned above, a second bra. I also wished I had another top along because I had spilled something on my shirt at dinner and had to wear my pajama T-shirt out that evening since I didn’t want to swap into my only other clean shirt for a few hours. So another top would have been nice. I also wished I had some tea tree or acne fighting face wash along as I broke out pretty badly on my chin (though it was bacterial/an allergic reaction), I wished I had something better than Dove to wash my face with.
10. My bag is basically indestructible. The only problem it has is that it lacks structure, so I wouldn’t take it hiking or anything like that but it’s pretty good for point a to point b. It did get a little heavy (even though it only weighed 6KG on the return) when I was stuck wearing it going through the long queue at UK immigration, but for the most part it was fine as I wasn’t wearing it for very long periods of time.
11. Absolutely. Though my next trip my ticket includes a checked bag and we want to bring along a tripod and some other non carry on items, so we will be checking a small (it’s still carry on sized) suitcase between the two of us.
We’re off back to Germany soon, but for a longer trip. Hopefully, I can still keep it minimal!
***
The contents of this post, including images are © Rebecca J Lockley and Tim Lockley unless otherwise stated and should not be reproduced without permission. If you are not reading this on http://blog.beccajanestclair.com, my facebook page, Networked Blogs, the RSS feed(s), or through an e-mail subscription, please notify me.
I have not been compensated by any of the companies mentioned in this blog post, however some links might be affiliate links where I earn a small commission.
[LJ readers reading this on the LJ RSS feed: Please click on the link at the top of the entry to go directly to my blog to leave a comment, as comments left on the LJ RSS do not get seen by me. Facebook users reading this from my Networked Blogs link can either comment on facebook or on my blog. If you are reading this through an e-mail subscription, you might need to go directly to my blog to view videos and images.]
For full Copyright and Disclaimer, please read http://www.blog.beccajanestclair.com/copyright/
99 Thoughts I had While Watching Anne With An E

Like every other die hard Anne of Green Gables fan out there, I waited with baited breath for the latest installation in adaptations, after being horribly disappointed in the 2015 version starring Martin Sheen as Matthew. Quite sadly, Anne With An E has sunk to the bottom of my ranking of all Anne adaptations that I’ve seen, and it sunk after episode one.
Even the trailer was a huge letdown:
So here are 99 thoughts I had while watching the full Anne With an E series now streaming on Netflix. Spoilers below (duh)
1) dislike the portrayal of Marilla so far. Yes she is supposed to be stern, but she seems nastier.
2) Anne’s flashback earlier to when Mr Hammond had his heart attack. No. While I don’t doubt that sort of thing happened to orphans, Anne never made mention of something like that, and given what triggered the flashback, I would have expected Anne to suffer from PTSD. Which she does not (though this Anne apparently does)
3) It’s Jasper!! I feel old now.
4) they definitely have taken some poetic licensing with the dialog. Matthew still speaks more than book!Matthew or Sullivan!Matthew.
5) GREEN GABLES
6) Mrs lynde is pretty spot on!
7) the actress playing Anne goes between “soreee” and “sorry”. But a friend knows her and she’s apparently Irish, so I guess I can forgive her.
8) Lol forgiveness scene spot on!!
9) hired hand scene….. unnecessary. Plus…..deliberately rude Anne!! OMG NO!
10) Mr Barry…..wrongwrongwrong!!!!!
11) another flashback. These sit uneasy with me.
12) The Barry’s are too posh for my liking.
13) er….no. that ending scene is definitely not canon. While a nice touch, I suspect this will lead episode 2 away from canon.
Episode 2
14) TRAIN!!!! We think potentially NG, now that they show more detail I’ll have Tim Lockley watch the first few minutes to try to identify……
15) I just noticed Anne has her carpet bag, but never made the comment about it being an “old carpet bag”
16) Ok, no. This Matthew is way way WAY out of character. NOPE.
17) WTF. Anne getting on the ferry….NO. Out of character for Anne. Anne does NOT run away. Anne challenges. More N-O-P-E.
18) I think “based on Anne of Green Gables” is right. LOOSELY based.
19) Seriously, seriously LOVING Mrs Lynde. She is incredible.
20) Well, she sure can spin a tale…..but again, doesn’t seem like Anne. I don’t think Anne would lie like that….I think Anne is more likely to tell people her fantasies, but not LIE.
21) REALLY???? Reeeeeaaaallllllyyyyy???? I….can’t……
22) Very sweet of Matthew to refer to her as his little girl. Heart. melt. I mean, it’s out of character for Matthew to speak this much, but this is totally Matthew.
23) “She’s my daughter” !!!!!! OH MATTHEW YOU BIG SOFTY I LOVE YOU!! (still OOC for him to say that out loud though)
24) Ah. No nonsense Marilla.
25) Ah, Awkward family meal time.
26) 30:52 in to the 45 minute episode and finally Anne is Anne.
27) Picnic. More overly posh Barrys. Seriously. No. This is NOT the Barry family!
28) Uhhhhh…..what? No. People were NOT that nasty to Anne. People were curious and cautious, but the only people nasty were Josy Pie, and Gilbert at first….but it still wasn’t THIS nasty.
29) well, at least she can finally call her Marilla.
30) Wait….take their name? I mean, that’s sweet and I was always surprised that Anne never did become a Cuthbert, but again this is kind of out of character. But I do think it was a really sweet moment.
Episode 3
31) Ok. Anne’s first day of school. Let’s hope this follow the book……
32) don’t like Diana either. She’s too bold!!
33) WTF is up with these kids?! Barking at her?
34) Birds and the bees talk?!?! Mouse in his pants?!?!? AAARRRRGGGGHHHHHHHHHHH THIS IS NOT ANNE. NOT AT ALL. Anne is more of a romantic.
35) It’s a bit weird for Marilla and Matthew to refer to themselves as parents.
36) OTOH, I suppose Marilla is more true-to-book looks wise than Coleen Dewhurst was, but she was so amazing, you could overlook that she didn’t fit the description.
37) More too much speaking from Matthew. And to/in front of other women too! I mean, he can barely ask Rachel Lynde to make that dress in the book and yet here he is….chattering away. But other than the speaking, I still like the portrayal of Matthew.
38) I’m going to have to re-read the books, because I can’t remember how well Anne did in Math. I know she always has been better at English, but I can’t remember if she had math skills.
39) Gibert is…..not Jonathan Crombie (RIP). I don’t think young me would have had a crush on this Gilbert….but he is pretty chivalrous. Which Book!Gilbert wasn’t at first, so….that’s kind of weird.
40) Diana struggles with reading? No, that’s not right. Anne over dramatising her reading…..Yep. That’s our Anne.
41) Trollop?!
42) OH. THERE’S THE CARROTS INCIDENT. at least we got that! Albeit, she smacked him across the face with it instead of breaking it over his head…..but we got our Carrots moment…..so OK, ONE THING TRUE TO BOOK!
43) But Anne walking out of school….again, no. Anne Shirley does NOT walk away. Also, if she “changed her name” to Anne Shirley Cuthbert, why is the teacher calling her Shirley? Continuity error?
44) OTOH, it gave us an opportunity to have a tender Anne/Marilla moment, so that was kinda nice.
Episode 4
Reading the blurb, it sounds like it might get back onto the book track this Episode. Maybe. Or am I giving it too much credit?
45) Anne not going to school is just so out of character. Anne loves to learn! She would return to school with her head held high….unless she dyes her hair green. HAHA! (will we see that?)
46) However being in her fantasy world and letting the pie burn is VERY Anne….
47) Skipping school after being told to go back? Again, NOT LIKE ANNE.
48) ARGH. SO FLIPPING DECEITFUL.
49) Ruby Gillis is adorable. Still unsure about Diana. Shes just too posh for who she is. My impression was always that Diana’s parents weren’t rich. Perhaps a little well-off, but it was Diana’s great-aunt who had the money. Mr Barry was a farmer and worked the fields same as Matthew….
50) a fire? Again, this wasn’t in the books, but it IS a good example of small village life in the late 1800s and adds drama. Again, its OK if this was a generic story of an orphan girl in the 1890s….but not part of Anne. But I guess they needed an act for Anne to be accepted.
51) I don’t remember Ruby having a crush on Gilbert. I thought Josey wanted Gilbert….hmm. Going to have to re-read the books.
52) The story club!!
53) And now the teacher calls her “Anne Shirley Cuthbert”….is this to signify she has finally been accepted?
Episode 5
54) They can’t even get the spelling bee incident correct?!
55) Anne starting her period….I mean, Obviously it happened to Anne as it happens to most women, and given the number of children she eventually has, it’s a given that she would have had some kind of cycle….but it wouldn’t have been something that LMM would have written into her books….this kind of stuff wasn’t talked about openly when she penned AoGG…..but again, they are trying to appeal to a modern pre-teen audience, and probably a good number could sympathise with Anne.
56) John Blythe wasn’t in a wheelchair!!!
57)The interaction/conversation between Rachel and Marilla….while again, not part of the books, it’s a nice touch because it helps to solidify their lasting friendship.
58) OK so now we’re seeing where Gilbert is starting to have feelings for Anne and Anne doesn’t want anything to do with him! hehe!
59) Hormonal stroppy Anne kind of makes me laugh.
60) “You may have some of the raspberry cordial” YES!!!!!! Please don’t screw up this scene guys.
61) Oh, we’re going to get the puffed sleeves! Not like it was in the book or in Sully’s Anne, but this is still just as adorable and awkward for Matthew.
62) Ok, so they’re both getting drunk….this is different. But also funny.
63) Who is this woman Matthew is talking to?! MATTHEW DOESN’T TALK TO WOMEN!!!! “Old friend”?! Are they trying to give Matthew a former love interest?
64) Is Mrs Lynde making a sexual innuendo?!
65) Where did Anne get that corset from? It’s too fancy to have been Marilla’s!
66) OK, this part is exactly as it happened in the book. Of course, it’s one of the sadder things that happens, but I think Mrs Barry almost said word-for-word what is in the books…or at least what I remember!
67) NOOOOO I’M CRYING!!
68) I’m really confused over Gilbert’s father being so ill.
69) SHE’S GETTING THE DRESS!!!! Again, completely not how it was in the book, but she still got her dress!
Episode 6
70) Ah, Finally an episode that opens with an actual event from the book!
71) Oh, but who’s the old lady? OH! This must be Aunt Josephine! I mean, she wasn’t there in the book when Minnie May had croup, but I suppose we had to meet her somehow!
72) Ok, why does Gil’s dad sound like he’s going to die?!
73) YAY! Friends again!!!!
74) NO. NO NO NO! GILBERT’S FATHER IS DEAD?!?!? THAT IS NOT THE BOOK IN ANY WAY WHATSOEVER! What purpose could this possibly be serving?!
75) A flashback to elude to the relationship between Marilla and John Blythe when they were younger is a nice touch. Also, John giving Marilla the hair ribbon she gave to Anne….who will of course wind up with Gilbert in the future.
76) So Anne and Gil’s fight has now been instigated by Gilbert. Interesting.
77) This is definitely delving deeper into the relationship between John and Marilla. I kind of like this, because it was only ever mentioned as an aside. But poor Marilla.
78) I still think Ruby is adorable. But her poor crush on Gilbert is never going to get anywhere.
79) Minnie May is cute too. Although I do think she’s slightly older than she should have been when she was ill in the book.
80) Well, that’s a pretty tender Marilla/Gilbert moment. I quite liked that.
81) Oh. Did they just make Aunt Josephine a lesbian? That’s interesting. I wonder if Mr Barry knows? Is that how they will explain Josephine having money?
82) DID GILBERT LEAVE?!?!??! OMG WHAT!!!!
Episode 7, at last…..
83) Hey look, there’s the bitch Josey Pye is known for being!
84) Woah. Matthew raised his voice!
85) NOOOOOOOOOOOOOOOOOOOOOOOOOO (I mean, OK, it’s Canon for it to happen eventually….but NOOOOOOOO) Oh Ok. Not dead. Er…..yet.
86) Anne not having a head for Geometry? She’s a whizz!
87) And, we’re back to completely out of canon.
88) I mean, maybe not. Because I know they did have a bit of the farm animals and things auctioned after Matthew passed away. But it wasn’t to pay the Mortgage as far as I can remember. It was just because Marilla wasn’t going to man the farm after Matthew.
89) OH CRAP. i was worried that one of them would get robbed!
90) GILBERT!!!!!!!!!
91) I Love Josephine Barry! She is pretty true-to-book once she warmed up to Anne
92) I do kind of like them expanding on Jerry. He was always just “the French boy” or “the hired boy” and I’m not even sure he had any lines of his own in the book.
93) What the heck is Matthew doing? I don’t like his being secretive….. NO! MATTHEW! YOU PUT THAT GUN DOWN RIGHT NOW. THAT IS NOT MATTHEW AT ALL. NO NO NO NO NO. PUT IT AWAY. DON’T YOU DARE THINK OF IT!!!! Whew.
94) Ah, resourceful Anne. Yep, that’s our Anne.
95) So….it’s going to end with the guys who robbed Jerry moving in and was Anne supposed to think he was good looking? What the….AAAAARRRGGGHHH
96) The opening song gave me chills every time, because it was the Hip.
97) Episode 2 seemed to be fabricated just for drama’s sake.
98) It wasn’t until Episode 5 that I felt it finally was starting to be Anne….until it wasn’t.
99) You know, if this has been just a regular period drama….it wouldn’t be so bad.
I have a 100th, but its not from me. A fellow Geek Girl Gang member said:
It’s like the GoT version of it, leaving the viewer stricken by omission of all the normal and good things that happen, and presenting a high-stakes view of the world that suffuses danger into the safety of our childhood tales.
And I have to agree with her. They tried to deliver Anne, but that’ not what we got. I think I only counted about a half dozen actual true-to-book events:
– The Cuthberts originally wanting a boy
– Rachel Lynde and the apology
– “Carrots!”
– Losing the broach
– Getting Diana Drunk
– Minnie May being ill
– The Story Club (briefly)
– Puffed sleeves
Ok, so EIGHT…..and even many of those barely followed canon for how the events unfolded. I’m just really disappointed overall with this adaptation. I wasn’t expecting another Sullivan version (and let’s be honest, he did plenty of out of canon things too!), but I was expecting something better than this.
And so, my definitive rank of all adaptations of Anne of Green Gables I have seen, from best to worst:
1) 1985/1987 Anne series with Megan Follows
2) BBC Anne of Avonlea from the 70s (no copies of AoGG exist!)
3) Anne of Green Gables the musical
4)Akage No Anne (Japanese Anime from 1979)
5) black and white 30s/40s AoGG film
6) Anne of Green Gabeles, The Animated Series (also by Sullivan)
7) the recent film version that had Martin Sheen as Matthew
8) That YouTube fan series that tried to modernise Anne into the 21st century)
9)Anne with an E (this series)
10)Anne 3 (the Sullivan version of books 5-8, which was total fiction)
So….it’s not at the bottom, but to be fair, Anne 3 was REALLY BAD and completely non-canon, and at least Anne With An E had SOME canon things in it. I read an interview that they hope it gets picked up for a second and third series…I can’t see that happening, unless there ARE Anne-fans out there who liked it, but all but one Anne-fan I spoke with has hated this.
I would rather Sullivan make an Anne 4 and totally botch that before I want a second Anne With An E.
***
*Anne with an E photo header is from their facebook page
Netflix, the CBC, etc. have not paid me for my opinion. You get it allll for free!!
For other articles about the new series, please see:
Vanity Fair – Netflix’s Bleak Adaptation Gets it All So Terribly Wrong
HuffPo – The Relentlessly Grim ‘Anne With An E’ Reveals The Limitations Of Today’s TV
Vox – Anne With an E turns Anne of Green Gables into a high gothic tragedy, missing the point
The contents of this post, including images are © Rebecca J Lockley and Tim Lockley unless otherwise stated and should not be reproduced without permission. If you are not reading this on http://blog.beccajanestclair.com, my facebook page, Networked Blogs, the RSS feed(s), or through an e-mail subscription, please notify me.
[LJ readers reading this on the LJ RSS feed: Please click on the link at the top of the entry to go directly to my blog to leave a comment, as comments left on the LJ RSS do not get seen by me. Facebook users reading this from my Networked Blogs link can either comment on facebook or on my blog. If you are reading this through an e-mail subscription, you might need to go directly to my blog to view videos and images.]
For full Copyright and Disclaimer, please read http://www.blog.beccajanestclair.com/copyright/
[Austria] Salzburger Freilicht Museum
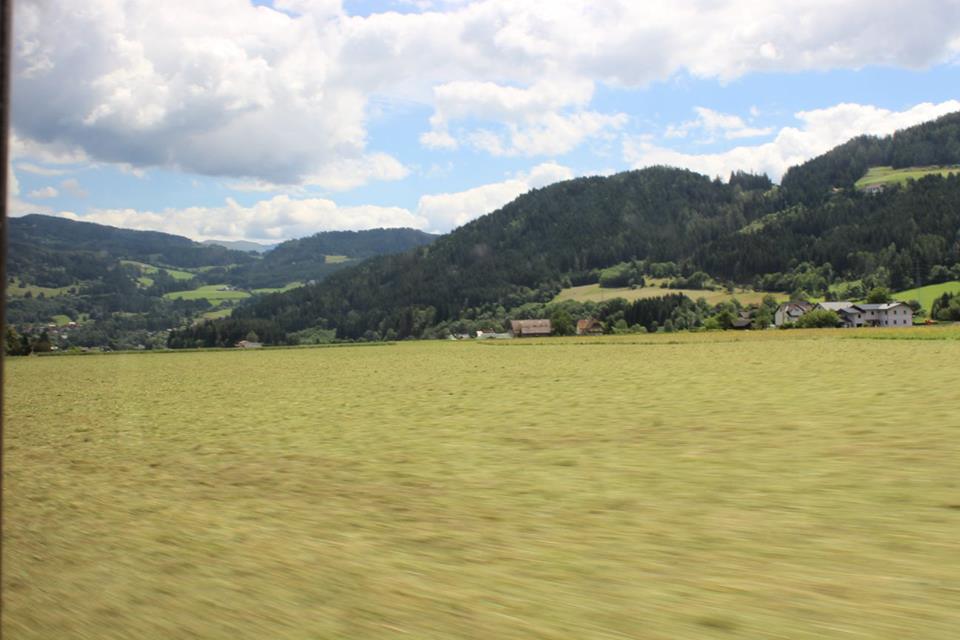 Tim and I had another day exploring on our own as my mom hurt her knee when we were on the Sound of Music tour and didn’t feel up to doing lots of walking….and that’s what this day was. LOTS of walking!
We decided to visit the Salzburger Freilicht Museum, or Salzburg Open Air Museum. I originally thought this place would be like an Austrian version of Beamish, one of our favourite museums to visit in the North, but it was so much more. We also went to Freilicht to ride on their small narrow gauge train.
We started our day by driving to the local ÖBB station in Pfarrwerfen and taking the local train into Salzburg, where we then changed over to Postbus 180 as the museum is about 15KM outside of Salzburg. And here’s where it started to get interesting. Even though we sat at the front of the bus and told the driver where we wanted to go (in German!)…..he missed our stop. The screen that displayed upcoming stops was somehow off by one, so when we pressed the stop button it was after the stop for the museum. When we alerted the driver that he went past our stop….he kept going. He took us past FOUR OTHER STOPS, finally letting us out over 2KM away from the museum with the instruction that we should cross the road for the next bus back…..which wasn’t for an hour. So….we walked. It was very hot that day and there wasn’t much shade along the route, but we finally made it to the museum about an hour and a half later than we had intended.
Admission is €11, but discounted by ,50 if you arrive by bus and show your bus ticket.
The museum covers 50 acres and contains buildings and relics from as far back as 1442 from the provinces of Flachgau, Flachau, Tennengau, Pongau, Pinzgau, and Lungau. The museum is divided into sections where each province is represented. Some areas are simply buildings that have been carefully demolished, moved, and reconstructed while other areas have displays and even demonstrations. Visitors are given free range to go between the sections, and if a door is unlocked or a building open, free to explore in your own time. The museum has plenty of picnic benches dotted around for eating a picnic lunch, but there also is a very reasonably priced restaurant on site serving traditional Austrian dishes (and beer!). While we were eating our Lunch, there was a group of ladies and gentlemen sat at a table dressed in traditional Austrian dress. Judging by how familiar the restaurant staff was with them, it looked like they used the museum for a regular get together!
If you don’t fancy travelling by foot around the museum, they also have a small narrow gauge railway that has three convenient stops, including one at the restaurant, and unlimited use of the train is included in your admission.
Here’s a short video I took of the railway at the museum:
We absolutely loved the museum. It was quite awesome seeing and touching the old buildings and seeing how even things like the construction of fences varied across the regions and seeing buildings built out of wood with the notches in the corner to the more modern brick. But I’ll let my pictures tell the story:
Follow along on our Austria trip
***
The contents of this post, including images are © Rebecca J Lockley and Tim Lockley unless otherwise stated and should not be reproduced without permission. If you are not reading this on http://blog.beccajanestclair.com, my facebook page, Networked Blogs, the RSS feed(s), or through an e-mail subscription, please notify me.
[LJ readers reading this on the LJ RSS feed: Please click on the link at the top of the entry to go directly to my blog to leave a comment, as comments left on the LJ RSS do not get seen by me. Facebook users reading this from my Networked Blogs link can either comment on facebook or on my blog. If you are reading this through an e-mail subscription, you might need to go directly to my blog to view videos and images.]
For full Copyright and Disclaimer, please read http://www.blog.beccajanestclair.com/copyright/
[Travel] Grocery Shopping

A selection of food and drink souvenirs from Austria.
One of the things I love to do when we travel is to hit up the local grocery store even if we’re not self-catering. On our recent day trip to Rotterdam, I went into a grocery store and purchased a bunch of foods to try, but my pic of everything turned out too blurry to use for anything (sorry!)
Going to a local grocery store first of all can cut down on food costs while travelling. Even if you’re not self-catered, you can pick up snacks for your visit or in your room – a box of cereal bars that will last for 5 days is going to be cheaper than buying them in singles from the corner shop. Same with a bag of apples. Buying beer or other alcohol to drink in your room can cut down on your bar bills tremendously, and if your room has a kettle, you can stock up on tea, cups of soup, etc. And if you packed a spork and a set of nesting plastic boxes, you can even pack up your own lunches to take with you when you’re on the go.
Second, you get a better feel for the language if you’re in a foreign country and don’t have knowledge of the native language. Everything in a grocery store is labelled and sometimes there are even pictures of the item. For example, with a pile of lemons in Germany, you will see the word “Zitrone”. Now you know when you go out to a restaurant and see the word “Zitrone” on a menu the dish contains lemon.

I bought zitrone wafer cookies in Austria, and other flavours.
Third, it can help to get a flavour for local food. Check out the bakery section to see what breads and pastries the locals buy. Head to the deli section and see what meat (if you’re a meat eater) is popular. Look at the local beer options if you’re a drinker. And check out the chocolate aisle! Don’t forget buying chocolate at the grocery store will be a lot cheaper than buying it at a convenience store.

Our chocolate haul from Austria
Fourth, as you can see from my photos, bringing back food as souvenirs is fun! Feeling glum in the middle of Winter knowing your next holiday is months away? Break into some chocolate or make a bowl of soup. Giving food to friends and family is great too – everyone loves cookies and chocolate! Need a gift for a beer drinker? How about a few bottles of a local brew (space permitting, of course!)?
Fifth, if you’re really feeling homesick, or are travelling with children who might need a dose of “home”, you can always head to the grocery store and look to see if they stock a similar product or if they have an import aisle. Imported items will be expensive, but sometimes, you just need it. As an American now living in the UK, I can vouch for sometimes just needing a dose of “home” and yes, I have paid £2 for a single can of Root Beer.
And lastly, shopping in a grocery store can be fun! Check out this short video I made while Tim and I were shopping in a Billa store in Gmünd and at a MPREIS in Werfen.
Follow along on our Austria trip: http://www.blog.beccajanestclair.com/2016/08/travel-austrian-road-trip-summer-2016/
Watch the rest of the videos here: https://www.youtube.com/playlist?list=PLDUaor7uXZQfPu6Un77YGHRkLMlPgKFp-
***
Disclaimer: I received no compensation from products pictured in my photos or video, nor did I receive compensation from the shops visited.
The contents of this post, including images are © Rebecca J Lockley and Tim Lockley unless otherwise stated and should not be reproduced without permission. If you are not reading this on http://blog.beccajanestclair.com, my facebook page, Networked Blogs, the RSS feed(s), or through an e-mail subscription, please notify me.
[LJ readers reading this on the LJ RSS feed: Please click on the link at the top of the entry to go directly to my blog to leave a comment, as comments left on the LJ RSS do not get seen by me. Facebook users reading this from my Networked Blogs link can either comment on facebook or on my blog. If you are reading this through an e-mail subscription, you might need to go directly to my blog to view videos and images.]
For full Copyright and Disclaimer, please read http://www.blog.beccajanestclair.com/copyright/
[Recipe] IKEA Swedish Meatballs Fakeaway
 Ah, so who doesn’t use a trip to IKEA as an excuse to eat Swedish Meatballs? Just us, then?
We love the Swedish meatballs, and we love that now you can even buy frozen meatballs and sauce packets to take home with you. I always buy 2 bags of frozen meatballs and at least a half dozen packets of sauce mix to keep us going between visits….but eventually, we run out. And as we haven’t had time or a need to go to IKEA in about a year, I needed to get creative. I found this recipe on a facebook group page for Slimming World, so this recipe also is Slimming World friendly. The sauce itself is free, and the meatballs can also be syn free depending on what you use.
You will need:
Your favourite meatballs or meatball recipe
4 vegetable stock cubes or pots (I used 1 pot and 3 cubes)
Enough water for half the stock cubes (this varies from type of cube. The ones I used needed 500ml of water per cube, so I used 1L water)
3-4 TBS fromage frais
I know, I know, the recipe sounds a little vague. But really, hear me out.
1. Cook meatballs as directed on their packaging or per your recipe. This time around I used Quorn Swedish style meatballs, but you can use the Slimming World meatballs (FREE) or any other type of meatball. Even make your own from mince if you prefer.
2. Add stock cubes and water to a sauce pan and bring to a boil until the cubes are dissolved. Continue to boil the stock for an additional 10 minutes.
3. Remove concentrated stock from heat and allow to cool for a few minutes before stirring in 3-4 TBS of Fromage Frais. This should make your sauce creamy and a little thick. If it’s not thick enough, add more Fromage Frais.
I served ours with Smash and some frozen mixed vegetables. While it’s not exactly the same as what you will get at IKEA, it’s still pretty tasty as a mock Swedish meatball sauce. I’m sure any Swedish friends reading this are shaking their heads in horror now….
***
Please note: While I used to work for IKEA (in 1998 and then again in 2006), I do not currently work for IKEA and they have not compensated me for writing this blog post. Nor have any of the brands mentioned in this post.
DISCLAIMER: I do not work for Slimming World, I am not affiliated with Slimming World beyond being a paying customer/member, I get no personal benefit from writing this post other than the joy of sharing.
Please note: Syn values are based on my exact ingredients using the online calculator. Your Syn value may vary based on your ingredients and the size of your baking containers and portions, so use this number as a guide only. Syn values also frequently change, but these values are correct at the time of publication.
The contents of this post, including images are © Rebecca J Lockley and Tim Lockley unless otherwise stated and should not be reproduced without permission. If you are not reading this on http://blog.beccajanestclair.com, my facebook page, Networked Blogs, the RSS feed(s), or through an e-mail subscription, please notify me.
[LJ readers reading this on the LJ RSS feed: Please click on the link at the top of the entry to go directly to my blog to leave a comment, as comments left on the LJ RSS do not get seen by me. Facebook users reading this from my Networked Blogs link can either comment on facebook or on my blog. If you are reading this through an e-mail subscription, you might need to go directly to my blog to view videos and images.]
For full Copyright and Disclaimer, please read http://www.blog.beccajanestclair.com/copyright/
[Review] P&O Mini Cruise Hull to Rotterdam
 * What to do with a few days off work for as little money as possible? Why not go to another country? I found an absolute steal on P&O Ferries website for their mini cruise from Hull to Rotterdam and back – £80 for an interior cabin with bunk beds! I think this is probably a Winter rate and only on certain days, as the mini cruise booked just a day before or a day after would have been £130. We decided to “splurge” and upgraded ourselves to a cabin with a window for an extra tenner. Having the window wasn’t super important since it would be mostly dark out while we were in the cabin not to mention sleeping, but the extra £10 also gave us two twin beds instead of bunk beds so the room was slightly larger too. And it was only an extra tenner. When you book on P&O’s website, you also get the option to add Breakfast & Dinner on both days at a slight discount, so we added Breakfast & Dinner on the day we would be in Rotterdam, bringing our total to £146. The price of the cruise also includes a bus transfer from the Europort to Rotterdam central, but it does not include transportation to or from Hull city centre. However, there is a shuttle bus operated by Stagecoach departing from stand 38 (I think) at 5PM and it costs £2.30 for a single. The shuttle then picks you up at the port of Hull at 830AM the day you arrive back and it’s a short 20 minute ride back to the railway station. However, I probably wouldn’t book a train until at least 0930 as you never know what kind of delays you will have! We also decided to arrive in Hull around 330PM, which gave us plenty of time to have a late lunch/early tea at the shopping centre next door to the railway station (and we didn’t buy food once on the boat unless a hot chocolate counts!).

The Port of Hull is a very simple building/multi-story car park. You enter as foot passengers on the ground floor to check in, and then you immediately get directed through security (random bag checks happen) and passport control with no chance to use a loo or get anything to eat from a vending machine. Then you go up….and up…..and up……before finally getting to the gangway to get onto the boat.
 *
*

As a foot passenger, you enter the boat on Deck 8. The bulk of the accommodations are on deck 10, with some cabins on 9&8. Lorry drivers get their own lounge and accommodation on deck 7. Apparently there is an option to not have a cabin, but when the sailing is 12 hours long and the cabin only cost £20, it seems silly not to. Even if you are bringing your car or caravan along, there is no unaccompanied access to the car decks, so you could not sleep in your car or caravan.
Once on board the ship, you have the option to immediately go to your cabin to drop off your bags. The restaurants are open, however the coffee shop does not serve hot snacks until after 8PM, and the casino and duty free shops aren’t open until we are out of the Humber.

The ship also has an Irish bar, 2 cinemas (you pay extra for them), a child’s softplay area (free), a lounge for live shows (free), and an arcade.
There is no room service like there would be on a large cruise ship, and the only option for takeaway food is the snack bar/Starbucks. I’m not sure if the Irish bar serves food, but the restaurant options are either a sit down brasserie or the buffet.
The duty free shops aren’t very large. They have a tobacco and alcohol shop (we didn’t go in), a candy and other sundry items shop, and a perfume and makeup shop. We went into the candy shop thinking it would have snacks like a convenience store, but they didn’t and I wound up buying a bag of crisps from the Starbucks. Tim was talking to one man who told him he takes these cruises only to buy duty free cigarettes and it somehow is worth it for him. Neither Tim or I are smokers, so we have no idea how much they cost or if it really is a good deal.
Once we dropped off our bags in our cabin, we immediately went out on deck. Unfortunately (as a non-smoker) the entire outside areas are smoking areas as is the slightly protected area on Deck 11. It’s annoying, but you just have to stay upwind from the smokers!


But the views of the sunset were pretty amazing and made the smoke worth it!
Of course, no trip would be complete without Hamish, so he tagged along too!
After taking our photos of the sunset, we headed back in and browsed the shops (we spent all of £13 on a guide book for Rotterdam, a Dutch phrase book, and some ginger chews), and got some hot chocolate and snacks to take back to our cabin. We retired early and watched an episode of Lewis I had downloaded to my Kindle, and set the alarm for dawn so we could hopefully catch the sunrise.


The sunrise wasn’t as spectacular as the sunset. Plus, we were running a little late as we had a problem with our cabin in the morning. This is my only complaint about P&O, but I did get an apology out of them via email, so I do forgive them.
The way the cabins are laid out, there is a fire detector located right outside the bathroom door along with several warning signs not to shower with the door open as the steam can set off the fire detector. I’m lifting the rest of the story off my Facebook post on P&O’s facebook page:
When I showered on Thursday morning (around 0600 CET), I made sure the bathroom door closed behind me when I took my shower, and after I was finished I turned off the water and waited in the bathroom until there was no more visible steam in the room before opening the door to swap places with my husband. While he was showering and I was towelling off there was a loud knock on the door. Now, as it was 6AM (5AM in the UK), I assumed it was silly drunks banging on doors, so I ignored the first knock. When there was a second knock, I asked “who is it?” and the response back was “Ship Police”. Again, this sounded a bit suspicious as I had not contacted the police and I knew we had not done anything that would have required police. I asked “Do you have any ID?” and all I got back was “This is the ship police”. I repeated my request for ID, and the response now changed to “This is the Ship Police and I need to check something in your cabin”. Well, progress I suppose. I responded “There’s nothing wrong with my cabin”. Bearing in mind, I STILL DID NOT KNOW if he was actual ship police or someone trying to gain access to rob us. Then I got told to “open the door or I will”. Now, I was scared. A stranger was going to open the door to my cabin without my permission. So I called back that I was naked and my husband was in the shower, and we needed a minute to throw some clothes on. AT THIS POINT I HAD TO OPEN THE BATHROOM DOOR WHILST THE SHOWER WAS RUNNING to alert my husband to the police outside our door. This was the ONLY time the bathroom door was open during a shower. My husband came out with a towel around his waist, and I hastily threw on a dress. We had another knock and I told him if he had a key to let himself in (because if he was a stranger, I was sure this would then deter them to go away). He did, and as it turned out, the little light on our fire detector was on. He then accused us of leaving the bathroom door open while we showered, told us he had to go tell the ship’s captain that nothing was wrong, and left. My husband then finished his shower but took a tepid shower as we were now afraid to take a hot shower.
That night, after we had turned out the lights and my husband had gone to use the loo, I noticed there was a sizeable gap at the bottom of the bathroom door that the light was streaming through. I pointed this out to my husband, and the following morning when we showered, we shared one towel between us and used the other at the bottom of the door to block the gap and I took a tepid shower as I was now afraid to shower with hot water.
So yeah. Make sure there is no gap in your bathroom door, and if there is, block it with a towel or you risk setting off the fire alarm and having a visit from the ship police!
After getting dressed and getting our photos, we went to Breakfast. The Breakfast buffet was half continental style and half full English style, so there were plenty of options. The layout of the buffet was a little backwards to me though. You needed to pick up your bread at the beginning, but the meats and cheeses for a continental style breakfast were not until after the hot food. The tea and coffee were at the very end, but after we entered the buffet everyone headed straight for the tea/coffee and it created a bit of a bottleneck between people who were going through the queue and getting their drinks last and the people who wanted to get their drinks first.
After breakfast, we hung out on the deck and watched the ship dock before being called for debarkment. If you drove you car, you have a massive rollercoaster style ramp to drive on to get to the shore, but for foot passengers, it was once again a long tunnel and lots of escalators (this time going down!) to get to passport control. And just like in Hull, you could not access the public loos or vending machines once you went through passport control. It was then on to the shuttle bus for our day out in Rotterdam.
Oh, and I should mention that since we had booked it as a mini cruise and our boarding card had a little suitcase on it we were able to leave things in our cabin. If you did not have a suitcase symbol on your boarding card but were coming back that evening, you could make arrangements to store your luggage on the ship.
There will be a separate post about our adventures in Rotterdam.
At the end of the day, we took the shuttle back to the port and after boarding we decided to stash our camera bags in our cabin before going to dinner. At this point, we were both pretty tired and didn’t want to take photos out on deck. Dinner was really good! They had several hot options including 2 types of curry, salmon (although it was labelled as trout!), chicken fingers, chips, steamed vegetables, salad, 2 types of cake, ice cream, and cheese & biscuits. We ate a leisurely dinner before once again retreating to our cabin for another episode of Lewis before falling asleep.
In the morning, we opted to buy snacks in Rotterdam the day before so we skipped breakfast and instead were able to sleep in a bit later. Due to the shower situation, we both took slightly cooler showers, finished packing up, and were soon debarking back onto British soil. Another short shuttle bus ride, and we were back in Hull and after two trains and another bus, arrived home in our village with our kittens around noon, making our total time away just about 48 hours exactly!
We will definitely be doing this again, and might even do the three day cruise with an overnight hotel stay in Rotterdam next time.
***
*Stock photo and deck plan images from P&O Ferries.
I did not receive any compensation from P&O Ferries in writing this blog post.
The contents of this post, including images are © Rebecca J Lockley and Tim Lockley unless otherwise stated and should not be reproduced without permission. If you are not reading this on http://blog.beccajanestclair.com, my facebook page, Networked Blogs, the RSS feed(s), or through an e-mail subscription, please notify me.
[LJ readers reading this on the LJ RSS feed: Please click on the link at the top of the entry to go directly to my blog to leave a comment, as comments left on the LJ RSS do not get seen by me. Facebook users reading this from my Networked Blogs link can either comment on facebook or on my blog. If you are reading this through an e-mail subscription, you might need to go directly to my blog to view videos and images.]
For full Copyright and Disclaimer, please read http://www.blog.beccajanestclair.com/copyright/
Packing for a Mini Cruise
Packing for travel in the Spring is never fun. Spring (and Autumn) are so changeable weather wise you can go from a warm, sunny day to snow within a 24 hour period in certain climates. The obvious solution is to pack layers and pack clothing that work in multiple climates – however, this becomes challenging when you are planning for a shorter trip and planning on sharing your bag with your spouse or partner!
While my husband was off on his Spring annual leave, we decided we wanted to get away for a few days. We hadn’t gone away since our wedding anniversary because we adopted kittens that weekend and hadn’t felt comfortable leaving them on their own. Now that the kittens are 7 months old, we decided we would go away for an overnight or two….But to where?
A friend of mine happened to mention Rotterdam to me about a week before our break. And by a happy coincidence, P&O was offering a 2 night mini cruise for 2 for £80! Score! (and I’ll review the cruise in a separate post).
Usually when we go away for a day or two, we’ll both take a backpack (usually LL Bean bookbags) and our camera bags….but I felt like that would be too much stuff in our cabin. So instead, we decided to share a single weekender bag from Cath Kidston, and a toiletries bag from LL Bean.
I started checking the weather the week before we left (also the week we booked it) and the temperature was hovering from 3C to 15C. Plus, we knew we would want to be on deck at least on our departure from Hull, and knew it would get chilly. We finally settled on packing some thermals just in case we needed them for layering.
Packing List
Small Packing Cube:
2 x boxers (T)
2 x knickers (R)
2 x socks (T)
2 x socks (R)
1 x thermal socks (T)
2 x tights (R)
1 x thermal tights (R)
Medium Packing Cube:
1 x Rugby top (T)
1 x dress (R)
1 x thermal top & bottoms (T)
1 x thermal top (R)
1 x leggings (R)
1 x camisole (R)
Toiletries Bag:
100ml 2 in 1 shampoo/conditioner (T)
2 x sample packs shampoo (R)
50ml conditioner(R)
50ml body wash (T)
30ml hibiscrub (R)
30ml face/body wash (R)
2 x Spray deodorant (T)/(R)
After shave (T)
Body spray (R)
Face moisturiser/eye cream (R)
Make Up (3 in 1 concealer/3 in 1 makeup pallet/lip gloss/BB cream) (R)
2 x folding toothbrush
Toothpaste
Mouthwash
Febreeze
First Aid/Medication Bag:
Sanitary products (R)
Gaviscon
Tums
Deep Heat
Zineryt (R)
Pill box (Metformin/Alieve/Paracetamol/Pepto/etc)
Vitamin C tablets
Eye drops
Misc items:
2 x face cloths
Wet bag
Laundry bag
4-port USB Charger with UK and EU plugs
4 USB cables
2 x Seabands
2 x earplugs
Travel Razor (T)
Travel Hairbrush (R)
Neck pouch for passports
I chose to use a Cath Kidston backpack as a camera bag/day bag. Initially because I felt that it would be better to distribute the weight over both shoulders….but I decided I won’t do that again as it meant I was constantly needing to take off the backpack to get to my camera or I was always asking Tim to go into it to get out my camera. My backpack had my DSLR in it, my kindle, legwarmers, wrist warmers, my purse with passport, and a mini first aid kit.
Ironically, we didn’t need any of the thermal items on the boat or in Rotterdam, but when we got back to Hull I changed into my thermal tights in the railway station loo because I was freezing on the platform!
Posts about the cruise itself and Rotterdam coming soon….
***
The contents of this post, including images are © Rebecca J Lockley and Tim Lockley unless otherwise stated and should not be reproduced without permission. If you are not reading this on http://blog.beccajanestclair.com, my facebook page, Networked Blogs, the RSS feed(s), or through an e-mail subscription, please notify me.
[LJ readers reading this on the LJ RSS feed: Please click on the link at the top of the entry to go directly to my blog to leave a comment, as comments left on the LJ RSS do not get seen by me. Facebook users reading this from my Networked Blogs link can either comment on facebook or on my blog. If you are reading this through an e-mail subscription, you might need to go directly to my blog to view videos and images.]
For full Copyright and Disclaimer, please read http://www.blog.beccajanestclair.com/copyright/
[Recipe] 2.5 Syn General Tso’s Chicken
 Ah, the great American Chinese staple. Full disclaimer – I can’t actually remember what General Tso’s Chicken is supposed to taste like, as it’s been almost 9 years since I had any, but I do remember the first time Tim and I ordered Chinese food here in the UK and I wanted to know where the General Tso’s chicken was on the menu! Chinese food in the UK and the US is very different. A friend of mine explained that a lot of British Chinese food recipes are from Hong Kong, whereas American Chinese food is…well, American. (kind of like how Italian food in the US is different from Italian food from Italy). So I swapped my General Tso for Sweet & Sour Chicken Cantonese style, but I always wanted to know how to make my own General Tso’s Chicken. And naturally, since I follow Slimming World, I also wanted to find something that was low in syns, especially since your average takeaway can be 10+ syns.
I originally found this recipe on a Beach Body blog, but modified it for Slimming world.
You will need:
450g diced chicken breast
2 TBS cornflour/cornstarch
1/2 tsp salt
small piece of fresh ginger, about the size of your thumbnail finely chopped
2 spring onion sprigs, chopped
150ml chicken or vegetable stock
2 TBS passata (or for a thicker sauce, use tomato puree)
1 TBS Hoisin Sauce
1 tsp Agave syrup (or use sweetener)
1. Preheat the oven to 180C.
2. Coat the chicken in the cornflour and place on a lined baking tray and bake 15-20 minutes*
3. while the chicken is cooking, combine together all other ingredients and bring to a boil, then simmer 10 minutes.
4. When the chicken is cooked, toss it with the sauce.
I served ours with broccoli, peas, and egg-fried cous cous. Divided into 2 portions, this comes out at 2.5 syns per person.
*for crispier but still low syns you could fry them in fry light!
***
DISCLAIMER: I do not work for Slimming World, I am not affiliated with Slimming World beyond being a paying customer/member, I get no personal benefit from writing this post other than the joy of sharing.
Please note: Syn values are based on my exact ingredients using the online calculator. Your Syn value may vary based on your ingredients and the size of your baking containers and portions, so use this number as a guide only. Syn values also frequently change, but these values are correct at the time of publication.
The contents of this post, including images are © Rebecca J Lockley and Tim Lockley unless otherwise stated and should not be reproduced without permission. If you are not reading this on http://blog.beccajanestclair.com, my facebook page, Networked Blogs, the RSS feed(s), or through an e-mail subscription, please notify me.
[LJ readers reading this on the LJ RSS feed: Please click on the link at the top of the entry to go directly to my blog to leave a comment, as comments left on the LJ RSS do not get seen by me. Facebook users reading this from my Networked Blogs link can either comment on facebook or on my blog. If you are reading this through an e-mail subscription, you might need to go directly to my blog to view videos and images.]
For full Copyright and Disclaimer, please read http://www.blog.beccajanestclair.com/copyright/
[Recipe] Cauliflower Cheese & Bacon
 Do you ever watch those recipe videos on Facebook and get really hungry? Me too. Last night, one of my friends linked to a video for Loaded Cauliflower Casserole and it got me hungry and wanting to create this dish to be Slimming World friendly. So I went out shopping today and picked up a Cauliflower and we had this for Tea tonight.
You Will Need:
1 Head of Cauliflower (chopped into florets)
300g frozen mixed vegetables
200g bacon medallions
250g Quark
3 heaped spoonfuls Fromage Frais
1 TBS dried or fresh chives (or use spring onion if you have them. I forgot to buy some but had chives)
1/4 tsp pepper
1/4 tsp mustard powder
45g reduced fat cheddar cheese
1. Boil or steam the cauliflower florets until tender and cook the frozen vegetables. Drain both.
2. Grill bacon. Chop bacon into bite sizes bits.
3. Combine quark, fromage frais, chives, pepper, and mustard.
4. Stir quark mixture into vegetables, add chopped bacon.
5. Spread into a casserole dish and top with 45g cheddar cheese
6. Bake at 200C 25 minutes or until bubbly and cheese is golden.
Syns per recipe: 6 (for the cheese).
This recipe is easy to adapt for vegetarians, just omit the bacon or use veggie bacon. If you are following a Low Carb High Fat diet, use full fat cream cheese and sour cream instead.
***
DISCLAIMER: I do not work for Slimming World, I am not affiliated with Slimming World beyond being a paying customer/member, I get no personal benefit from writing this post other than the joy of sharing.
Please note: Syn values are based on my exact ingredients using the online calculator. Your Syn value may vary based on your ingredients and the size of your baking containers and portions, so use this number as a guide only. Syn values also frequently change, but these values are correct at the time of publication.
The contents of this post, including images are © Rebecca J Lockley and Tim Lockley unless otherwise stated and should not be reproduced without permission. If you are not reading this on http://blog.beccajanestclair.com, my facebook page, Networked Blogs, the RSS feed(s), or through an e-mail subscription, please notify me.
[LJ readers reading this on the LJ RSS feed: Please click on the link at the top of the entry to go directly to my blog to leave a comment, as comments left on the LJ RSS do not get seen by me. Facebook users reading this from my Networked Blogs link can either comment on facebook or on my blog. If you are reading this through an e-mail subscription, you might need to go directly to my blog to view videos and images.]
For full Copyright and Disclaimer, please read http://www.blog.beccajanestclair.com/copyright/